Woodworking Fasteners: Complete Guide to Screws, Nails, and Joinery Hardware
Master woodworking fasteners with this complete guide! Learn which screws, nails, bolts, and specialty hardware to use for every project, plus pro tips for stronger joints and cleaner results.
WOODWORKING

I'll never forget the bookshelf I built in my first apartment. Spent a whole weekend measuring, cutting, and assembling this beautiful piece. Used whatever screws I had lying around—mostly drywall screws because I had a big box of them. The shelf looked great for about three months, then one day I heard this crack and the whole middle shelf collapsed under the weight of books. Screws had snapped clean off. Turns out drywall screws are brittle and terrible for structural loads. Who knew?
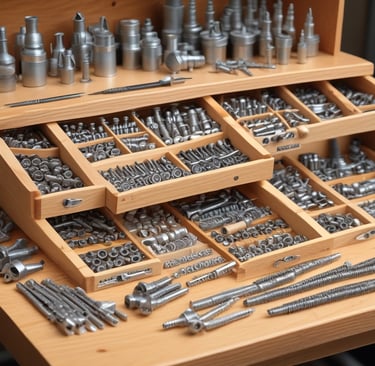
That failure sent me down a rabbit hole of learning about fasteners, and holy crap, the variety is overwhelming! Walk into any hardware store and you're confronted with literally hundreds of options. Different head styles, different threads, different materials, different lengths. And the employees usually can't help much beyond pointing you toward the general area. I've spent probably thousands of dollars over the years figuring out through trial and error which fasteners work for which applications.
Here's what I've learned: choosing the right fastener isn't just about what holds things together—it's about strength, longevity, appearance, and whether you'll be able to take things apart later if needed. The difference between a project that lasts decades and one that fails in months often comes down to using the right fastener. And honestly? Once you understand the basics, it's not that complicated.
I've built furniture, cabinets, decks, fences, and done countless repairs using every type of fastener imaginable. I've had spectacular failures (that bookshelf wasn't my last) and learned from each one. I've also discovered some amazing specialty fasteners that make certain joints way easier and stronger than traditional methods.
In this guide, I'm gonna break down everything you need to know about woodworking fasteners—from basic wood screws to specialized cabinet hardware. We'll talk about when to use nails versus screws, why drive type matters, how to prevent splits, and all those little details that separate beginner work from professional results. Whether you're building your first project or you're a seasoned woodworker looking to expand your fastener knowledge, there's something here for you. Let's dive in!
Why Fastener Choice Actually Matters
Before we get into specific types, let me explain why this matters more than you might think. It's not just about what's convenient or cheap.
Strength and load-bearing considerations are fundamental. Different fasteners have wildly different holding power. A finish nail might hold 20 pounds withdrawal force. A proper construction screw in the same situation might hold 200 pounds. If you're building a shelf that'll hold heavy books or a bed frame that needs to support a person, using inadequate fasteners is straight-up dangerous. I learned this with that bookshelf collapse—drywall screws have maybe 30-40% of the shear strength of proper wood screws because they're heat-treated to be hard but brittle. They'll snap under load.
Wood movement and seasonal expansion/contraction is something that tripped me up for years. Wood is constantly moving—expanding in humidity, contracting in dryness. A solid wood tabletop can expand/contract by 1/4 inch or more across its width seasonally. If you rigidly screw it down to a base, something's gotta give—either the screws shear off, the wood cracks, or the joints fail. I built a beautiful walnut dining table and screwed the top directly to the apron. Six months later—massive crack right down the middle. Now I use figure-8 fasteners or buttons that allow movement. Choosing fasteners that accommodate wood movement is critical for furniture that lasts.
Visibility and aesthetic impact on finished projects separate amateur work from professional. Exposed screw heads on a fine furniture piece look terrible. Big nail holes on trim molding look sloppy. Sometimes you want visible fasteners—like decorative brass screws on a jewelry box or copper rivets on a craftsman-style piece. But usually you want fasteners hidden or minimized. Learning to use pocket screws, counterbored plugs, or trim head fasteners makes your work look cleaner and more refined. My early projects had screws everywhere because I didn't know better. Now people ask if my furniture is held together with "just glue and magic" because they can't see fasteners.
Reversibility for future disassembly or repairs matters more than you'd think. I built a bed frame with glue and screws, super solid. Two years later we moved to a house with narrow doorways—couldn't get the bed through. Had to literally saw it apart and rebuild it. Now I design furniture with knockdown hardware (barrel nuts, cross dowels, bolts) so it can be disassembled. If you're building something that might need to move through doorways, go upstairs, or be repaired later, reversible fasteners are essential. Screws are reversible; nails really aren't. Glue definitely isn't.
Cost-effectiveness for different project scales adds up fast. Building a fence? You'll use hundreds of screws—buying premium stainless steel would cost a fortune. Regular coated deck screws work fine and cost 1/4 as much. Building a jewelry box? You'll use maybe 20 screws—spend the $10 on brass screws that look beautiful and won't rust. I've seen people use $50 worth of premium fasteners on a rough shed where $10 worth would work fine. I've also seen people use cheap hardware on fine furniture where it looks terrible. Match your fastener budget to the project's purpose and visibility.
Time savings with the right fastener for the job is real. Pocket screws are faster than mortise-and-tenon joints and almost as strong for many applications. A pneumatic nailer can attach trim in 1/10th the time of hand-nailing. But using a fastener that requires pre-drilling, countersinking, and plugging might take longer than a joint that needs no fasteners at all. I used to think fastest was always best, but sometimes a traditional joint is actually quicker than fussing with complicated fasteners. The right fastener balances speed, strength, and results.
Preventing wood splitting and damage is about choosing appropriate fasteners for the wood species and location. Driving a big screw near the end of a board without a pilot hole? Guaranteed split. Using thick nails in thin trim? Split. I've ruined expensive hardwood boards by forcing fasteners where they didn't belong. Now I pre-drill religiously in hardwoods, use smaller gauge fasteners near board ends, and respect the wood. The right fastener for the situation means the wood stays intact.
How fasteners affect wood glue effectiveness surprised me when I learned it. Glue creates incredibly strong bonds—often stronger than the wood itself. But certain fasteners can actually weaken glue joints. Driving screws through wet glue can create gaps as the threads compress wood fibers. Some people use screws as clamps while glue dries, which works, but over-tightening can starve the joint of glue. Other times, mechanical fasteners and glue work together perfectly—like biscuits with glue or screws holding joints while glue cures. Understanding this interaction makes better joints.
Understanding Wood Screw Types and When to Use Each
Wood screws are probably what you'll use most, but there are way more varieties than people realize.
Traditional wood screws versus modern construction screws is like comparing a Model T to a Tesla—both get you there but the modern version is objectively better for most uses. Traditional wood screws have a shank (smooth unthreaded section under the head) and threads only on the bottom 2/3 of the screw. They require both a pilot hole and a clearance hole for proper installation. Modern construction screws are threaded the entire length and are self-tapping. I rarely use traditional wood screws anymore except for restoration work where I want period-correct hardware. Construction screws are faster, stronger, and easier.
Coarse thread versus fine thread applications is straightforward once you understand it. Coarse threads (wider spacing) are for softwoods like pine, cedar, fir. They bite into soft fibers better and have more holding power in less dense wood. Fine threads (closer spacing) are for hardwoods like oak, maple, walnut. They need less force to drive and are less likely to split dense wood. I keep both in my shop. The frustrating thing is most bulk screws don't specify thread type—you have to eyeball it. Generally, construction screws and deck screws are coarse thread. Cabinet screws are often fine thread.
Flathead (countersunk) screws for flush surfaces are the standard for most applications. The tapered head sits flush with or below the wood surface. These are what you want when screw heads can't protrude—like when installing flooring, attaching hinges, or any application where something needs to sit flat against the surface. I'd say 80% of the screws I use are flathead. You can countersink them below the surface and fill with wood putty or plugs for invisible fastening. The 82-degree angle of the head is standardized, so countersink bits match perfectly.
Pan head and round head for visible fastening have their place when you can't or don't want to countersink. Pan head screws have a flat underside and low rounded top. Round head screws have a dome shape. I use these mostly for attaching hardware, mounting things to walls, or situations where the screw head is visible but that's okay. They're also good for attaching thin materials that don't have enough thickness to countersink into. The larger head diameter distributes load better than flathead screws, so they're good for soft materials that might pull through.
Trim head screws for minimal hole size are game-changers for finish work. They have a tiny head—about half the diameter of standard screw heads. The resulting hole is so small you can often just fill it with putty without it being noticeable. I use these extensively for attaching trim, beadboard, tongue-and-groove—anywhere I want fastening without obvious holes. They require a specific drive bit (usually square or Torx) and the small head means you can't over-tighten or the head will pull through. But for clean finished appearance, they're fantastic.
Pocket hole screws and self-tapping features are specifically designed for the Kreg system and similar pocket hole jigs. They have a washer head that sits in the pocket hole, self-drilling tip, and they're usually square drive. The threads are coarse and aggressive. You can technically use regular screws in pocket holes, but dedicated pocket screws work way better—the head design prevents splitting, and the self-tapping tip means you don't need to pre-drill the second board. I've built entire cabinets using nothing but pocket screws and glue. Fast, strong, and hidden.
Lag screws for heavy-duty applications are basically large bolts with wood threads instead of machine threads. They range from 1/4 inch to 1 inch in diameter and can be 6+ inches long. Hex head that you drive with a wrench or socket. I use lag screws for structural connections—attaching deck ledgers to houses, securing posts to beams, heavy-duty shelf brackets. They're overkill for most furniture but essential for large structural woodworking. Always pre-drill for lag screws—the diameter is too large to self-tap without splitting even in softwood.
Sheet metal screws in woodworking—yes, really—are something I discovered by accident and now use regularly. Sheet metal screws have very fine threads and are sharp. They're great for attaching thin plywood or hardboard where the material is too thin for wood screws. I use them for attaching drawer bottoms, thin cabinet backs, or any situation with 1/4 inch or thinner material. The fine threads bite into thin wood better than coarse wood screw threads. They're also good for plywood edge screwing where wood screws might cause delamination.
Screw Drive Types: Phillips, Square, Torx, and Beyond
The drive type (the shape of the recess in the screw head) matters way more than I initially realized. It affects torque transfer, how easily screws strip, and how much force you can apply.
Phillips head is ubiquitous but prone to cam-out, which is actually by design—and a terrible design for woodworking. The tapered shape of Phillips drives causes the bit to cam out (pop out of the screw) under high torque. This was originally a feature for assembly lines to prevent over-tightening, but for woodworking it means stripped screw heads and frustrated woodworkers. I've stripped countless Phillips screws, especially in hardwood. I avoid Phillips screws now except where I have no choice (like some purchased hardware). The only advantage is Phillips bits are available everywhere.
Square drive (Robertson) is the Canadian favorite and honestly superior to Phillips in almost every way. The square recess holds the bit firmly without cam-out. You can drive square drive screws one-handed because the bit grips the screw. They transfer torque efficiently and rarely strip. I use square drive screws for probably 50% of my projects now. The downsides: slightly less common than Phillips in the US, and you need to make sure you have the right size bit—there are several square drive sizes and using the wrong one will round out the recess.
Torx (Star drive) provides maximum torque transfer and is becoming my preferred drive type. The 6-point star shape engages deeply and distributes force evenly—virtually impossible to strip unless you're really trying. I can drive 3-inch screws into hardwood with an impact driver and the bit never cams out. Deck screws are increasingly Torx drive. Cabinet screws are often Torx. The main downside is you need to have the right size Torx bits, and there are many sizes (T10, T15, T20, T25, T30, etc.). But once you stock up on bits, Torx is fantastic.
Pozidriv is the improved Phillips that nobody uses, which is a shame because it's actually better. It looks similar to Phillips but has additional smaller cross-hatch marks. Pozidriv doesn't cam out like Phillips and transfers more torque. It's common in Europe but rare in the US. I've used Pozidriv screws on imported European hardware and they work well. The problem is you need Pozidriv bits—a Phillips bit will kind of work but damages the screw head and vice versa. The lack of availability in the US means I rarely encounter Pozidriv screws.
Combination drives offer benefits of multiple drive types in one screw. Common combos are square/Phillips or Torx/Phillips. These are great because you have options—use whichever bit you have on hand or whichever works better for the situation. I appreciate combination drives when I'm doing a project and don't want to keep switching bits. The compromise is the recess is usually a bit shallower than dedicated single-drive screws, so torque transfer is slightly reduced. Still, the convenience often outweighs this minor downside.
Hex head for impact drivers and high torque situations is common on structural screws and lag screws. The external hex head (no recess) is driven with a socket or hex bit. This provides maximum torque transfer—you can really crank on hex head screws without slipping. I use them for heavy-duty applications where I need serious holding power and I'm driving long, large-diameter screws. The obvious downside is the head protrudes significantly, so they're not for situations where you need flush or countersunk fastening. But for structural work, they're excellent.
Slotted screws are traditional but frustrating in modern applications. Single slot driven by flathead screwdriver. These are what all screws used to be before Phillips was invented in the 1930s. The bit slips out constantly, you can't drive them one-handed, and it's hard to apply torque without slipping and scarring the wood. I only use slotted screws for restoration work where I want historically accurate hardware, or for decorative brass screws where the slot is part of the aesthetic. For actual woodworking, there are much better options.
Matching bits to screws for best results means using the exact right bit for the screw. A #2 Phillips bit for #8 Phillips screws. A #2 square drive bit for #8 square drive screws. T20 Torx bit for T20 Torx screws. Using the wrong size bit damages both the bit and the screw. I keep a full set of bits in each drive type, organized in a case. Impact-rated bits for impact drivers last way longer than standard bits—the hardened steel resists breakage. I go through regular bits constantly but impact-rated bits last for years. Worth the extra cost.
Nail Types for Every Woodworking Application
Nails still have their place despite screws being more popular now. Sometimes nails are the right choice.
Common nails versus finish nails versus brad nails represent different applications entirely. Common nails are thick, have large flat heads, are ugly and meant for structural framing where appearance doesn't matter. Finish nails are thinner, have small heads that can be set below the surface, and are for trim and finish work. Brad nails are even thinner (18-gauge) with tiny heads for fine trim and delicate work. I rarely use common nails in furniture—maybe for rough shop fixtures. I use finish nails constantly for trim, and brad nails for small moldings and delicate assemblies.
Box nails for avoiding splits in thin wood have thinner shanks than common nails of the same length. The thinner diameter is less likely to split wood, especially near board ends. I use box nails when attaching thin materials like 1/4-inch plywood backs or attaching molding where splits would be visible. They don't have the holding power of common nails but for situations where splitting is a concern, they're the better choice. In furniture work, I probably use box nails more than common nails because I'm rarely doing heavy structural nailing.
Casing nails for trim and molding are like finish nails but slightly thicker and with a tapered head that's easier to set deeply. I use casing nails for door and window casing, baseboards, and heavier trim that needs more holding power than finish nails provide. You drive them slightly proud, then use a nail set to drive the head 1/16 inch below the surface, then fill with putty. The tapered head design means they don't split the wood when setting. Good middle ground between common nails and finish nails.
Spiral and ring shank nails for holding power are dramatically better than smooth nails at resisting withdrawal. Spiral shanks twist as you drive them, creating a screw-like holding action. Ring shank nails have ridges that bite into wood. Both are harder to pull out than smooth nails. I use ring shank nails for subflooring and any application where withdrawal force matters. They're more expensive than smooth nails and harder to drive (you'll bend more) but the holding power is worth it for critical applications. Once driven, they're basically permanent—very hard to remove without damaging wood.
Cut nails for period-correct restoration are square nails with a tapered shape, made by cutting from sheet steel rather than drawing wire. They're what all nails were before 1900 or so. They split wood easily and are a pain to use, but for restoration work or when you want an authentic historical look, they're the correct choice. I've used them when restoring old furniture or building historically-accurate reproductions. You need to pre-drill or they will split every board. They're expensive—maybe 10x the cost of regular nails—but you're paying for authenticity.
Pneumatic nails in various gauges are a complete game-changer for efficiency. 15-gauge nails are finish nails, used for trim and cabinetry—strong enough for most applications. 16-gauge nails are slightly thinner, good for lighter trim. 18-gauge brad nails are for delicate work—they leave tiny holes that barely need filling. 23-gauge pin nails (headless pins) are for the most delicate work—holding thin moldings or veneers while glue dries. I own all four nailers and use them constantly. The speed and ease compared to hand nailing is incredible. A project that took hours of hand-nailing takes minutes with pneumatic nailers.
When to use nails instead of screws is something people debate endlessly. My rule: use screws for strength and when you might disassemble later. Use nails for speed, for trim work, for traditional joinery, or when you're also using glue and the nail is just holding things while glue dries. Nails are faster to install. They're less likely to split thin trim than screws. They're better for certain aesthetic applications (like face-nailing with decorative nails). For structural joints I need to rely on, I use screws. For trim and glued joints, nails are often better.
Preventing splits and proper nailing technique saves so much frustration. Blunt nail tips by hitting them with a hammer before driving—blunted nails crush fibers instead of wedging them apart, reducing splits. Don't nail near board ends—stay at least 3/4 inch from ends if possible. Angle nails slightly when nailing close to edges. Pre-drill if you're worried about splits—use a bit slightly smaller than the nail diameter. I drill pilot holes for any nail going near a board end in hardwood. The few seconds of drilling saves expensive boards from splitting.
Specialized Fasteners for Specific Joints
Beyond basic screws and nails, there are specialized fasteners designed for specific joinery applications.
Pocket hole screws and the Kreg system revolutionized hobbyist woodworking. A pocket hole jig drills an angled hole, and a special screw joins two boards at 90 degrees with the fastener completely hidden. It's fast, strong, requires no clamps, and creates joints that look professional. I've built entire cabinets, bookcases, and tables using pocket screws. The system is brilliant for face frames, carcass construction, and joining boards edge-to-edge. The downside is you need the jig ($40-150 depending on model) and special screws. But the speed and ease make it worthwhile for anyone building furniture.
Biscuits versus dowels versus dominoes are three systems for creating strong aligned joints. Biscuits are football-shaped compressed wood pieces that fit in slots cut by a biscuit joiner. They're mainly for alignment—don't add huge strength but ensure perfectly flush joints. Dowels are round wood pins that fit in drilled holes—add strength and alignment. Dominoes are elongated tenons (like loose mortise and tenon) made by Festool's domino joiner—strongest of the three systems. I have a biscuit joiner and use it constantly for panel glue-ups and cabinet carcasses. Dominoes are amazing but the tool costs $1,000+ so I don't own one. Dowels are cheap but fussy to align perfectly.
Confirmat screws for cabinet construction are Euro-style screws specifically for joining cabinet parts (typically melamine or plywood). They have a blunt tip, coarse threads, and are usually 5mm or 7mm diameter. You drill a precise pilot hole and the screw creates a very strong joint in sheet goods. Common in RTA (ready-to-assemble) furniture and European-style cabinets. I use confirmat screws when building shop cabinets or utility storage. They're stronger than regular screws in plywood and the joint can be disassembled. You need a special stepped bit to drill the correct pilot hole.
Hanger bolts for attaching legs and posts are threaded like a screw on one end and like a machine bolt on the other. You screw the wood-threaded end into the furniture leg (or post), then use a nut to attach it to a mounting plate. I use hanger bolts for attaching table legs where I want the legs to be removable. You can also use them for attaching posts to bases or any situation where you need wood-to-metal-to-wood connections. The tricky part is driving them—you need to use two nuts locked together on the bolt end and turn with a wrench, or use a special hanger bolt driver.
Threaded inserts for removable connections are metal cylinders with wood threads on the outside and machine threads on the inside. You screw them into wood, and then you can repeatedly screw and unscrew machine screws or bolts. Perfect for knockdown furniture, attaching jigs, or any connection that needs frequent disassembly. I use them extensively—attaching jig fences that I need to adjust, creating removable legs on shop tables, anywhere I'll be screwing and unscrewing repeatedly. The threaded insert prevents the wood threads from stripping out. Get the E-Z Lok type with external hex drive—way easier to install than the slotted type.
Barrel nuts and bolts for knockdown furniture are pairs of hardware that connect through the thickness of panels. A bolt goes through one panel and threads into a barrel nut embedded in the edge of the perpendicular panel. Ikea furniture uses these constantly. I use barrel nuts (also called sex bolts or Chicago screws) when building furniture that needs to disassemble completely for moving. They're strong and mostly hidden but require precise drilling. The barrel nut needs a large diameter hole (typically 10mm) drilled into the panel edge, and the bolt needs a smaller hole drilled through the face. Measurement accuracy is critical.
Cross dowels for bed frames and shelving are cylindrical nuts with a threaded hole perpendicular to the axis. A bolt goes through one piece of wood and threads into the cross dowel embedded in the perpendicular piece. Similar concept to barrel nuts but the cross dowel is round and sits in a round hole drilled from the face of the wood. Common in bed frames and adjustable shelving systems. I've used them for building knock-down workbenches and shelving units. They're cheaper than barrel nuts and easier to install (one hole from the face rather than edge drilling) but slightly less elegant.
Figure-8 fasteners for attaching tabletops are metal figure-8 shaped plates that span between the tabletop and apron. Half the figure-8 is screwed to the apron, the other half sits in a shallow mortise on the underside of the tabletop. As the tabletop expands/contracts, it slides along the slot. This allows wood movement while keeping the top attached. Absolutely essential for solid wood tabletops. I fought wood movement for years before learning about figure-8s and similar fasteners. Now every table I build has some system for allowing movement. Figure-8s are cheap and easy to install.
Bolts, Nuts, and Washers in Woodworking
Bolts are less common in furniture than screws, but when you need serious strength or through-bolting, they're essential.
Carriage bolts for through-bolting applications have a smooth rounded head and a square section under the head that bites into wood and prevents spinning. You drill a hole through both pieces, slide the bolt through, and tighten with a nut on the back side. I use carriage bolts for outdoor furniture, structural connections, attaching legs to heavy tables—anywhere I need serious strength and don't mind visible hardware. The smooth rounded head looks better than hex head bolts. Sizes range from 1/4 inch to 1 inch diameter. I keep assorted lengths in 5/16 inch and 3/8 inch on hand.
Hex bolts and when to use them have a six-sided head that you turn with a wrench or socket. Unlike carriage bolts, both ends have threads. You need to hold the head with one wrench while tightening the nut with another, or use a lock washer to prevent spinning. I use hex bolts less than carriage bolts in woodworking because the hex head looks more industrial. But for metal-to-wood connections or when bolting through metal brackets, hex bolts are often the better choice. The external hex allows more torque than you can get with a screwdriver.
Machine screws versus bolts—there's actually a difference!—though people use the terms interchangeably. Technically, a bolt threads into a nut. A machine screw threads into a threaded hole (like a tapped hole or threaded insert). Machine screws have finer threads than wood screws and a variety of head styles. I use machine screws when working with metal hardware on wood—like mounting drawer slides, attaching store-bought brackets, or connecting to threaded inserts. They usually have Phillips or hex socket heads. Keep an assorted kit of metric and imperial machine screws around.
T-nuts for threaded connections in wood are pronged nuts that hammer into the back side of wood, creating a threaded hole on the front side. The prongs bite into wood and prevent the nut from spinning. Then you can screw a machine screw or bolt into the T-nut. I use T-nuts on jigs and shop fixtures where I need adjustable, removable connections. They work okay but can pull out under tension if not installed properly. The prongs also create an ugly backside so they're not for fine furniture. Better for shop projects and fixtures.
Wing nuts for tool-free adjustments are nuts with two large wings that you can tighten by hand without tools. I use them on adjustable jigs, fences, clamps—anywhere I need frequent adjustment without grabbing a wrench. They don't hold as tight as regular nuts but for many applications the tool-free convenience is worth it. I've built shop jigs with bolts and wing nuts that I adjust multiple times during every use. Way faster than nuts that need wrenches.
Fender washers for distributing load are large-diameter washers with a small center hole. They distribute clamping force over a larger area, preventing nuts and bolt heads from digging into soft wood. I use fender washers anytime I'm bolting something to wood and want to prevent damage or increase holding power. They're especially important on softwoods or when bolting near edges or ends where a regular washer might pull through. Cheap insurance against bolt heads crushing into wood or pulling through.
Lock washers and thread-locking compounds prevent nuts from loosening due to vibration. Split lock washers are common—the spring tension resists loosening. Tooth lock washers bite into metal. Thread-locking compounds like Loctite chemically prevent loosening. I don't usually need these for furniture that sits still, but for anything with moving parts or that will vibrate (like power tool jigs), preventing loosening is important. I use blue Loctite (removable) on shop equipment. Red Loctite is permanent—only use if you never want it apart.
Bolt grade markings and strength ratings are indicated by radial lines on the bolt head. No markings = low grade (Grade 2). Three radial lines = Grade 5 (medium strength). Six radial lines = Grade 8 (high strength). For woodworking, Grade 5 bolts are usually adequate—stronger than wood itself. Grade 8 is overkill except for heavy structural applications. I buy Grade 5 bolts at hardware stores and they've never failed. Metric bolts use property class markings (like 8.8 or 10.9). For woodworking, honestly most bolts are stronger than needed—wood failure happens before bolt failure.
Hidden Fasteners and Invisible Joinery
Creating joints where fasteners are hidden is what separates amateur work from professional-looking projects.
Pocket screws are the hidden workhorse I mentioned earlier but they deserve emphasis here. They're truly hidden when done right—you see the face of the joint but no fasteners. The pocket holes are on the back side or bottom where they're not visible. For face frames, bookcases, cabinets—anywhere you want invisible joinery without the skill required for traditional joinery—pocket screws are incredible. The only downside is the pocket holes are visible on the back side, so it's not appropriate for pieces visible from all sides. But for most furniture, it's perfect.
Biscuit joints for alignment and strength sit in slots cut into edges that are being joined. The biscuit swells when glue is applied, creating a tight strong joint. The beauty is you see no fasteners at all—just a clean glue line. I use biscuits for edge-joining boards into panels, miter joints on cabinets, attaching cabinet backs—anywhere I need alignment help and hidden strength. The biscuit joiner tool costs about $100 for a decent one. The joints aren't as strong as mortise-and-tenon but they're way faster and more than adequate for most applications.
Domino tenons (the modern mortise and tenon) are created by Festool's Domino joiner—basically a horizontal plunge router that cuts oval mortises and uses pre-made beech tenons. The joints are incredibly strong (nearly as strong as traditional mortise and tenon) and perfectly aligned. It's the system professional cabinet makers use now. The downside is the tool costs $1,000+ which puts it out of reach for many hobbyists. I've used a friend's Domino and it's amazing—if I ever have $1,000 burning a hole in my pocket, it's on my list. For now, I make do with pocket screws and biscuits.
Miller dowels for visible but attractive fastening are stepped dowels that show on the surface but look like intentional design elements. You drill a hole, add glue, tap in the Miller dowel, and trim flush (or leave proud for a design accent). They're stronger than screws and look way better—the end grain of the dowel becomes a decorative feature. I've seen Arts & Crafts furniture that uses exposed dowels as design elements. You can buy Miller dowel kits with bits and dowels, or just use regular dowels and drill stepped holes. The visible dowel endgrain adds warmth and craftsmanship appearance.
Counterboring and wood plugs create invisible fasteners by hiding screws under plugs. Drill a large hole (3/8 inch or 1/2 inch) about 1/4 inch deep, drill a pilot hole through the bottom for the screw, drive the screw, then glue in a wood plug made from the same species. Sand flush and if grain-matched well, the plug nearly disappears. I use this technique for tabletops, visible surfaces, anywhere I need the strength of screws but don't want visible fasteners. The key is matching grain direction and color of the plug to the surrounding wood. With careful work, plugs are nearly invisible.
Drawbore pegs in timber framing are a traditional technique where the peg hole is slightly offset between the mortise and tenon. When you drive the peg, it pulls the joint tight. This creates incredibly strong joints without glue or metal fasteners—timber frame barns from the 1800s still stand because of drawbore pegs. I've used this technique on large outdoor furniture and timber-frame garden structures. It's traditional, looks great with exposed pegs, and requires no specialty hardware. Just need to drill carefully with the right offset (about 1/16 inch).
Buttons and clips for tabletop attachment allow wood movement like figure-8 fasteners. Wood buttons are small blocks with a tongue that fits in a groove routed in the apron. The button is screwed to the tabletop and can slide in the groove as the top expands/contracts. Clips are metal versions of the same concept. I prefer buttons because I can make them in the shop from scrap wood. They're more traditional looking than figure-8s and work great. Every solid wood tabletop I build uses buttons, figure-8s, or some other movement-friendly attachment.
Miter fold fasteners for picture frames are small folded metal pieces that slip into saw kerfs cut in the back of miter joints. They span the joint and add strength without being visible from the front. I use these on picture frames and small boxes with mitered corners. They're fussy to install (need precise kerf cuts) but they add significant strength to glued miters. Alternative methods include splines (wood strips in saw kerfs) or just glue and nails, but miter fold fasteners are elegant and hidden. Available at woodworking specialty stores.
Cabinet and Furniture Hardware
Moving beyond basic fasteners, let's talk about the hardware that makes cabinets and furniture functional.
Euro-style hinges and mounting plates are what modern cabinets use almost exclusively. These are the hinges with the big round hinge cup that mounts in a 35mm hole drilled in the door, plus a mounting plate that screws to the cabinet side. They're adjustable in three dimensions, allow doors to open 110+ degrees, and can have soft-close mechanisms. I resisted Euro hinges for years, preferring traditional butt hinges, but once I learned to install them properly, I converted. They're easier to adjust, more forgiving, and more functional. The 35mm forstner bit and hinge installation jig are worthwhile investments.
Drawer slides in various types make or break drawer functionality. Side-mount slides are cheapest and easiest—mount on the drawer sides and cabinet sides. They're functional but take up some interior space and aren't as smooth. Under-mount slides hide completely under the drawer, preserving interior space and looking cleaner. They're more expensive and require precise installation. Soft-close slides (either side-mount or under-mount) have dampers that slow the drawer in the last few inches—luxury feature but once you have them, regular slides feel cheap. I use side-mount slides for shop cabinets and under-mount soft-close for fine furniture.
Shelf pins and standards allow adjustable shelving. Shelf pins are small metal pins that fit in holes drilled in cabinet sides—simple and nearly invisible. Standards are vertical metal tracks with slots—more industrial looking but very adjustable and strong. I use shelf pins for most cabinets—drill a series of 1/4 inch or 5mm holes and you can position shelves anywhere. The key is a drilling jig to ensure holes are perfectly aligned and level. I made a pegboard drilling template that ensures perfect spacing every time. Without a jig, hand-drilling never produces aligned holes.
Keyhole hangers for wall mounting are metal plates with a keyhole-shaped slot. You screw them to the back of furniture, mount screws in the wall, and hang the furniture on the screws through the keyholes. They're mostly hidden when installed. I use keyhole hangers on any wall-mounted cabinet, shelf, or mirror. Way easier than trying to align multiple screws through the back of a piece. The furniture just hangs on exposed screw heads. Make sure to use appropriate wall anchors and screws for the weight.
French cleats for heavy items are two beveled pieces—one mounted to the wall, one to the furniture. They interlock and create a very strong mounting system. I use French cleats for heavy cabinets, shop storage, and tool organization. They're incredibly strong (easily support 100+ pounds) and make mounting easy—just lift and hang. The downside is the cleat adds thickness to the back of the furniture and creates a gap from the wall. For shop storage I don't care. For fine furniture, keyhole hangers look cleaner.
Magnetic catches versus roller catches hold cabinet doors closed. Magnetic catches have a magnet mounted to the cabinet and a metal plate on the door—simple and effective but can eventually lose magnetism. Roller catches have a spring-loaded roller that snaps into a strike plate—more mechanical and positive but visible from inside the cabinet. I use magnetic catches for most applications because they're cheap and invisible. For doors that need a really positive catch (like doors that might swing open), roller or ball catches are better.
Adjustable leveling feet solve the problem of furniture on uneven floors. Threaded feet screw into T-nuts or threaded inserts on the bottom of furniture. Turn them to raise or lower individual corners until furniture is level. Essential for kitchen cabinets and shop equipment. I install leveling feet on any large cabinet or workbench that needs to sit level. The alternative is shims, which work but aren't adjustable if the floor settles or you move the furniture. Small investment that makes a big difference in functionality.
Corner braces and mending plates are metal reinforcements for joints. Corner braces are L-shaped and strengthen 90-degree joints. Mending plates are flat and span across joints to add strength. I use these mostly for repairs or in situations where I need quick strength and appearance doesn't matter. They're not elegant but they work. I keep assorted sizes in my shop for repairs and shop fixtures. For fine furniture, I avoid visible metal braces, but for utility cabinets and shop equipment, they're practical and fast.
Fastener Materials: Steel, Stainless, Brass, and Coatings
The material your fasteners are made from matters for longevity, appearance, and corrosion resistance.
Zinc-plated steel is the budget option and what most interior screws are. A thin layer of zinc provides some rust resistance. They work fine for indoor projects in dry conditions. Once exposed to moisture, they'll rust eventually. I use zinc-plated screws for indoor furniture, shop projects, anything that won't see weather or high humidity. They're cheap—maybe 1/4 the cost of stainless steel. For indoor use, zinc-plated is totally adequate. Don't use them outdoors or in bathrooms—they'll rust and leave ugly stains.
Stainless steel for outdoor and moisture exposure is what you need for decks, outdoor furniture, bathrooms, anywhere moisture is present. Stainless steel doesn't rust (or rusts very slowly). It's expensive—maybe 4x the cost of zinc-plated screws. There are different grades: 304 stainless (common, good for most applications) and 316 stainless (marine grade, better corrosion resistance, more expensive). For a deck or outdoor furniture project, the extra cost of stainless steel is worth it for longevity. I've seen decks built with regular screws rust out in 5-10 years. Stainless screws last decades.
Brass screws for fine furniture and aesthetics look beautiful on traditional furniture—jewelry boxes, desk accessories, humidors. The golden color is attractive and brass doesn't rust. The downside is brass is soft—screws break easily if over-tightened. I always pre-drill and sometimes even pre-drive a steel screw, then back it out and install the brass screw in the pre-threaded hole. This prevents breaking expensive brass screws. Brass screws cost 10x regular screws but for small decorative applications, they're worth it for appearance.
Bronze and copper for marine applications offer superior corrosion resistance, especially in saltwater. Silicon bronze screws are what boat builders use—they don't corrode even in constant saltwater exposure. Copper nails are traditional in boat building. These materials are expensive—bronze screws are maybe $1+ each. I don't use them much because I don't build boats or live near the ocean. But if you're building something that will live on a dock or beach, bronze or copper fasteners are worth the investment for corrosion resistance.
Ceramic-coated screws are expensive but rust-proof—high-end deck screws have ceramic coatings that provide excellent corrosion protection while costing less than stainless steel. Brands like GRK and SPAX offer ceramic-coated deck screws. They perform similarly to stainless at maybe 2/3 the cost. I've used them on outdoor projects and they hold up well. The coating is tough and doesn't chip easily. For outdoor projects where budget matters but you want longevity, ceramic-coated is a good middle ground.
Yellow zinc versus black oxide coatings are both finishes on steel screws. Yellow zinc (gold/yellowish color) provides reasonable corrosion resistance—better than plain zinc plating. Good for moderately humid environments but not truly outdoor. Black oxide (black color) is mostly decorative—provides minimal rust resistance. It looks good on visible hardware and blends with some woods, but it's not protective. I use yellow zinc for bathrooms and basements. I use black oxide when I want screws to visually disappear against dark wood.
Hot-dipped galvanized for exterior projects is a thick zinc coating applied by dipping steel in molten zinc. Much more corrosion resistant than zinc plating. Hot-dipped galvanized nails and screws are common for exterior framing and rough construction. They're ugly—rough bumpy coating—but they resist rust extremely well. I use them for outdoor structures where appearance doesn't matter but longevity does. They cost more than regular nails but way less than stainless steel.
When material choice actually matters: for indoor furniture, zinc-plated is fine and saves money. For outdoor furniture and decks, use stainless steel or high-quality coated screws—the extra cost is worth decades of durability. For decorative applications, brass or bronze looks beautiful. For bathrooms and humid areas, at minimum use yellow zinc or stainless. Don't cheap out on fasteners for outdoor projects—the material cost difference is small compared to replacing failed fasteners and damaged wood in a few years.
Sizing Fasteners: Length, Gauge, and Load Capacity
Getting fastener sizing right prevents failures and makes joints stronger.
Screw gauge numbers explained—what is #8 anyway? The gauge is the diameter of the screw shank. Larger numbers = larger diameter. Common sizes: #6 (about 1/8 inch), #8 (about 5/32 inch), #10 (about 3/16 inch), #12 (about 7/32 inch). For furniture, I use mostly #8 screws. They're strong enough for most joints without being so large they split wood. I use #6 for delicate trim work. I use #10 or #12 for heavy structural applications. The gauge number doesn't tell you thread count or style—just diameter.
How to choose the right length for the job depends on what you're fastening. The screw should penetrate at least 2/3 of its length into the second piece. So if you're fastening 3/4 inch material to another piece, your screw should be at least 1-1/2 inches long (3/4 inch through the first piece + 3/4 inch into the second = 1-1/2 inches). I often go slightly longer if possible—a 1-3/4 inch screw in that situation would be better. Just don't go so long you blow through the other side.
The "2/3 penetration rule" for screws ensures adequate holding power. Less than 2/3 penetration and you're not getting full strength. I see people use 1-inch screws for everything because that's what they have on hand, then wonder why joints fail. Match screw length to your material thickness. For pocket screws, the rule is different—the special screws are sized to penetrate about 3/4 inch into the second board. The pocket hole instructions tell you which length to use for different material thicknesses.
Pilot hole sizing to prevent splits varies by wood species and screw size. For hardwoods, drill a pilot hole about 80-90% of the screw's root diameter (the solid part under the threads). For softwoods, maybe 70-75% of root diameter. Or just buy tapered pilot bits that are sized for specific screw gauges—they drill the perfect size in one pass. I have a set of tapered pilot bits for #6, #8, and #10 screws. Makes life way easier. Near board ends, always pre-drill regardless of wood species.
Clearance holes versus pilot holes serve different purposes. A pilot hole is for the threaded part of the screw—it allows threads to bite while preventing splits. A clearance hole is for the shank—it's slightly larger than the screw diameter so the shank passes through without threads engaging. Traditional wood screws needed both: clearance hole in the first piece, pilot hole in the second. This let the screw pull the pieces together. Modern construction screws often don't need clearance holes because they're threaded all the way to the head. But for attaching hinges or hardware, clearance holes let the screw head pull tight.
Shear strength versus withdrawal strength are two ways screws fail. Withdrawal strength is how much force it takes to pull the screw straight out. This depends on thread engagement, wood density, and screw diameter. Shear strength is how much lateral force makes the screw break. Screws are much weaker in shear than withdrawal. That bookshelf collapse I mentioned? Shear failure—the screws broke because books created a lateral load. For joints that'll see lateral loads, use longer screws, stronger screw material, or bolts.
Calculating load capacity for shelves and joints prevents failures. As a rough guideline, a properly installed #8 wood screw in hardwood might have 100-150 pounds withdrawal strength per inch of thread engagement. A 2-inch screw with 1-1/4 inches of thread engagement = maybe 150 pounds holding power. But that's straight withdrawal—lateral loads are much less. For shelf loads, I calculate weight, divide by number of screws, add a 2-3x safety factor. If a shelf will hold 100 pounds with four screws, each screw needs to handle 25 pounds. With a 3x safety factor, I need screws rated for 75 pounds each.
Overkill versus adequate: finding the balance means not using lag bolts where finish screws suffice, but also not using brad nails where construction screws are needed. I see people massively over-build joints—like using 3-inch construction screws on a jewelry box. The screws are bigger than necessary and look heavy-handed. I also see people under-build—using 1-inch screws on a bookshelf that will hold 200 pounds of books. Find the middle ground. For most furniture joints, #8 screws 1-1/2 to 2 inches long are adequate. Bigger isn't always better.
Pre-Drilling, Pilot Holes, and Preventing Splits
This is where a lot of beginners mess up. Pre-drilling seems like extra work but it prevents so many problems.
When you absolutely need pilot holes: in hardwoods, always. Near board ends, always. With large screws, always. In thin stock, always. The harder the wood, the closer to the end, the larger the screw, or the thinner the stock—the more critical pilot holes become. I've split expensive walnut boards by skipping pilot holes. Now I pre-drill religiously. In softwoods away from ends with small screws, you can sometimes skip pilot holes. But when in doubt, drill.
Choosing the right drill bit size is critical. Too small and the screw still splits the wood. Too large and threads don't bite. For hardwood, drill about 85-90% of the screw's root diameter. For softwood, maybe 70-80%. This is where tapered pilot bits shine—they're specifically sized for common screw gauges and drill the perfect hole. I bought a set of tapered bits five years ago and use them constantly. They're one of those small investments that make a big difference in success rate and speed.
Tapered pilot bits versus straight bits—tapered bits match the screw's shape, drilling a cone that matches the screw's taper. This provides optimal holding power while preventing splits. Straight bits drill a uniform diameter hole—they work but aren't quite as ideal. I prefer tapered bits but straight bits are fine if that's what you have. Just choose the right diameter. For small screws like trim screws, regular twist bits work fine. For larger screws in hardwood, tapered bits are better.
Self-centering bits for hinges are spring-loaded bits that automatically center themselves in the hinge screw hole. Essential for mounting hinges—if hinge screws aren't perfectly centered, the hinge doesn't work smoothly. I fought with hinges for years before getting self-centering bits. Now hinge installation is foolproof. They're sized for common screw sizes—I have bits for #6 and #8 screws. They cost $10-20 and are worth every penny for anyone installing cabinet or door hinges.
Countersink versus counterbore explained: countersinking creates a cone-shaped recess so a flathead screw sits flush. Counterboring creates a straight-walled hole so the screw head sits below the surface and can be covered with a plug. Countersink bits have a tapered cutting edge. Counterbore bits have straight cutting edges. I use countersink bits for flush fastening. I use counterbore bits when I want to plug over screws. You can get combination bits that pilot, countersink, and counterbore in one operation—super convenient.
Stop collars for consistent depth ensure all holes are drilled to the same depth. A stop collar is a ring that clamps onto the drill bit at a specific length. When the collar hits the wood, you stop drilling. I use stop collars when drilling shelf pin holes (need consistent depth), when counterboring for plugs (need exact depth for plugs to sit correctly), or any time I need uniform depth holes. They're cheap—$5-10 for a set. Makes repetitive drilling way more consistent.
Preventing splits in hardwood versus softwood requires different approaches. Hardwoods are dense—drill pilot holes closer to the screw's actual diameter. Softwoods are less dense—smaller pilot holes work. But softwoods split more easily near ends because the grain structure is looser. In softwood near ends, I drill pilot holes even though I might not elsewhere. Some softwoods like pine and fir split really easily. Others like cedar are more forgiving. Learn the characteristics of the woods you use most.
Edge distance rules to avoid blowouts: stay at least 3/4 inch from board ends with screws. At least 1/2 inch from edges. Closer than this and you risk splitting or blowing out the end/edge. If you must fasten closer, use smaller screws and definitely pre-drill. I've learned these rules the hard way by splitting boards. Sometimes you can't avoid close-edge fastening—use your best technique and cross your fingers. Blunt screw tips by hitting them with a hammer—this crushes fibers instead of wedging them apart.
Glue and Fasteners: When to Use Both
The relationship between glue and mechanical fasteners is more nuanced than just "use both for strength."
Why glue is often stronger than fasteners alone surprises people. A properly glued long-grain joint (like edge-joining boards) is stronger than the wood itself—if you break it, the wood fails before the glue joint. A screwed joint without glue is only as strong as the screws. I've tested this—glued joints are often 2-3x stronger than fastened joints. The glue creates a continuous bond across the entire joint surface. Fasteners are just point connections. For maximum strength, glue is usually more important than fasteners.
Using screws as clamps while glue dries is a common technique. You don't have enough clamps? Add some screws to pull the joint tight while glue cures. This works well for edge gluing panels, attaching face frames, assembling carcasses. The screws hold everything in position and apply clamping pressure. Once the glue cures, the screws are redundant—the glue is doing the structural work. I do this all the time when building cabinets. The screws make assembly way faster than trying to get enough clamps in place.
Fastener-only joints that don't need glue include: any joint you might want to disassemble later, joints that need to allow wood movement, temporary assemblies, shop jigs and fixtures. I built a workbench with screws only (no glue) so I can disassemble it if I move. I attach tabletops with screws only (or figure-8 fasteners) to allow movement. Some joints are strong enough with just mechanical fasteners—no glue needed. Don't default to using both when fasteners alone are adequate.
How fasteners can weaken glue joints was a surprise when I learned it. Driving screws through wet glue can squeeze glue out of the joint, creating a "starved" joint with inadequate glue. Over-tightening screws compresses wood fibers and creates gaps once you release pressure. Some glues need gap-filling properties if joints aren't tight. I've had joints fail where I used screws with glue because the screws actually worked against the glue. Now I'm more thoughtful—use screws as light clamps, don't over-tighten, let glue do the work.
PVA glue, polyurethane, epoxy with fasteners—different glues interact differently with fasteners. PVA (like Titebond) is what I use 90% of the time with fasteners—works great as long as joints are tight. Polyurethane glue expands and gap-fills—good with screws because even if joints aren't perfect, it fills gaps. Epoxy is strong and gap-filling but expensive—I use it for problem joints or outdoor furniture where I want waterproof glue. Match the glue to the application. For most indoor furniture with screws, PVA is perfect.
Clamping strategies when using both glue and fasteners: apply glue, bring pieces together with clamps to ensure good contact, then add screws. Or apply glue, add a few screws to pull joint together, add clamps for even pressure. Don't rely solely on screws for clamping pressure—they create point loads. Clamps distribute pressure evenly across the joint. I usually do: glue, clamps for even pressure, screws to hold position while glue dries, then I can remove clamps for other projects.
Removable joints: skip the glue if there's any chance you'll need to disassemble. Once glue cures, joints are permanent. I learned this when I glued AND screwed a bed frame, then couldn't get it through a doorway when moving. Now I think about future disassembly. Beds, desks, large bookcases—anything that might need to move through doors—consider leaving out glue and relying on mechanical fasteners only. Or design knockdown joints with barrel nuts or bolts.
Traditional joinery that needs no fasteners: mortise and tenon joints properly fitted and glued are incredibly strong. Dovetails need no fasteners—the mechanical interlock plus glue creates joints that last centuries. Through-tenons with wedges need no metal fasteners. Traditional woodworking used few metal fasteners—joints were designed to interlock mechanically. If you have the skills to cut proper joinery, you can build furniture with minimal fasteners. But for most of us, modern fasteners make strong joints accessible without years of practice.
Tools for Installing Fasteners
Having the right tools makes fastener installation way easier and more successful.
Cordless drills versus impact drivers—which when? is a question I get constantly. Drills have a chuck that can hold any bit, adjustable clutch for torque control, and they're good for drilling holes and driving smaller screws. Impact drivers have a hex collet for hex-shank bits, no clutch, high torque with impact action—they're for driving screws, especially long or large screws. I use my drill for drilling holes and driving finish screws where I need torque control. I use my impact driver for construction screws, deck screws, anything long or in hardwood. Both tools are essential. If you can only have one, get a drill. Once you can afford both, your life gets easier.
Pneumatic nailers in various types completely change trim and cabinet work. Framing nailers shoot 2-3 inch nails for rough construction—I don't own one because I don't do framing. Finish nailers (15 or 16-gauge) shoot 1-1/4 to 2-1/2 inch nails for trim, cabinetry, furniture—I use mine constantly. Brad nailers (18-gauge) shoot smaller thinner nails for delicate trim—excellent for small moldings. Pin nailers (23-gauge headless pins) for ultra-delicate work—holding veneers or tiny moldings while glue dries. I own finish, brad, and pin nailers. They require an air compressor but the speed and clean results are worth it.
Hammer types for hand-nailing matter more than you'd think. A 16oz finish hammer with smooth face is perfect for finish nails and general woodworking. Heavier framing hammers (20-24oz) have textured faces and are for rough construction—overkill for furniture. I have a lightweight 10oz hammer for really delicate work like small brads or veneer nails. The right weight hammer makes nailing easier—too heavy and you'll bend nails, too light and you can't drive nails efficiently. For woodworking, a 13-16oz hammer is ideal.
Nail sets for recessing finish nails are essential for professional results. A nail set is a tapered punch that drives finish nails below the surface so you can fill the hole. Available in different tip sizes for different nail gauges. I have sets sized for 6d, 8d, and 10d nails. Hit the nail almost flush with the hammer, then use the nail set for the final 1/8 inch to recess the head. Fill with putty and the nail disappears. Without a nail set, finish nails stick up and look amateur.
Screwdriver types and when to use hand tools: I own screwdrivers for those times when I need precise control or I'm working on delicate material where power tools are too aggressive. Good quality screwdrivers with hardened tips that won't strip. Phillips #2 for most wood screws. Square drive and Torx in common sizes. Slotted in various widths. I don't use hand screwdrivers often but when I need them, having quality ones matters. For driving lots of screws or driving long screws, power tools are better. For precision work or a few screws, hand tools are fine.
Driver bit quality and why cheap bits fail: I went through so many cheap Phillips bits before I learned. They round off, cam out constantly, strip screw heads. Impact-rated bits are heat-treated to be tougher—they last 10-50x longer than standard bits. Bits with good fit (precisely manufactured) work better than loose-fitting cheap bits. I now buy impact-rated bits in the drive types I use most. They cost more ($10-15 for a set versus $3 for cheap bits) but they last forever. For standard drill use, regular bits are fine. For impact drivers, buy impact-rated.
Magnetic bit holders and extensions are small accessories that make life easier. Magnetic bit holders hold screws on the bit so you can drive one-handed. Extensions let you reach into recessed areas. Right-angle adapters let you drive screws in tight spaces. I have a 6-inch extension for my impact driver that I use constantly when screws are recessed (like in pocket holes or inside cabinets). The magnetic holder is on my drill 90% of the time. These are cheap tools ($5-15) that improve productivity.
Specialized tools like pocket hole jigs and doweling jigs expand your joinery options. Pocket hole jigs (Kreg is the big brand) run $40-150 depending on model—worth it if you build furniture or cabinets. They pay for themselves in time saved and joint strength. Doweling jigs ensure perfectly aligned dowel holes—available from $20 (simple) to $150 (precision). Biscuit joiners cut slots for biscuits—$100-300 depending on quality. These specialty tools aren't essential but they make certain joints way easier. Start with pocket holes if you're going to invest in one specialty joinery system.
Common Fastening Mistakes and How to Avoid Them
I've made all these mistakes. Let me save you the pain of learning them yourself.
Over-driving screws and stripping heads happens when you apply too much force or keep driving after the screw is tight. With power drivers, it's easy to blow right through optimal tightness into stripped territory. Impact drivers especially can strip screws instantly if you're not careful. The solution: use the clutch setting on your drill to limit torque. With impact drivers, develop a light touch and stop as soon as you feel resistance. I've learned to feather the trigger and stop right at tight. Stripped screws are weaker, look terrible, and are hard to remove.
Using drywall screws in structural applications is a huge mistake I made on that bookshelf I mentioned. Drywall screws are hardened to be brittle so they snap cleanly during installation if you hit a stud. This brittleness means they snap under load. Wood screws are more ductile—they bend before breaking. For structural applications, use actual wood screws or construction screws. Drywall screws are only for attaching drywall. I see people use them for everything because they're cheap and available. Don't. They will fail.
Not pre-drilling hardwoods leads to splits, usually right when you're almost done driving the screw. That board you spent an hour milling and cutting? Ruined by one split. I've done this more times than I care to admit. Now I pre-drill ANY screw going into hardwood, especially near ends. Takes 10 seconds. Prevents splits. Worth it every time. In softwood away from ends you can sometimes skip pre-drilling, but in hardwood it's mandatory. Don't skip this step.
Wrong length causing blowouts or weakness: too long and you blow through the other side (looks terrible and weakens the joint). Too short and you don't get adequate thread engagement (weak joint that fails). I've done both. Measure your material thickness, calculate required length (remember the 2/3 penetration rule), and use the right length screw. Keep an assortment of lengths on hand so you're not tempted to "make do" with whatever's available. The right length matters.
Mixing fastener types in same joint creates problems. Different fasteners expand wood differently, have different strength characteristics, and can work against each other. Use consistent fasteners within a joint. Don't use nails and screws randomly in the same joint. Don't use different screw types. Pick one fastener type and stick with it. The exception is using different fasteners for different parts of a project—that's fine. But within a single joint, be consistent.
Ignoring wood grain direction affects how fasteners work. Screws have less holding power when driven into end grain versus long grain. I always try to orient joints so screws go into long grain. If I must screw into end grain, I use longer screws and maybe glue or dowels for additional strength. Dowels and biscuits work in end grain better than screws. Understanding grain direction and orienting your joinery accordingly makes stronger projects.
Countersinking too deep weakens joints by removing too much material. The screw head pulls against thin wood that can't handle the load, and the joint fails. I've countersunk too aggressively and created weak spots that cracked under load. Countersink just enough for the screw head to sit flush or slightly below surface. Use a depth stop on your countersink bit to ensure consistency. Don't create deep craters—you're weakening the wood.
Using outdoor fasteners indoors causes rust stains on some woods, especially tannin-rich woods like oak. Galvanized and some exterior screws can react with wood chemistry and cause dark stains. I've had this happen on a white oak project—dark stains around every screw from using galvanized fasteners. For indoor projects, use interior-rated fasteners (zinc-plated or stainless if you want to be safe). Save the exterior-rated fasteners for actual outdoor use. The stains can't be removed without sanding deep, and they bleed through finish.
Fasteners for Outdoor and Treated Lumber Projects
Outdoor projects require special consideration for corrosion and chemical compatibility.
Why regular screws fail on treated lumber: modern treated lumber uses copper-based preservatives (ACQ or copper azole). These chemicals are corrosive to regular steel fasteners. I've seen regular screws on treated lumber decks corrode to nothing in 3-5 years. The copper in the treatment creates galvanic corrosion with regular steel. The screws turn to rust, the wood gets stained, and joints fail. This isn't theoretical—I've seen it firsthand. Don't use regular screws on treated lumber, period.
ACQ and copper azole chemical reactions with fasteners are the reason you need special fasteners. The copper content creates electrochemical reactions with certain metals. Regular steel corrodes rapidly. Galvanized steel corrodes, just more slowly. Aluminum corrodes (actually gets eaten away). What works: stainless steel (best), hot-dipped galvanized (okay), ceramic-coated (good), specially rated deck screws. The fastener packaging will say if it's rated for treated lumber. Look for "ACQ compatible" or "approved for treated lumber."
Stainless steel—which grade to use? There are multiple grades. 304 stainless (sometimes marked 18-8) is common and works well for most outdoor applications including treated lumber. 316 stainless (sometimes called marine grade) has better corrosion resistance and is what you want for coastal areas with salt exposure. 316 costs more but lasts longer in harsh environments. For typical deck projects, 304 stainless is fine. For oceanfront applications, spend extra for 316. Both are dramatically better than regular steel.
Hot-dipped galvanized versus electroplated: electroplated (bright shiny zinc coating) is thin and doesn't hold up well to treated lumber. Hot-dipped galvanized (thick rough gray coating) is much more corrosion resistant. The thick zinc layer provides real protection. Hot-dipped galvanized fasteners are acceptable for treated lumber in most areas. They're not as good as stainless but cost way less. I use hot-dipped galvanized for framing and rough construction with treated lumber. For finished decks where joints matter, I use stainless.
Ceramic and polymer-coated exterior screws are high-end options—brands like GRK, Spax, FastenMaster. They have thick ceramic or polymer coatings over hardened steel that provide excellent corrosion protection. They're approved for treated lumber and cost less than stainless steel (but more than hot-dipped galvanized). I've used GRK screws on decks and they perform really well. The coating is tough and doesn't chip easily. If stainless steel is too expensive but you want quality fasteners, these are great middle-ground options.
Fastener warranties and corrosion claims: some premium fastener manufacturers offer warranties against corrosion—typically 25 years to lifetime. Read the fine print—the warranty usually requires proper installation in approved applications. If you use fasteners rated for treated lumber and they corrode, you might have recourse. I've never actually claimed a warranty because I choose appropriate fasteners, but it's nice to know manufacturers stand behind their products. This is one reason to buy name-brand fasteners for critical outdoor applications.
Aluminum fasteners for coastal areas seem like a good idea (aluminum doesn't rust) but actually aluminum corrodes rapidly in contact with treated lumber or in salt environments. Aluminum and copper create galvanic corrosion. I learned this from a marine contractor—he said aluminum fasteners fail faster than regular steel in treated lumber. Don't use aluminum fasteners on treated lumber. In coastal salt environments without treated lumber, aluminum can work, but stainless is still better. This is counterintuitive but it's chemistry.
Cost versus longevity in outdoor fasteners: stainless steel screws cost maybe $20-40 per pound versus $5-10 for regular screws. For a deck project, you might use 5 pounds of screws—the cost difference is $50-150. Over a 20-30 year deck lifespan, that extra $100 is nothing. Replacing failed fasteners means disassembling and reassembling the deck, replacing corroded/stained boards—costs hundreds or thousands in labor and materials. The premium for quality outdoor fasteners is absolutely worth it. Don't cheap out on fasteners for outdoor projects.
Budget-Friendly Fastener Strategies
Fasteners add up in cost, especially for large projects. Here's how to save money without compromising quality.
Buying in bulk versus small packages saves massive amounts of money. A small box of 20 screws costs $4-6. A pound of the same screws (maybe 120 pieces) costs $10-15. The per-screw cost is literally 3-5x less in bulk. I buy screws by the pound or multi-pound boxes for types I use frequently. For specialty screws I rarely need, I buy small quantities. But for #8 x 1-1/4", 1-1/2", 2" wood screws in various drive types, I buy pounds. Same with 15-gauge finish nails—I buy 2,500 count boxes. Calculate cost per piece, not cost per box.
When to splurge and when to save: splurge on fasteners that are visible or critical to structure. Brass screws on a jewelry box—splurge, they're visible and important to aesthetics. Deck screws for a 400 square foot deck—splurge on stainless or quality coated screws for longevity. Save on screws for rough shop fixtures, practice projects, temporary assemblies. I use cheap screws for shop jigs and save premium fasteners for actual projects. Think about where fasteners matter and allocate budget accordingly.
Mixing premium and budget fasteners strategically works great. For a bookshelf: use quality wood screws for the structural joints (where strength matters), use cheap screws for attaching the back panel (non-structural). Use trim screws for visible edge banding but regular screws for hidden joints. You don't need premium fasteners everywhere. Identify critical fasteners and use quality there. Use budget fasteners where failure isn't catastrophic or appearance doesn't matter.
Reusing screws—when it's okay and when it's not: I reuse screws from practice projects, failed assemblies, shop fixtures being rebuilt. If threads are damaged or head is stripped, toss it. If the screw looks good, I'll reuse it for shop projects. I don't reuse screws for fine furniture or structural applications—the threads are slightly damaged from first use and holding power is reduced. For shop fixtures and non-critical applications, reusing screws is fine. For anything important, use new screws. Keep a "reuse" bin of screws salvaged from other projects.
Store brands versus name brands: for basic screws and nails, store brands are usually fine and cost less. For specialized fasteners (deck screws, trim screws, exterior fasteners), name brands like GRK, Spax, FastenMaster, Deckmate are worth the premium—better quality control, better coatings, warranties. For standard interior wood screws, I buy whatever's cheap. For exterior or specialty applications, I buy quality brands. The store brand drywall screws work as well as name brand. Store brand stainless deck screws might not hold up as well.
Sales and clearance fastener hunting saves money if you're patient. I watch for sales and stock up. End of season, hardware stores clear outdoor fasteners—I buy stainless deck screws 30-50% off in fall. I check clearance sections for odd fasteners in quantities I can use. I bought a huge box of brass screws for $15 (retail $60) because it was clearance odd stock. Building a fastener inventory slowly by buying on sale means you have what you need without paying full retail every time.
Building a fastener inventory over time means you're not buying fasteners for every single project. Over years, I've accumulated a collection of common sizes and types. Now when I start a project, I probably have 70% of fasteners I need already. I supplement with project-specific purchases. Starting from zero every project is expensive. Build inventory gradually—buy extra when things are on sale, keep extras from completed projects, organize everything so you know what you have.
Online versus local hardware store pricing varies dramatically. Online suppliers (Amazon, specialized fastener companies) often have way better bulk prices. Shipping costs can negate savings for small orders. Local hardware stores are convenient but expensive for bulk purchases. I buy online for bulk (pounds of screws, boxes of nails). I buy locally for small quantities I need immediately. For a pound of screws, online is usually 30-50% cheaper even with shipping. For 20 screws, paying local prices is fine for convenience.
Conclusion
Alright, after all that, here's the bottom line: fastener choice matters way more than most people realize. That failed bookshelf taught me that using the wrong fastener doesn't just mean a weak joint—it can mean complete project failure. But once you understand the basics, it's not complicated.
You don't need to memorize every fastener type or own every specialty screw. Start with the fundamentals: good quality wood screws in a few common lengths (#8 in 1-1/4", 1-1/2", 2"), decent driver bits, a drill and maybe an impact driver, understanding of when to pre-drill. That covers 80% of woodworking projects. Then add specialty fasteners as you encounter specific needs—pocket screws when you build cabinets, stainless deck screws when you build a deck, brass screws when you want visible decorative fastening.
The key lessons I've learned: match the fastener to the application (don't use drywall screws for everything), pre-drill hardwoods and near edges, use quality fasteners where it matters, understand that glue is often stronger than fasteners. Follow these principles and you'll avoid most common mistakes.
Build your fastener collection gradually. Every time you do a project, buy slightly more fasteners than you need and keep the extras organized. After a few years, you'll have a well-stocked collection that covers most projects without special trips to the store. Organization is key though—a pile of mixed fasteners is useless. I use divided cases and label everything clearly.
And when a project fails because of fastener choice, don't get discouraged—learn from it. Every failed joint teaches you something about what not to do next time. I've had plenty of failures and each one made me better at this.
I'd love to hear about your fastener experiences! What mistakes have you made that taught you important lessons? Have you discovered any specialty fasteners that solved specific problems? What's your go-to fastener for everyday projects? Share in the comments—we all learn from each other's experiences and failures.
Now get out there and build something, with the right fasteners for the job! Your projects will be stronger, last longer, and look better with thoughtful fastener selection.