Container Drainage: Why It Matters and How to Fix Poor Drainage
Learn why container drainage matters and how to fix poor drainage in your pots. Discover drainage hole basics, soil solutions, and expert tips to prevent root rot and grow healthier container plants.
GARDENING
I still remember the moment I realized drainage was literally killing my container plants. I'd been growing tomatoes in these gorgeous decorative pots I'd splurged on - beautiful ceramic planters that cost $40 each. The plants looked great for about three weeks, then suddenly started wilting despite being in constantly moist soil. Within days, they were dead!
When I dumped out the pots to investigate, the smell hit me first - that awful, swampy, rotting odor. The roots were brown, mushy, and completely decomposed. The soil was a waterlogged, anaerobic mess. And here's the kicker: those expensive pots had NO drainage holes. Zero. I'd basically been drowning my plants in their own containers.
That expensive mistake taught me something crucial - you can have perfect soil, ideal fertilizer, optimal sunlight, and still completely fail at container gardening if drainage isn't right. Research shows that improper drainage is responsible for over 50% of container plant failures! It's literally the most common cause of death for potted plants, yet it's also one of the easiest problems to prevent.
Proper drainage isn't just about holes in the bottom of pots, though that's critical. It's about creating conditions where excess water can escape freely while the soil retains enough moisture for plant roots. It's the balance between too wet and too dry - and getting that balance right is absolutely fundamental to container gardening success.
In this guide, I'm gonna break down everything you need to know about container drainage. We'll cover why it matters so much, how to identify drainage problems, multiple ways to fix poor drainage, and how to prevent drainage issues from developing in the first place. Let's dive into this critical topic!
Why Proper Drainage is Critical for Container Plants
Understanding exactly why drainage matters helps you take it seriously and make better container gardening decisions. The science behind drainage issues is actually pretty straightforward once you get it!
Root rot is the primary consequence of poor drainage. Plant roots need oxygen to survive - they literally breathe just like we do, taking in oxygen and releasing carbon dioxide. When soil is waterlogged, the spaces between soil particles fill with water instead of air. Roots suffocate in this oxygen-free environment and begin to rot.
I've pulled apart root systems from waterlogged containers, and it's obvious when roots are rotting. Healthy roots are white or tan, firm, and have a fresh, earthy smell. Rotted roots are brown or black, mushy, and smell terrible - like a swamp or sewage. Once root rot sets in, it's almost always fatal because the damaged roots can't absorb water or nutrients even if you fix the drainage.
Anaerobic bacteria thrive in waterlogged soil, creating toxic compounds that further damage plant roots. When oxygen is absent, beneficial aerobic bacteria die off and are replaced by anaerobic bacteria that produce harmful substances like hydrogen sulfide (that rotten egg smell). This toxic environment kills roots even faster than simple oxygen deprivation.
I learned about this when researching why my waterlogged containers smelled so bad. That distinctive swampy odor is literally toxic bacterial byproducts! It's a warning sign that conditions in the container have gone terribly wrong.
Nutrient availability decreases dramatically in poorly drained soil. Many essential nutrients become chemically locked up and unavailable to plants when soil is constantly saturated. Even if you fertilize religiously, plants in waterlogged containers will show nutrient deficiency symptoms because they can't access the nutrients present in the soil.
This explains why my overwatered plants looked yellowed and stunted despite regular fertilizing. The nutrients were there - the plants just couldn't absorb them from the oxygen-deprived, waterlogged roots!
Fungal diseases flourish in poorly drained containers. Fungi like constantly wet conditions, and most serious plant diseases are fungal. Root rot fungi (Pythium, Phytophthora, Rhizoctonia) are particularly devastating and spread rapidly in waterlogged soil. Once established, these fungi can persist in soil and infect future plantings.
I've had to completely dispose of soil from containers where fungal root rot took hold. The fungi can survive in the soil, so reusing it just spreads the problem to the next crop. Prevention through proper drainage is way easier than dealing with established fungal diseases!
Temperature fluctuations affect waterlogged soil more severely. Wet soil heats up and cools down more slowly than properly drained soil, creating temperature extremes that stress plant roots. In summer, waterlogged soil can get much hotter than it should. In winter, it stays colder longer. Both scenarios damage roots.
I noticed this when checking soil temperatures in different containers. My poorly-drained containers stayed 5-10°F cooler in spring, which significantly delayed plant growth compared to well-drained containers with the same sun exposure.
Plant growth and productivity decline dramatically with poor drainage even before plants actually die. Stressed roots produce weak, stunted top growth. Flowers drop, fruit production decreases, leaves yellow, and overall vigor suffers. I've seen identical plant varieties perform 50-70% worse in poorly-drained containers versus well-drained ones!
Signs Your Container Has Drainage Problems
Learning to recognize drainage issues early allows you to fix them before plants die. I've gotten pretty good at spotting drainage problems just by looking at containers and plants!
Water pooling on the soil surface after watering is an obvious red flag. When I water and the water just sits on top of the soil instead of soaking in, that tells me drainage is severely compromised. This might mean the soil has compacted, the drainage holes are clogged, or the soil mix itself doesn't drain well.
Healthy containers should absorb water almost immediately, with excess draining from the bottom within a minute or two. If water is still pooled on the surface after 5-10 minutes, there's definitely a drainage problem!
Soil that stays wet for days after watering indicates poor drainage. I check moisture by sticking my finger 2-3 inches into the soil. If it's still soaking wet 3-4 days after watering, drainage is inadequate. Properly drained containers should be starting to dry out by then, with soil feeling moist but not saturated.
I learned to judge this through experience - I check my containers regularly and I know how quickly they should dry based on pot size, weather, and plant type. Containers that stay wet way longer than expected have drainage issues.
Foul, swampy smell from soil or drainage holes is a bad sign. Healthy soil has a fresh, earthy smell. Soil that smells sour, rotten, or like sewage indicates anaerobic conditions from poor drainage. This smell means beneficial bacteria have died and been replaced by smelly anaerobic bacteria.
I literally stick my nose near containers when investigating problems! If it smells bad, drainage is almost certainly the issue. This distinctive odor helped me identify waterlogging problems before visible symptoms appeared on plants.
Algae or mold growing on soil surface suggests excessive moisture. Green algae or white/gray fuzzy mold growing on top of potting mix means the surface is staying too wet. This can happen from overwatering or from poor drainage that keeps the entire container saturated.
I see this most often with indoor plants in decorative pots without drainage holes, or in outdoor containers during rainy periods when drainage is inadequate to handle the water input.
Plant symptoms include wilting despite wet soil (roots can't absorb water), yellowing leaves (nutrient lockup), slow growth (root stress), dropped flowers or fruit (plant stress response), and leaves developing brown or black spots (fungal diseases from excess moisture).
The classic symptom that always tips me off is wilting in wet soil. When a plant wilts and I check the soil and it's saturated, I immediately know it's a drainage problem, not a watering problem. Healthy roots in properly drained soil would absorb that moisture and perk the plant up!
Moss or liverwort growing in containers indicates chronic wetness. These primitive plants only grow where conditions are constantly moist. If I see moss establishing in my containers, it's a clear signal that drainage needs improvement.
Water draining very slowly from the bottom or not draining at all when I water from the top is the most obvious sign. I always watch for water coming from drainage holes when I water. If it takes more than a few minutes for water to appear, or if it never appears at all, drainage is definitely insufficient.
How to Check if Your Container Has Adequate Drainage
Before planting or when troubleshooting problems, testing drainage helps you identify issues and verify fixes. I test drainage on all new containers before filling them with expensive potting mix!
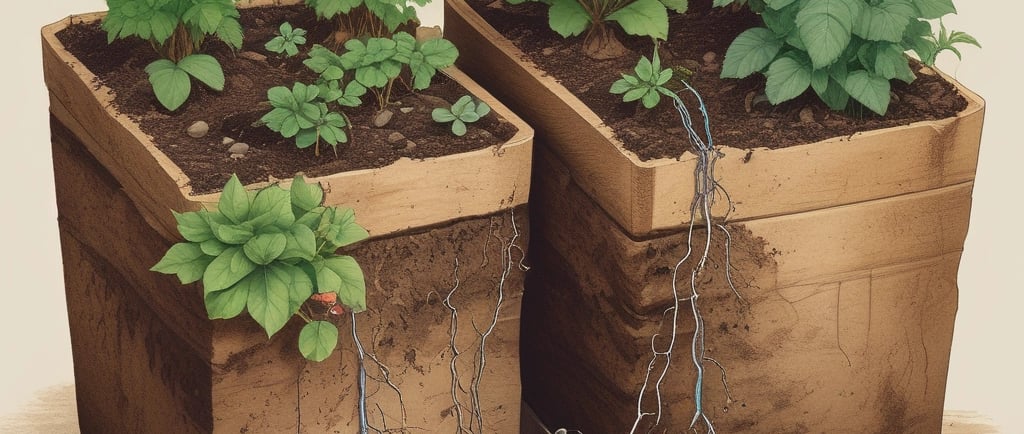
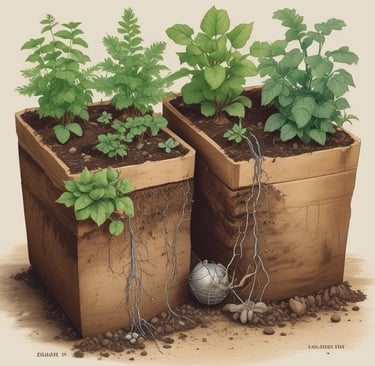
The visual inspection method is the simplest starting point. I flip containers upside down and look at the bottom. Are there drainage holes? How many? How large? How are they positioned? A single small hole in the center of a large pot is inadequate. Multiple holes spread across the bottom is much better.
For opaque containers, I also look down from the top with a flashlight to see if I can spot light coming through drainage holes. This confirms holes are actually there and not covered by anything.
The water test is the gold standard for checking drainage. I fill the empty container with water to the brim and time how long it takes to drain completely. Well-draining containers should empty within 5-10 minutes maximum. Containers taking 15-20+ minutes have drainage issues.
I've done this test on dozens of containers, and it's incredibly revealing! Some decorative pots that appeared to have drainage holes actually took 30+ minutes to drain because the holes were too small or poorly positioned.
The pour-through test checks drainage with soil in place. I water the planted container thoroughly from the top and immediately watch the drainage holes. Water should start draining from the bottom within 30-60 seconds. If it takes several minutes or doesn't drain at all, there's a problem.
I also note how long water continues draining. It should drain steadily for a minute or two, then slow to occasional drips. If it's still pouring out after 5+ minutes, the soil might be too coarse and not retaining enough moisture (though this is rare - usually the problem is too little drainage, not too much).
The saturation test evaluates soil moisture retention versus drainage. I water a container thoroughly, let it drain completely, then check soil moisture at different depths. The top 1-2 inches should feel damp but not soggy. 4-6 inches down should feel moist. If the entire container is waterlogged and dripping wet hours after watering, drainage is inadequate.
Conversely, if the soil is dry even a few inches down right after watering, drainage might be too aggressive (or watering was insufficient). Good drainage maintains moisture throughout the container while allowing excess water to escape.
The excavation test involves actually removing soil to inspect drainage materials and holes. For containers that are performing poorly, I sometimes partially or completely unpot plants to see what's happening. I've found clogged drainage holes, compacted soil blocking drainage, landscape fabric that wasn't porous enough, and even roots completely filling the container and preventing drainage.
This is destructive and stressful to plants, so I only do it when other methods don't reveal the problem. But it's sometimes the only way to diagnose stubborn drainage issues.
The weight test compares saturated versus dry weight. I lift containers after watering and again a few days later. Containers should feel noticeably lighter as they dry out. If a container feels just as heavy 3-4 days later, it's retaining too much water - either from poor drainage or from overwatering.
I use this method especially with larger containers that are difficult to inspect closely. The weight change tells me whether moisture is leaving the container appropriately.
Creating Proper Drainage Holes in Containers
If your container lacks adequate drainage holes, adding them is the single most important fix. I've drilled hundreds of drainage holes in various containers over the years!
Drill bits are the primary tool for adding drainage holes. For plastic pots, a regular drill with 1/4 to 1/2 inch bits works perfectly. I usually use 3/8 inch bits as a good middle ground. For larger containers, I might use 1/2 inch or even 3/4 inch bits to create bigger drainage holes.
Start with the drill on slow speed to prevent cracking, especially with harder plastics or when drilling near edges. Once the bit penetrates, you can increase speed. I drill from the outside bottom, applying steady but gentle pressure.
Hole saws work great for creating larger drainage holes, especially in buckets or storage totes being converted to planters. A 1.5-2 inch hole saw creates generous drainage openings. I use these when converting 5-gallon buckets to self-watering containers or when I want fewer but larger holes instead of many small ones.
For ceramic, terra cotta, or concrete containers, specialized masonry bits are necessary. Regular drill bits will destroy themselves on these hard materials! I use carbide-tipped masonry bits and drill on slow speed with frequent cooling breaks (dipping the bit in water).
The process is slower and requires patience, but it works. I've successfully drilled drainage holes in expensive ceramic pots that didn't come with them, saving containers that would otherwise be useless for growing plants.
How many drainage holes you need depends on container size. My general rule: minimum of 3-4 holes for small containers (under 10 inches diameter), 6-8 holes for medium containers (10-14 inches), and 10-15+ holes for large containers (over 14 inches). More holes is almost always better!
I space holes evenly across the entire bottom surface, not just clustered in the center. This ensures water drains from all parts of the container, not just the middle.
Drainage hole placement should cover the entire bottom area. I avoid drilling only in the center, which creates a "bathtub effect" where water pools around the edges. Holes near the perimeter are just as important as central holes.
For rectangular or oval containers, I place holes every 4-6 inches along the length and width. The goal is comprehensive drainage coverage so water can't pool anywhere.
Preventing cracks when drilling requires some technique. For plastic, I place a piece of wood under the drilling spot to provide support and prevent the plastic from flexing and cracking. For ceramic and terra cotta, I start with a very small pilot hole (1/8 inch bit), then gradually increase bit size to reach the final hole diameter.
I learned this the hard way after cracking several ceramic pots by drilling too aggressively! Taking it slow and using pilot holes prevents expensive mistakes.
Mesh or screen over drainage holes prevents soil from washing out while allowing water to drain. I cut pieces of fine mesh screen, landscape fabric, or even coffee filters to cover holes before adding soil. This keeps potting mix in the container while water flows freely through.
Some people use broken pottery shards or small stones to cover holes, but I've found this less effective than mesh. Fabric or screen conforms to the hole and provides better filtration.
Side drainage holes can supplement bottom drainage in very deep containers. I sometimes drill additional holes 2-3 inches up from the bottom on the container sides. This creates a "maximum water level" where excess water drains out, preventing the bottom few inches from becoming waterlogged.
This technique is especially useful for very deep containers or for plants that prefer drier root conditions. The side holes prevent a saturated zone from developing at the container bottom.
Fixing Compacted or Poor-Draining Soil
Sometimes the container has adequate drainage holes, but the soil itself is the problem. Compacted or poorly formulated soil blocks water flow and creates drainage issues!
Identifying soil-related drainage problems usually involves examining the soil texture and behavior. If water pools on the surface but the container has good holes, the soil is the culprit. I squeeze a handful of soil - if it forms a dense, clay-like ball that holds together tightly, it's too heavy and compacted for good drainage.
Soil amendments improve drainage in heavy potting mixes. The most effective amendment is perlite - those white, lightweight volcanic glass pieces. I mix perlite into existing soil at ratios of 20-30% by volume. This creates air spaces, prevents compaction, and dramatically improves drainage.
For containers already planted, I carefully work perlite into the top few inches of soil without disturbing roots too much. For empty containers, I dump out the old soil, mix in perlite thoroughly, then refill.
Coarse sand (not fine play sand) also improves drainage when mixed into heavy soil. I use builder's sand or horticultural sand at ratios of 15-20% by volume. Sand keeps soil from compacting and creates drainage channels. However, adding sand to clay-heavy soil can sometimes make it worse, creating a cement-like texture, so I primarily use sand with peat-based mixes that are too moisture-retentive.
Bark or wood chips in small quantities add structure and prevent compaction. I mix in pine bark fines (small, partially composted bark pieces) at about 10-15% by volume. This works similarly to perlite but also adds organic matter as it breaks down.
Avoid large bark chunks which can create air pockets and actually reduce water retention too much. Small, uniform-sized bark fines work best.
Replacing soil entirely is sometimes the only solution for severely compacted or inappropriate potting mix. I dump out the old soil (which goes in the compost pile or garden), wash roots gently to remove clinging old soil, and repot in completely fresh, quality potting mix formulated for good drainage.
This is more work and stressful to plants, but it's necessary when the existing soil is fundamentally unsuitable. I've done this with containers where I'd initially used garden soil or heavily compacted potting mix.
Aerating soil helps in the short term but doesn't solve underlying problems. I use a chopstick, screwdriver, or specialized soil aerator tool to poke holes throughout the soil mass, creating temporary drainage and aeration channels. This helps waterlogged containers drain somewhat better immediately.
However, these holes will close up over time as soil settles, so aeration is a stopgap measure while you plan more permanent fixes like soil replacement or amendment.
Preventing soil compaction in the first place involves using quality potting mix (never garden soil!), avoiding over-packing soil when filling containers (keep it fluffy!), and refreshing or amending soil every 2-3 seasons before it breaks down completely and compacts.
I've learned that spending a bit more on quality potting mix with good perlite content prevents so many drainage headaches down the road!
Improving Drainage with Container Design and Setup
The way you set up and position containers significantly affects drainage performance. Small changes in container design and placement make big differences!
Elevating containers off the ground improves drainage by allowing air circulation under the pot and preventing drainage holes from becoming blocked. I use pot feet, bricks, pieces of wood, or specially designed container risers to raise pots 1-2 inches off surfaces.
This is especially important on patios, decks, and balconies where pots sit on flat surfaces. Without elevation, water can't drain freely from bottom holes. I've seen containers sitting flat on surfaces where drainage was severely restricted just because there was no gap for water to escape!
Saucers and trays under containers catch drainage water (protecting surfaces from water damage) but can create problems if not managed properly. I always dump out saucer water 15-20 minutes after watering so pots aren't sitting in standing water. Pots left in full saucers essentially become containers without drainage!
For indoor plants especially, I'm religious about emptying saucers. This one habit has prevented countless cases of root rot in my houseplants and indoor herb containers.
Adding drainage layers at the bottom of containers is controversial. Traditional advice was to put gravel, rocks, or pottery shards in the bottom to "improve drainage." However, research shows this actually REDUCES drainage by creating a perched water table where water accumulates at the soil-gravel interface.
I stopped using drainage layers years ago after learning they don't help and often hurt. Better to fill the entire container with quality, well-draining potting mix rather than wasting space on gravel layers that don't improve drainage.
The exception is using coarse material to keep soil from washing through very large drainage holes. A piece of screen or landscape fabric works better than gravel for this purpose.
Choosing containers with proper drainage hole design from the start saves trouble later. When shopping for pots, I check the bottom carefully. Multiple holes spread across the entire bottom is ideal. A single small center hole is inadequate for anything but tiny pots.
Some containers have raised feet molded into the bottom, which is excellent - built-in elevation and drainage. I look for these features when buying pots.
Double-potting uses an inner growing pot with drainage inside a larger decorative pot without drainage. This protects surfaces while still allowing proper drainage. I grow plants in ugly but functional plastic pots with lots of holes, then set those inside pretty ceramic cache pots.
I always remove the inner pot from the cache pot after watering, let it drain completely, then return it. Never let the inner pot sit in water that accumulates in the cache pot!
Fabric grow bags provide superior drainage compared to rigid containers. The fabric allows water to drain through the entire surface, not just bottom holes. Air pruning of roots (roots that hit fabric dry out and branch rather than circling) also promotes healthier root systems.
I use fabric grow bags for plants that are particularly sensitive to overwatering or for situations where I tend to water too heavily. The excellent drainage of fabric makes overwatering almost impossible!
Sloped bottoms help drainage in some container designs. Containers with bottoms that slope toward drainage holes allow water to flow more easily to exit points rather than pooling in flat-bottom areas. I've noticed this feature in some commercial containers and it definitely helps with thorough drainage.
When building custom containers from wood or other materials, I intentionally create slight slopes toward drainage holes to facilitate water movement.
Special Drainage Solutions for Specific Situations
Certain growing situations require specialized drainage approaches. I've developed solutions for several common challenging scenarios!
Large containers and planters need more extensive drainage than small pots due to the soil volume involved. For containers over 15-20 gallons, I drill 12-20+ drainage holes spread across the entire bottom. I also consider drilling a few holes in the lower sides to create supplemental drainage points.
With very large containers (30+ gallons), I sometimes use perforated drainage pipe laid across the bottom, covered with landscape fabric, before adding soil. This creates an integrated drainage system within the container.
Deep containers (over 18 inches) can develop saturated zones at the bottom even with good drainage holes. The weight of soil above compacts lower layers and can restrict drainage. I address this by using especially well-draining soil mixes for deep containers - extra perlite and coarse materials to maintain porosity even under pressure.
I also drill side drainage holes 3-4 inches from the bottom to prevent the lowest layer from becoming waterlogged.
Self-watering containers have built-in water reservoirs, so drainage works differently. These containers have overflow holes positioned at the maximum desired water level. When rain or watering fills the reservoir beyond this point, excess drains out the overflow hole.
I check overflow holes regularly to ensure they're not clogged. If the overflow is blocked, the reservoir can fill beyond capacity and waterlog the soil above.
Indoor containers without access to ground drainage require saucers to catch water. I use saucers large enough to catch all drainage without overflowing. For plants that need thorough watering, I sometimes water in the sink or bathtub, let them drain completely, then return them to their saucers.
I'm fanatical about emptying saucer water with indoor plants. I set a timer for 20 minutes after watering, and when it goes off, I dump all saucers. This prevents root rot in my indoor plants.
Balcony and deck containers have special drainage considerations. I need to prevent water from draining onto neighbors below or staining decking. I use saucers sized appropriately, or I position containers so drainage falls in acceptable areas.
Some balconies have built-in drainage systems in the floor. If available, I position containers near these drains so excess water flows away properly.
Window boxes need drainage but can't drip on walls or windows below. I use window boxes with built-in reservoirs that catch drainage, and I empty these reservoirs regularly. Alternatively, I attach drip trays beneath window boxes or position them slightly away from walls so drainage falls clear.
Hanging baskets drain freely by nature, but they need protection for surfaces below. I learned this after hanging baskets dripped on my patio furniture! Now I either position hanging baskets where drainage won't hit anything important, or I use saucers attached to baskets.
The challenge with hanging basket saucers is they fill with water during watering and add significant weight. I sometimes remove saucers to water, let baskets drain completely in the sink, then reattach saucers before rehanging.
Preventing Drainage Problems Before They Start
The best drainage problems are the ones you prevent entirely! I've developed good habits that keep drainage issues from developing in my containers.
Choose containers wisely from the beginning. I never buy pots without drainage holes unless I plan to drill them or use them as cache pots. I check hole size, quantity, and placement before purchasing. If drainage looks questionable, I pass on that container no matter how pretty it is!
I learned this lesson after wasting money on decorative pots that turned out to have inadequate drainage. Now I'm picky about container selection upfront.
Use quality potting mix formulated for containers. I never use garden soil, topsoil, or cheap potting "soil" that's mostly composted wood products. Quality potting mix with peat or coir, perlite, and good structure maintains drainage for much longer than inferior products.
The few extra dollars spent on good potting mix prevents months of drainage headaches. It's the best investment you can make in container gardening!
Avoid overwatering by checking soil moisture before watering. I stick my finger 2 inches into soil - if it's still moist, I don't water. This prevents excessive water input that can overwhelm even good drainage systems.
Overwatering is more common than underwatering, and it leads to many problems that masquerade as drainage issues. Better watering habits reduce stress on drainage systems.
Clean drainage holes seasonally to prevent clogging. At the end of each growing season, I dump out containers, wash them thoroughly, and make sure drainage holes are completely clear. Roots, soil particles, and debris can gradually clog holes if not cleaned.
I use a bottle brush or old toothbrush to scrub drainage holes clean. This five-minute maintenance task prevents drainage problems all season!
Refresh or replace potting mix every 2-3 seasons before it breaks down completely. Potting mix compacts and degrades over time, losing its drainage properties. I don't wait for drainage to become a problem - I proactively refresh soil before it gets to that point.
This involves dumping out containers, breaking up the old soil, mixing in fresh potting mix and perlite, then refilling containers. It's work, but it maintains good drainage year after year.
Monitor plants for early warning signs of drainage problems. Yellow leaves, slow growth, wilting in wet soil, or foul odors all indicate possible drainage issues. I address these signs immediately rather than waiting for plants to die.
Early intervention often means simple fixes like improving watering habits or adding perlite. Waiting until plants are dying often means major surgery like complete soil replacement.
Position containers for good air circulation and sunlight. Good air movement around containers helps soil dry at appropriate rates. Containers crammed together in shady, still-air locations stay wet much longer than containers in sunny, breezy spots.
I space containers adequately and position them where air moves freely. This supports proper soil drying between waterings.
Match plants to containers based on drainage needs. I grow moisture-loving plants like basil in containers with standard drainage, and I grow drought-tolerant plants like rosemary in containers with extra drainage holes and fast-draining soil mixes.
Understanding each plant's preferences and matching container drainage accordingly prevents most water-related problems!
Troubleshooting Persistent Drainage Issues
Sometimes despite best efforts, drainage problems persist. Here's how I troubleshoot stubborn cases that don't respond to standard fixes!
Hidden drainage blockers can sabotage even well-designed containers. I've found landscape fabric that wasn't porous enough blocking drainage, rocks or gravel layers creating perched water tables, roots completely filling the container and preventing water movement, and even plastic saucers that somehow got inside the container during repotting!
When standard fixes don't work, I unpot the plant and thoroughly investigate. There's almost always something unexpected interfering with drainage.
Soil chemistry problems can affect drainage. Highly alkaline or acidic soil can change soil particle structure, affecting water movement. Salt buildup from fertilizer and water minerals can alter soil properties. I test soil pH if drainage seems mysteriously poor, and I flush containers thoroughly to remove salt accumulation.
Adding sulfur can help alkaline soil drain better, while lime improves acidic soil. However, these are last-resort fixes - usually replacing soil is easier!
Hydrophobic soil repels water rather than absorbing it. This happens when peat-based mixes dry out completely. Water beads up and runs off the surface instead of soaking in. I've had this happen with containers that dried out during vacations.
The fix is adding a drop of dish soap to watering water (breaks surface tension) or bottom-watering by setting containers in trays of water until soil rehydrates from below. Once soil is re-wet, it usually behaves normally again.
Damaged or deteriorated containers can develop drainage problems. Plastic pots sometimes crack or warp, blocking drainage holes. Wood containers rot and settle, changing drainage patterns. I inspect containers themselves, not just soil and plants, when troubleshooting.
Sometimes the container is just worn out and needs replacement. I've learned to recognize when a container has reached the end of its functional life.
Incorrect watering technique causes problems that look like drainage issues. Watering too lightly and frequently creates constantly moist surface soil while lower soil stays dry. Watering from only one side creates dry pockets and waterlogged zones within the same container.
I always water thoroughly and evenly around the entire soil surface, ensuring the whole container gets moistened uniformly. This proper technique solves many "drainage" problems that are actually watering problems!
Root-bound plants can't drain properly because solid root masses block water movement. I check for roots growing from drainage holes or circling densely at container edges. The solution is dividing the plant or transplanting to a larger container with fresh soil.
I've saved many struggling plants simply by giving them more root room!
Climate and weather affect drainage needs. Rainy climates might need more aggressive drainage (larger holes, faster-draining soil) than dry climates. Hot climates dry containers quickly, while cool climates keep them moist longer.
I adjust my drainage setup based on local conditions. What works in Arizona won't work in Seattle! Understanding your specific climate helps you optimize drainage.
Conclusion
Proper drainage is absolutely fundamental to successful container gardening. You can have everything else perfect - ideal soil, perfect fertilizer, optimal sunlight, beautiful containers - but if drainage isn't right, your plants will struggle or die. It's genuinely that important!
The good news is that drainage problems are almost always preventable and usually fixable. Starting with containers that have adequate drainage holes, using quality potting mix, avoiding overwatering, and maintaining good practices will prevent 95% of drainage issues before they develop.
For the remaining 5% where problems do occur, you now have the knowledge to identify and fix them. Whether it's drilling additional holes, adding perlite to compacted soil, elevating containers properly, or replacing inadequate potting mix, these solutions work when applied correctly!
Don't underestimate how much difference proper drainage makes. I've seen identical plants in identical conditions perform completely differently based solely on drainage quality. The well-drained containers produce healthy, vigorous plants with abundant growth. The poorly-drained containers produce weak, yellowed, struggling plants that never reach their potential.
Take drainage seriously from day one of your container gardening journey. Check every container for adequate holes before using it. Invest in quality potting mix with good drainage properties. Water appropriately rather than excessively. Empty saucers after watering. These simple habits prevent the heartbreak of watching expensive plants die from preventable drainage problems.
Have you dealt with drainage issues in your containers? What solutions worked for you? Drop a comment below and share your experiences! I'd love to hear about creative drainage fixes or persistent problems you've encountered. Let's help each other grow healthier container gardens!