Best Vegetables to Grow in Containers for Beginners in 2026
Discover the best vegetables to grow in containers for beginners in 2026. Learn which container vegetables thrive in pots, proper sizing, care tips, and how to start your successful patio garden today.
GARDENING
Did you know that over 35% of American households now grow food in containers because they don't have access to traditional garden space? That's wild! I remember standing on my tiny apartment balcony five years ago, staring at the concrete and thinking there was absolutely no way I could grow anything edible. Boy, was I wrong.
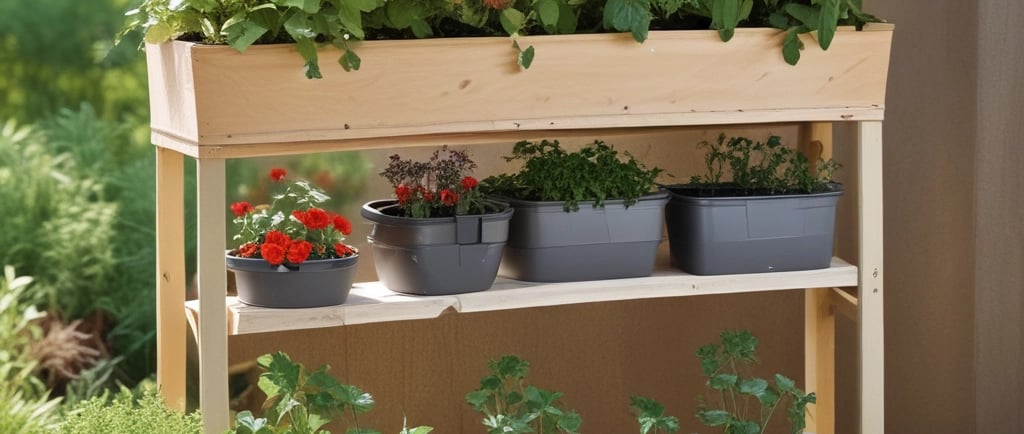
Container gardening completely changed my relationship with growing food. You don't need a huge backyard or even a patch of dirt to grow fresh, delicious vegetables right outside your door. Whether you've got a sunny balcony, a small patio, or even just a front stoop that gets decent light, you can absolutely grow your own food in pots.
The best part? Container vegetable gardening is actually easier than traditional in-ground gardening in a lot of ways. You've got total control over the soil quality, drainage is simpler to manage, and you can move plants around to chase the sun or protect them from harsh weather. Plus, there are way fewer weeds to deal with!
In this guide, I'm gonna walk you through the absolute best vegetables for container growing if you're just starting out. These are crops I've personally grown (and sometimes killed, let's be honest) over the years, and I'll share what actually works and what's just a waste of your time and money.
Why Container Vegetable Gardening is Perfect for Beginners
Let me tell you something that took me way too long to figure out - container gardening is genuinely more forgiving than traditional gardening for newbies. When I first started, I thought containers would be limiting or difficult. Turns out, they solve so many problems!
The soil situation alone is a game-changer. With in-ground gardens, you're stuck with whatever soil you've got, which might be clay, sand, or full of rocks. I spent an entire summer trying to amend my parents' terrible clay soil before I realized containers let you start with perfect soil right from the beginning. You just buy a quality potting mix and you're done!
Pest control is also way easier with containers. Slugs and snails have a much harder time reaching your plants when they're elevated off the ground. I used to lose entire lettuce crops to slugs before I switched to containers - now it's rarely an issue.
And here's something nobody told me when I started: container gardens are perfect for renters! I moved three times in four years, and each time I just loaded up my pots and took my garden with me. Try doing that with an in-ground garden. Your mobility with containers means you're never stuck leaving behind the garden you worked hard to establish.
The maintenance is honestly less intensive too. Weeding takes like five minutes instead of an hour because weeds just don't establish themselves as aggressively in containers. Watering does require more attention since pots dry out faster, but I actually prefer that because it forces me to check on my plants daily and catch problems early.
Essential Container Gardening Basics Before You Start
Okay, before we dive into specific vegetables, you gotta understand a few fundamentals. I learned these lessons the hard way, so let me save you some heartache and dead plants!
First up: drainage holes are non-negotiable. I cannot stress this enough! My very first container garden failed spectacularly because I used these gorgeous decorative pots without drainage holes. The plants basically drowned, and I couldn't figure out why they kept dying until someone pointed out the obvious. Every single container needs drainage holes in the bottom - at least three to five holes for proper water flow.
Pot size matters way more than I initially thought. A lot of beginners (myself included) try to save money by using small pots, but that's a mistake that'll cost you later in poor harvests. Most vegetables need at least a 5-gallon container, and some need 10 gallons or more. I know that sounds huge, but trust me, bigger is almost always better when it comes to container gardening.
The potting mix you choose is critical too. Regular garden soil is too heavy and compacts in containers, suffocating roots. I made this mistake early on by filling pots with dirt from my yard, wondering why everything looked so sad. You need actual potting mix or container mix that's specifically formulated to stay fluffy and drain well while retaining some moisture. Brands like FoxFarm Ocean Forest or Miracle-Gro Performance Organics work great.
Sunlight requirements can't be faked either. Most vegetables need 6-8 hours of direct sunlight daily to produce well. I tried growing tomatoes on my north-facing balcony once - they barely produced anything. If you've only got partial shade, stick with leafy greens and herbs rather than fruiting vegetables. The sun situation is what it is, so choose crops that match your available light.
The 10 Best Vegetables to Grow in Containers for Beginners
1. Cherry Tomatoes - The Gateway Container Vegetable
Cherry tomatoes are hands down the best starter crop for container gardening. They're productive, delicious, and pretty hard to completely screw up. I've grown them every single year since I started, and they never disappoint!
Varieties like 'Sweet Million,' 'Sun Gold,' and 'Tiny Tim' are absolute workhorses in containers. They'll produce way more tomatoes than you'd expect from a single plant. I usually get 50-100 cherry tomatoes from one plant over the growing season, which is insane considering they're growing in a pot.
For cherry tomatoes, you'll need at least a 5-gallon container, though I prefer 7-10 gallons for bigger varieties. The larger the container, the less frequently you'll need to water, which is a lifesaver during hot summer months. I use 10-gallon fabric grow bags now, and the root development is noticeably better than in plastic pots.
The biggest mistake I made with tomatoes initially was not providing support early enough. Even dwarf varieties need some kind of stake or cage. I learned this when my first tomato plant flopped over under the weight of its fruit, breaking the main stem. Now I stake or cage them as soon as I transplant, and life is much easier.
Tomatoes are heavy feeders, so you'll want to fertilize regularly. I use a liquid organic fertilizer every two weeks once they start flowering. Fish emulsion works great, though it smells pretty funky for a day or two. The payoff in fruit production is totally worth the temporary stink though!
2. Lettuce and Salad Greens - Fast and Foolproof
If you want nearly instant gratification, lettuce is your vegetable. You can harvest baby greens in as little as 3-4 weeks, which is perfect when you're impatient like me. Plus, lettuce is one of the few vegetables that actually prefers cooler weather, so you can grow it in spring and fall when tomatoes wouldn't survive.
Loose-leaf varieties are way better for containers than head lettuce. 'Oak Leaf,' 'Red Sails,' and 'Buttercrunch' all perform beautifully in pots. The cool thing about loose-leaf lettuce is you can harvest outer leaves and the plant keeps producing from the center. I've kept single lettuce plants producing for two months using this cut-and-come-again method.
Container size for lettuce is super flexible. You can grow it in anything from a 6-inch pot to a large window box. I really like wide, shallow containers for lettuce because you can plant multiple plants together and create a little salad garden in one pot. A 12-inch wide bowl can easily hold 4-6 lettuce plants.
The main challenge with lettuce is that it bolts (goes to seed) when temperatures get too hot, usually above 75-80°F. Once it bolts, the leaves turn bitter and inedible. I combat this by growing lettuce in spring and fall, and moving containers to shadier spots during heat waves. Sometimes just giving them afternoon shade is enough to extend the harvest.
Lettuce has shallow roots, so it's not a heavy feeder like tomatoes. I mix some slow-release organic fertilizer into the potting mix at planting time, and that's usually enough. The key with lettuce is consistent moisture - they hate drying out completely, so I check the soil daily and water whenever the top inch feels dry.
3. Peppers - Compact and Crazy Productive
Peppers might be my favorite container vegetable overall. They're beautiful plants, they produce like crazy, and they actually prefer the confined space of containers because it keeps them more compact and manageable. Win-win-win!
Both sweet bell peppers and hot peppers work great in pots. For beginners, I'd recommend starting with something like 'California Wonder' bell peppers or 'Jalapeño' if you like heat. These varieties are reliable and forgiving. I've also had amazing success with 'Lunchbox' mini sweet peppers, which are absolutely adorable and the kids go nuts for them.
Peppers need a 5-gallon container minimum, though they'll be happier in 7-10 gallons. I grow mine in 7-gallon fabric pots, and each plant produces 15-25 peppers throughout the season. That's way more than my family can eat fresh, so we end up freezing a bunch for winter cooking.
One thing that surprised me about peppers is how long they take to produce. From transplant to first ripe pepper is usually 60-90 days, depending on variety. Be patient! I almost gave up on my first pepper plants because they took forever to ripen, but once they start producing, they keep going until frost.
Peppers benefit from regular feeding just like tomatoes. I fertilize every 2-3 weeks with a balanced liquid fertilizer once the plants start flowering. They also appreciate consistent watering - letting them dry out too much causes blossom end rot and misshapen fruit. I learned that lesson the hard way when half my peppers developed ugly dark spots on the bottom.
4. Radishes - The 30-Day Wonder Vegetable
Radishes are perfect for beginners who want quick success. These little guys go from seed to harvest in about 25-30 days, which is faster than almost any other vegetable. They're also nearly impossible to kill, which makes them confidence-builders for new gardeners!
'Cherry Belle' and 'French Breakfast' are my go-to radish varieties. They're classic, reliable, and taste great. I also really like 'Easter Egg' radishes because you get a mix of colors - pink, purple, red, and white. They're fun to grow with kids because the surprise colors keep things interesting.
You can grow radishes in surprisingly small containers. I've successfully grown them in containers as small as 6 inches deep, though 8-10 inches is better. Width matters more than depth since radishes spread out rather than down. A 12-inch wide pot can hold 10-15 radish plants easily.
The key to good radishes is fast growth. They need to develop quickly to stay tender and mild-flavored. Slow-growing radishes turn woody and spicy in a bad way. To keep them growing fast, I make sure they get plenty of water and I use soil that drains well. I also succession plant them every two weeks throughout spring and fall for continuous harvests.
One mistake I made early on was planting radishes too deep. The seeds only need to be about half an inch deep in the soil. Planting them deeper slows germination and can lead to weird-shaped roots. Also, don't overcrowd them - thin seedlings to about 2 inches apart once they sprout, even though it feels wasteful to pull out perfectly good baby plants.
5. Bush Beans - No Trellis Required
Bush beans are awesome for containers because they don't need any support structure like pole beans do. They're compact, they produce a solid harvest from a small space, and they're one of those vegetables that actually tastes noticeably better when it's super fresh from your own garden.
'Provider' and 'Contender' are reliable bush bean varieties that perform well in containers. I've also had great luck with 'Dragon Tongue' beans, which are really pretty with purple stripes on yellow pods. They turn solid green when cooked, but they look amazing in the garden.
For bush beans, you'll want a container that's at least 8-10 inches deep and 12 inches wide. I typically plant 4-6 bean plants per 12-inch pot. They don't take up much space individually, but planting several together gives you enough beans for actual meals rather than just a handful.
Beans fix nitrogen in the soil, which is pretty cool from a gardening perspective. They actually improve the potting mix as they grow! This means you don't need to fertilize them as heavily as other vegetables. In fact, too much nitrogen fertilizer causes beans to produce tons of leaves but very few actual beans. I learned this when my bean plants were gorgeous and lush but barely produced any pods.
The main challenge with beans is timing your harvest right. They go from perfect to overripe in just a few days. I check my bean plants every single day once they start producing, and I harvest any pods that are full-size but still tender. Once beans get too big and bumpy, they're tough and not great to eat. Pick them young!
6. Spinach - Cool-Weather Container Champion
Spinach is another cool-season crop that's perfect for beginners. It's nutritious, productive, and grows happily in containers during spring and fall when most other vegetables struggle. I love having fresh spinach available because it's so expensive at the grocery store!
'Bloomsdale' and 'Space' are both excellent spinach varieties for containers. 'Space' is especially good because it's a hybrid bred specifically for compact growth. I can fit more plants in a container with 'Space' than with traditional varieties, which means bigger harvests from the same pot.
Spinach doesn't need huge containers. An 8-inch deep pot works fine, and you can plant spinach fairly densely. I usually space plants about 3-4 inches apart in all directions. If you're planning to harvest baby spinach, you can plant even closer together - just 2 inches apart works.
Like lettuce, spinach bolts when temperatures get too warm. It's even more sensitive to heat than lettuce, typically bolting when daytime temps consistently hit 75°F or higher. This is why I only grow spinach in early spring (March-April in my area) and again in fall (September-October). Trying to grow it in summer is basically pointless unless you live somewhere really cool.
Spinach appreciates consistent moisture and doesn't like drying out completely between waterings. The leaves get tough and bitter if the plants are water-stressed. I water spinach more frequently than most vegetables, especially on warm days. A good mulch layer on top of the soil helps retain moisture and keeps the roots cool.
7. Green Onions (Scallions) - The Easiest Regrow Vegetable
Green onions are ridiculously easy to grow in containers, and here's a cool trick: you can regrow them from grocery store scraps! I haven't bought green onions in years because I just keep regrowing the same ones over and over. It's basically free food!
Any green onion variety works in containers, but 'Evergreen Hardy White' is particularly vigorous. That said, I usually just save the white root ends from store-bought green onions, stick them in a pot of soil, and they regrow within a week or two. It feels like magic every single time.
Green onions have tiny root systems and can grow in very small containers. I've successfully grown them in containers as shallow as 4 inches. A 6-8 inch pot is plenty for a dozen or more green onion plants. I also like growing them in window boxes where I can pack in 20-30 plants for continuous harvesting.
The great thing about green onions is you can harvest them at any size. Want baby scallions? Harvest at 6 inches tall. Want big, thick green onions? Let them grow to 12-14 inches. I typically harvest them when they're about 8-10 inches tall by cutting them off about an inch above the soil line. They usually regrow 2-3 times before they start getting tired and need to be replanted.
Green onions are one of the few vegetables that tolerate partial shade reasonably well. They prefer full sun but will still produce in 4-5 hours of direct light. This makes them perfect for shadier balconies where tomatoes and peppers would struggle. They're also incredibly cold-hardy and can survive light frosts, so I often grow them year-round.
8. Kale - The Indestructible Superfood
Kale is tough as nails and grows like a weed in containers. It handles heat better than lettuce, tolerates cold better than tomatoes, and pests generally leave it alone compared to other vegetables. If you want a low-maintenance container crop, kale is your friend!
'Lacinato' (also called dinosaur kale) is my favorite variety for containers because it grows upright rather than spreading out. This means you can fit more plants in less space. 'Winterbor' is another excellent choice that's super cold-hardy and looks really beautiful with its curly blue-green leaves.
Kale needs a decent-sized container - at least 5 gallons for a single plant. The plants get pretty big over time, sometimes 2-3 feet tall, so give them room to spread out. I typically grow one kale plant per 5-7 gallon pot, though you could squeeze two plants into a 10-gallon container if needed.
One thing I love about kale is you harvest individual leaves rather than the whole plant. This means one kale plant can produce for months and months. I start harvesting the lowest leaves once the plant is about 12 inches tall, and I keep harvesting from the bottom as new leaves grow from the top. My kale plants usually produce from early spring through late fall - sometimes even into winter!
Kale actually tastes better after a light frost. The cold temperatures convert some of the starches to sugars, making the leaves sweeter and less bitter. I grow kale specifically for fall and winter harvests because it's one of the few fresh vegetables available when everything else has died back. There's nothing quite like harvesting fresh kale in November while there's snow on the ground!
9. Carrots - Surprisingly Container-Friendly
A lot of people don't realize you can grow carrots in containers, but it totally works! You just need to choose the right varieties and use deep enough pots. The key is selecting short, round, or "baby" carrot varieties rather than those long carrots you see in grocery stores.
'Thumbelina,' 'Paris Market,' and 'Little Finger' are all perfect for container growing. These varieties are bred to be short and stubby, usually 3-4 inches long at maturity. 'Thumbelina' is especially cool because the carrots are round like radishes. Kids absolutely love growing these because they look so different from regular carrots.
Depth is critical for carrots. You need at least 12 inches of depth for short varieties, and up to 18 inches if you want to try longer varieties. I use deep rectangular window boxes for carrots, which gives me plenty of depth while maximizing the number of carrots I can grow in one container.
The biggest challenge with carrots is getting good germination. Carrot seeds are tiny and need consistent moisture to sprout, which usually takes 10-14 days. I cover the soil surface with a thin layer of vermiculite after planting, which helps retain moisture without forming a hard crust that prevents seedlings from emerging. I also water very gently with a misting nozzle to avoid washing seeds away.
Carrots need loose, rock-free soil to develop straight roots. Any obstacles in the soil cause the carrots to fork or twist into weird shapes. This is actually easier to achieve in containers than in-ground gardens because you're starting with potting mix rather than native soil. I've had much better success with straight, uniform carrots in containers than I ever did in my garden plot!
10. Zucchini - The Abundance Plant
Okay, full disclosure: zucchini plants are BIG and they need a lot of space. But if you have room for one large container, zucchini will absolutely bury you in produce all summer long. One plant can easily produce 20-30 zucchinis over the course of the season!
Compact bush varieties are essential for container growing. 'Raven,' 'Astia,' and 'Eight Ball' are all bred specifically for smaller spaces. 'Eight Ball' is particularly cool because it produces round zucchinis instead of the traditional long ones. They're perfect for stuffing and look adorable growing on the plant.
Zucchini needs a LARGE container - think 10-15 gallons minimum. I use 15-gallon fabric pots for my zucchini, and the plants still manage to fill out every inch of available space. These are big, sprawling plants with enormous leaves, so don't try to cram them into small pots. It won't work, and you'll just end up with sad, unproductive plants.
The productivity of zucchini plants is honestly kind of crazy. During peak season, I'm harvesting 2-3 zucchinis every single day from one plant. The key is harvesting them when they're still small - about 6-8 inches long. If you let them get huge, the plant slows down production significantly. Plus, small zucchinis taste way better than those baseball-bat-sized monsters.
Zucchini are heavy feeders and need regular fertilization. I feed mine every week during peak production with a balanced liquid fertilizer. They also need tons of water - I'm watering my zucchini containers daily during hot summer weather, sometimes twice a day. The huge leaves transpire massive amounts of water, so the soil dries out incredibly fast.
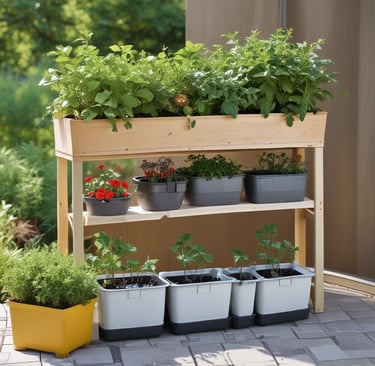
Choosing the Right Containers for Your Vegetables
The container itself matters almost as much as which vegetables you choose to grow. I've experimented with pretty much every type of container over the years, and I've definitely got opinions about what works best!
Fabric grow bags are my absolute favorite containers now. They're lightweight, they promote incredible root growth through air pruning, and they're super affordable. I buy 5-gallon and 7-gallon fabric pots in bulk, and they last for 3-4 seasons before starting to deteriorate. The biggest advantage is drainage - you literally cannot overwater plants in fabric pots because water drains through the entire surface.
Terra cotta pots look beautiful and are traditional for good reason, but they dry out crazy fast. I learned this the hard way with some gorgeous terra cotta pots that I had to water twice daily during summer. They also break easily if dropped and are heavy to move around. I still use them for herbs and ornamentals, but for vegetables that need consistent moisture, I stick with other options.
Plastic pots are inexpensive and work perfectly fine for most vegetables. The UV-resistant black nursery pots you get from garden centers are actually really durable and can last years. I use these for plants that aren't heavy feeders or drinkers. The main downside is that dark plastic pots can get really hot in direct sun, which can stress plant roots.
Self-watering containers are awesome if you travel frequently or tend to forget about watering. They have a water reservoir in the bottom that plants can draw from as needed. I use these for tomatoes and peppers on my front porch where I don't pass by as often. The plants do great, and I only need to fill the reservoir every 3-4 days instead of watering daily.
Food-grade buckets from bakeries or restaurants make excellent free containers! I've gotten dozens of 5-gallon frosting buckets from a local bakery over the years. Just drill drainage holes in the bottom, and they work perfectly for growing vegetables. They're sturdy, they have handles for easy moving, and did I mention they're free? Always a win in my book.
Best Potting Mix for Container Vegetables
The soil - or more accurately, the potting mix - can make or break your container garden. This is one area where you absolutely shouldn't cheap out. I made that mistake my first year, bought the bargain-basement potting soil, and my plants struggled the entire season.
Quality potting mixes are specifically formulated for containers. They're lighter and fluffier than regular soil, which allows roots to breathe and prevents waterlogging. They also contain ingredients like peat moss or coco coir that retain moisture while still draining excess water. This balance is critical for healthy root development.
My go-to mix these days is a combination of commercial potting mix amended with additional perlite and compost. I start with something like FoxFarm Ocean Forest or Espoma Organic Potting Mix, then I add about 20% perlite for extra drainage and 20% compost for nutrition. This creates a fluffy, nutrient-rich growing medium that vegetables absolutely love.
For big containers (10+ gallons), you can save money by using the "lasagna method" for filling. I put 4-6 inches of cheaper filler material in the bottom - things like sticks, leaves, or old potting mix from last year. Then I fill the top portion with quality potting mix where the plant roots will actually be growing. This cuts costs significantly without impacting plant performance.
Avoid using garden soil or topsoil in containers! I cannot stress this enough. Garden soil is too heavy and compacts in containers, suffocating roots and causing drainage problems. I see this mistake constantly with new container gardeners, and it always leads to poor results. Just use actual potting mix designed for containers, and your plants will thank you.
Watering Container Vegetables the Right Way
Watering is probably the number one challenge with container gardening. Containers dry out way faster than in-ground gardens, especially during hot weather. I killed more plants from improper watering than anything else when I first started!
The finger test is your best friend. Stick your finger into the soil up to your second knuckle. If it feels dry at that depth, it's time to water. If it's still moist, wait another day. I do this check every single morning during my coffee ritual, and it takes literally 10 seconds per pot. This simple habit has saved countless plants from both under and overwatering.
When you do water, water thoroughly until you see it draining out the bottom holes. This ensures the entire root ball gets moisture, not just the top few inches. I learned this lesson when I was doing quick, light waterings that only wet the surface. The plants looked okay for a while, then suddenly crashed because their deeper roots were bone dry.
Time of day matters more than I initially realized. Watering in early morning is ideal because it gives plants moisture before the heat of the day, and foliage has time to dry before evening. I used to water in the evening after work, and I had constant problems with fungal diseases. Switching to morning watering reduced these issues by probably 80%.
Mulching the soil surface helps tremendously with water retention. I cover the top 1-2 inches of my containers with shredded bark, straw, or even grass clippings. This mulch layer prevents moisture from evaporating as quickly and keeps the soil cooler during hot weather. It also looks nicer than bare soil!
Self-watering systems are worth considering if you struggle with consistent watering. I use drip irrigation on a timer for my larger container garden now, and it's been life-changing. The system waters everything for 15 minutes every morning automatically, and I only need to manually water on super hot days. The initial setup cost about $100, but it's saved me so much time and worry.
Fertilizing Container Vegetables for Maximum Production
Container vegetables need more frequent fertilization than in-ground plants because nutrients wash out of pots with regular watering. This was a hard lesson I learned when my second-year plants in the same soil were noticeably less productive than the first year!
I use a two-pronged fertilization approach. At planting time, I mix a slow-release organic fertilizer into the potting mix. Something like Osmocote or an organic equivalent provides baseline nutrition for 3-4 months. This handles the plants' basic nutritional needs without me having to remember constant feeding schedules.
On top of the slow-release fertilizer, I supplement with liquid feeding every 1-2 weeks during active growth. I alternate between fish emulsion (for nitrogen) and a bloom booster (for phosphorus and potassium) once plants start flowering. This combination seems to give me the best overall results in terms of plant health and harvest quantity.
Heavy feeders like tomatoes, peppers, and zucchini need fertilizing on the more frequent end - every 7-10 days during peak growth. Light feeders like lettuce, radishes, and beans can go 2-3 weeks between feedings. Leafy greens actually get too much nitrogen sometimes, causing them to bolt prematurely, so I go easy on fertilizing those.
Compost tea is another excellent option that I use regularly. I make it by steeping finished compost in water for 24-48 hours, then straining out the solids and using the liquid to water my plants. It's gentler than commercial fertilizers and adds beneficial microorganisms to the potting mix. My plants always perk up noticeably after a compost tea feeding.
Watch for signs of over-fertilization like leaf tip burn, excessive leafy growth with no fruit, or white crusty buildup on the soil surface. I've definitely overdone it before, especially with tomatoes where I thought more fertilizer would equal more tomatoes. It doesn't work that way! Following the package directions and erring on the side of less is usually the safer approach.
Common Container Gardening Mistakes to Avoid
Let me save you from some of the painful mistakes I've made over the years. These are the issues I see beginners struggle with constantly, and they're all easily preventable!
Using containers without drainage holes is mistake number one. I already mentioned this earlier, but it bears repeating because it's such a common problem. Plants sitting in waterlogged soil will develop root rot and die, no matter how much you love them or what variety they are. Every container needs drainage, period.
Overcrowding plants is another huge mistake I made early on. I wanted to maximize my limited space, so I crammed way too many plants into each pot. The plants competed for nutrients and light, everything got spindly and weak, and harvests were terrible. Now I follow spacing recommendations religiously, even though it means I grow fewer plants overall. The increased productivity per plant more than makes up for growing fewer of them.
Not providing adequate support for tall plants causes so many problems. I've had tomato plants snap in half, pepper branches break under the weight of fruit, and bean plants flop over and smother neighboring plants. Now I stake or cage everything that might need support at planting time, before they get big and it's awkward to install supports without damaging roots.
Ignoring sunlight requirements is a recipe for disappointment. I tried growing full-sun vegetables in partial shade multiple times before accepting that it just doesn't work well. Sure, the plants will survive, but production will be maybe 20% of what you'd get in proper sunlight. Match your crop choices to your available light, and you'll be so much happier with your results.
Inconsistent watering stresses plants and leads to all kinds of problems - blossom end rot in tomatoes, bolting in lettuce, woody radishes, cracked carrots. I get it, life gets busy and we forget sometimes. Setting a daily alarm on my phone to check my containers has helped me maintain much more consistent watering, and my plants are noticeably healthier for it.
Conclusion
Container vegetable gardening is honestly one of the most rewarding hobbies I've ever picked up. There's something incredibly satisfying about growing food in pots on a balcony or patio, proving that you don't need acres of land to be a gardener!
The vegetables I've covered in this guide - cherry tomatoes, lettuce, peppers, radishes, bush beans, spinach, green onions, kale, carrots, and zucchini - are all proven performers in containers. They're forgiving of beginner mistakes, productive enough to feel worthwhile, and actually taste better than anything you'll find at the grocery store.
Start small with just 2-3 containers your first season. Learn how the plants grow, figure out your watering routine, and make mistakes on a small scale. You can always expand your container garden next year once you've got the basics down. I started with three tomato plants on my balcony, and now I have over 40 containers producing food nearly year-round!
The best time to start container gardening was five years ago. The second best time is right now! Grab a few pots, some quality potting mix, and some seedlings from your local nursery. Get your hands dirty, make mistakes, learn from them, and most importantly, enjoy the process.
I'd love to hear about your container gardening experiences! What vegetables are you planning to grow? What challenges are you facing? Drop a comment below and let's help each other grow amazing container gardens in 2026!