Best Potting Soil for Container Vegetables
Discover the best potting soil for container vegetables in 2026. Learn which potting mixes produce healthier plants, bigger harvests, and how to choose the perfect soil for your container garden.
GARDENING
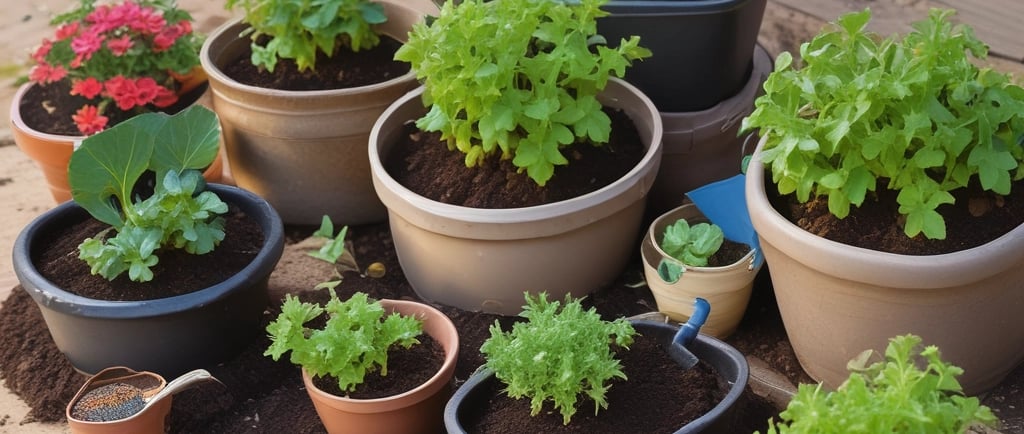
Here's something that blew my mind when I first started container gardening: the difference between mediocre potting soil and quality potting mix can literally double your harvest! I'm not exaggerating - I tracked this over two seasons and the yield difference was shocking.
My first year of container gardening was honestly pretty disappointing. I filled my pots with cheap "potting soil" from the dollar store, thinking soil was soil and I was being smart by saving money. My tomato plants barely grew, peppers produced maybe three fruits each, and everything looked kind of yellowish and sad. I blamed my balcony's sun exposure, my watering schedule, even the container sizes.
Then my neighbor - who had gorgeous, productive container gardens - took one look at my struggling plants and immediately identified the problem: terrible soil! She scooped up a handful of my potting mix, squeezed it into a dense brick, and said "There's your problem right there." Quality potting mix shouldn't compact like that. It should stay fluffy and loose even when wet.
I invested in actual quality potting mix the next season, and the transformation was unbelievable. Same containers, same balcony, same plants, completely different results! The tomatoes grew huge and productive, peppers cranked out dozens of fruits, and everything just looked healthier and happier. That experience taught me that potting soil is literally the foundation of successful container gardening - you simply cannot skip this investment and expect good results.
In this guide, I'm gonna break down everything you need to know about choosing the best potting soil for container vegetables. We'll cover what makes quality potting mix different from cheap stuff, which brands actually perform well, DIY mix recipes, and how to match soil to specific crops. Let's dig into this!
Why Regular Garden Soil Fails in Containers
This is the number one mistake beginning container gardeners make, and I absolutely made it myself. Using regular garden soil or topsoil in containers seems logical and saves money, but it's actually a disaster waiting to happen!
Garden soil is formulated for in-ground growing where it has completely different physical properties than what containers need. In the ground, soil can spread out indefinitely, excess water drains downward into deeper layers, and earthworms and soil organisms constantly work to maintain structure. None of these conditions exist in a container!
The compaction problem is the biggest issue. Garden soil is much denser and heavier than potting mix. In a container, this soil compresses under its own weight, especially when watered repeatedly. I watched my containers filled with garden soil literally turn into cement-like blocks within a few weeks. The soil compressed so tightly that roots couldn't penetrate it, water pooled on the surface instead of draining, and air couldn't reach the roots.
Drainage becomes terrible with regular soil in containers. The confined space and compacted soil create what's essentially a mud pit when watered. Water has nowhere to go, so it just sits there drowning the roots. I had plants that were constantly waterlogged despite having drainage holes in the containers. The problem wasn't the holes - it was the soil that wouldn't let water pass through!
Aeration is critical for healthy roots, and garden soil doesn't provide it in containers. Roots need oxygen as much as they need water, and compacted soil suffocates them. I pulled out some of my failed plants to examine the roots, and they were brownish, sparse, and clearly unhealthy. The soil was so dense that roots literally couldn't grow through it properly.
Weight becomes a serious issue with garden soil in containers. Soil is HEAVY, especially when wet. A 10-gallon container filled with garden soil can weigh 60-80+ pounds when saturated. The same container filled with potting mix weighs maybe 30-40 pounds. This matters hugely if you ever need to move containers or if you're gardening on a balcony with weight restrictions!
Weed seeds, diseases, and pests often come along with garden soil. Even if the soil looks clean, it probably contains dormant weed seeds that will sprout in your containers. It might harbor soil-borne diseases that will attack your vegetables. I dealt with constant weeds in my garden-soil-filled containers my first year, pulling little seedlings out constantly. Switching to sterile potting mix eliminated that problem entirely.
The texture and structure of garden soil changes dramatically when confined to containers. Soil that drains perfectly fine in the ground becomes heavy and boggy in a pot. The physics are just different! I learned this lesson hard - you really cannot use garden soil successfully in containers no matter how good that soil is in the ground.
What Makes Quality Potting Mix Different
Understanding what actually goes into quality potting mix helped me make better purchasing decisions and even create my own custom blends. Let me break down the key components and why they matter!
Peat moss is the primary ingredient in most commercial potting mixes. It's extremely lightweight, holds moisture well while still allowing drainage, and stays fluffy without compacting. Peat moss can hold several times its weight in water while maintaining an airy structure. The downside is peat harvesting raises environmental concerns since peat bogs are important ecosystems. I use peat-based mixes but I'm conscious of the environmental trade-off.
Coconut coir is an increasingly popular peat alternative that's more sustainable. It's made from coconut husks, a renewable resource. Coir holds moisture similarly to peat, provides good aeration, and is more environmentally friendly. I've used coir-based potting mixes and honestly can't tell much performance difference from peat-based ones. The plants seem equally happy!
Perlite is those little white bits you see in potting mix that look like styrofoam. It's actually expanded volcanic glass that's incredibly lightweight and provides air pockets in the soil. Perlite prevents compaction and improves drainage. Quality potting mixes contain a good amount of perlite - I'd say 10-20% by volume is ideal for most vegetables.
Vermiculite is similar to perlite but it actually holds moisture while also providing air spaces. It's those golden-brownish flecks you sometimes see in potting mix. Vermiculite is great for moisture retention, which is helpful in containers that dry out quickly. I particularly like mixes with vermiculite for thirsty crops like tomatoes and cucumbers.
Compost or composted bark adds organic matter and some nutrition to potting mixes. This gives the mix a darker color and provides slow-release nutrients. Not all potting mixes contain compost - some are purely peat/coir and perlite. I prefer mixes with some compost included because it supports beneficial soil microorganisms and provides baseline nutrition.
Fertilizer is often pre-mixed into potting soil, providing nutrients for the first 2-3 months of growth. This is convenient for beginners! The fertilizer might be synthetic (like Miracle-Gro) or organic (like composted manure or seaweed). I check the bag to see if fertilizer is included and what type, because it affects my feeding schedule.
Mycorrhizal fungi are beneficial organisms that some premium potting mixes include. These fungi colonize plant roots and help them absorb water and nutrients more efficiently. I've used mixes with and without mycorrhizae, and honestly haven't noticed dramatic differences. It's a nice bonus but not essential.
Wetting agents help potting mix absorb water more easily. Without wetting agents, peat-based mixes can become hydrophobic (water-repellent) when they dry out completely. I've experienced this - trying to re-wet bone-dry potting mix where water just beads up and runs off the surface. Wetting agents prevent this problem.
pH balance matters for vegetable growing. Most quality potting mixes are formulated to a slightly acidic pH (around 6.0-6.5) which is ideal for most vegetables. Cheaper mixes might have wildly inconsistent pH that causes nutrient availability problems. This isn't something you can easily check without a pH meter, but quality brands generally have better pH control.
Top Commercial Potting Mixes for Container Vegetables
I've tested dozens of potting mixes over the years, from budget options to premium brands. Here are the ones that have consistently performed well in my container vegetable gardens!
FoxFarm Ocean Forest is probably my favorite overall potting mix for vegetables. It's a bit pricey at around $20-25 for a 1.5 cubic foot bag, but the performance is excellent. It contains earthworm castings, bat guano, composted forest humus, and mycorrhizae. The texture is perfect - fluffy and well-draining while retaining adequate moisture. My tomatoes and peppers absolutely thrive in Ocean Forest!
The only downside to Ocean Forest is it can be a bit "hot" (high in nutrients) for seedlings. I've burned young seedlings by planting them directly in Ocean Forest. For transplants and larger plants it's perfect, but I use something gentler for seeds and small seedlings.
Espoma Organic Potting Mix is my go-to for organic container gardening. It's OMRI certified organic, contains Myco-tone (their proprietary mycorrhizae blend), and performs consistently well. A 1 cubic foot bag costs around $12-15, which is reasonable for the quality. The mix contains sphagnum peat moss, humus, perlite, earthworm castings, and alfalfa meal.
I use Espoma for all my herbs, leafy greens, and most vegetables. It's gentle enough for seedlings but rich enough to support productive vegetables. The only drawback is it can dry out fairly quickly, so I water more frequently with this mix than with heavier ones.
Miracle-Gro Performance Organics is surprisingly good for a mainstream brand. I was skeptical at first because Miracle-Gro's reputation is more synthetic than organic, but this blend actually works well. It contains aged compost, sphagnum peat moss, and coconut coir. A large bag costs around $15-18 and is widely available at big box stores.
The advantage of Miracle-Gro is easy availability - every Home Depot and Lowe's carries it. The quality is consistent batch to batch, and it performs reliably. I wouldn't call it the absolute best, but it's solidly good and convenient to find.
Black Gold Natural & Organic Potting Soil is another excellent choice, especially for the price. It costs around $10-12 for a 1 cubic foot bag and contains Canadian sphagnum peat moss, compost, forest humus, perlite, and pumice. The drainage is excellent, and I've had great results with vegetables across the board.
Black Gold can be harder to find depending on your location - not every store carries it. But if you can source it, the performance-to-price ratio is excellent. I buy this in bulk when I find it on sale.
Pro-Mix BX is popular with professional growers for good reason. It's a peat-based mix with perlite, vermiculite, and limestone for pH adjustment. It's very neutral - doesn't contain much fertilizer, which gives you complete control over nutrition. A 2.8 cubic foot compressed bale costs around $35-40 and expands to fill lots of containers.
I use Pro-Mix when I want precise control over fertilizing, or when I'm growing plants with very specific nutritional needs. It's probably overkill for most home container gardeners, but it's what I reach for when I'm serious about optimizing conditions.
Coast of Maine Stonington Blend is a premium organic option that's gained popularity recently. It's formulated specifically for vegetables and contains lobster meal, kelp, peat, compost, and perlite. A bag costs $15-20 depending on size. The plants seem to really respond well to this mix - I get vigorous growth and excellent yields.
The smell is pretty funky when you first open the bag (thanks to the lobster meal and kelp), but it dissipates after a day or two. Don't let that scare you off - the performance is worth the temporary fishiness!
Budget Potting Mix Options That Actually Work
Not everyone can afford $20+ bags of premium potting mix, especially when filling many containers. I've tested budget options to find which ones work adequately even though they're cheaper!
Sta-Green Potting Mix from Lowe's is probably the best budget option I've found. It typically costs $8-10 for a 1 cubic foot bag, sometimes less on sale. The quality varies somewhat batch to batch, but overall it's decent for the price. I use this for annual flowers and less-demanding crops like lettuce and herbs.
The texture is acceptable though not as fluffy as premium mixes. It compacts somewhat over the season, and drainage isn't as good as high-end options. But for the price, it works adequately. I wouldn't use it for my best tomatoes, but it's fine for many applications.
Vigoro Organic Potting Mix from Home Depot is another budget-friendly choice at around $8-12 per bag. It's OMRI certified organic and contains composted materials, peat, and perlite. The performance is okay - not amazing, but not terrible. I've grown successful container vegetables in Vigoro.
The main issue with Vigoro is inconsistency. Some bags are great, others seem to have too much wood chips or not enough perlite. It's a bit of a gamble, but when you get a good batch, it works fine for the price.
Generic store brands can work if you know what to look for. I examine the bag contents carefully - it should feel light and fluffy when squeezed, you should see visible perlite chunks, and it shouldn't smell sour or moldy. I've had decent results with Walmart and Target store brands when I chose carefully.
Avoid the absolute cheapest options - those $2-3 bags that are suspiciously inexpensive. These are usually mostly soil or composted bark with very little actual potting mix ingredients. I learned this the hard way buying "potting soil" that was essentially ground-up wood chips and dirt. Total waste of money even though it was cheap!
Bulk potting mix from landscape supply companies can be very economical if you need large quantities. I buy compressed bales of basic potting mix for around $25-30 per 3 cubic foot bale when I'm filling many containers. The quality varies by brand and supplier, but it's much cheaper per cubic foot than bags.
The key with budget mixes is supplementing them with amendments. I often buy cheaper base mix and add my own perlite (15-20% by volume), vermiculite, and compost to improve it. This lets me control quality while keeping costs reasonable. A bag of perlite costs $15-20 and goes a long way in improving cheap potting mix!
DIY Potting Mix Recipes for Container Vegetables
Making your own potting mix can save money and lets you customize the blend for specific crops. I mix my own for about half my containers now, and I've dialed in some recipes that work really well!
My all-purpose vegetable mix uses equal parts peat moss or coir, compost, and perlite. So for a big batch, I might mix 2 cubic feet peat moss, 2 cubic feet compost, and 2 cubic feet perlite. This creates about 6 cubic feet of potting mix for around $25-30 in materials - significantly cheaper than buying 6 cubic feet of bagged premium mix.
The peat or coir provides moisture retention and a fluffy base. The compost adds nutrition and beneficial microorganisms. The perlite ensures good drainage and prevents compaction. This blend works for tomatoes, peppers, eggplants, and most vegetables. I've used variations of this recipe for years with excellent results!
For heavy-feeding vegetables like tomatoes, I modify the basic recipe by adding extra nutrition. I use the same base (equal parts peat/compost/perlite) but I add 1 cup of earthworm castings per 5 gallons of mix, plus 2-3 tablespoons of organic granular fertilizer. This creates a richer mix that supports vigorous tomato and pepper growth without immediate fertilizing.
For moisture-loving crops like lettuce and greens, I increase the vermiculite and reduce the perlite. My lettuce mix is roughly 40% peat or coir, 30% compost, 20% vermiculite, and 10% perlite. This holds moisture better than my standard mix, which prevents lettuce from drying out and bolting as quickly. The plants stay tender and productive longer.
For root vegetables like carrots and radishes, I skip the compost and use extra perlite for a really loose, fluffy texture. I use 50% peat or coir, 40% perlite, and 10% vermiculite. Root vegetables need soil that drains extremely well and doesn't create any obstacles to root development. This ultra-light mix lets carrots grow straight and uniform without forking or twisting.
For seed starting, I use a finer, lighter mix without compost. I blend 50% peat moss or coir with 50% vermiculite. This creates a gentle mix that won't burn delicate seedlings. It's very light and moisture-retentive, perfect for germination. I transplant seedlings to richer mixes once they're established.
My herb mix includes extra drainage since most herbs prefer drier conditions. I use 40% peat or coir, 30% compost, and 30% perlite. This drains more aggressively than my vegetable mix, which prevents root rot in herbs like rosemary, thyme, and oregano. Herbs in this mix stay healthier and more aromatic.
For budget DIY mix, I use what's available cheaply. My ultimate budget blend uses 40% cheap bagged potting mix (as the base), 30% perlite (adds drainage), 20% compost (free from my compost bin), and 10% vermiculite (moisture retention). This creates a much better mix than the cheap bagged stuff alone, for maybe $10-12 per cubic foot in materials.
pH adjustment can be needed depending on your ingredients. Peat moss is acidic (pH around 4-5), while compost tends to be more neutral (pH 6-7). For most vegetables, you want a final pH around 6.0-6.5. I add garden lime (calcium carbonate) if my mix tests too acidic - about 1-2 tablespoons per 5 gallons of mix usually does it.
How to Choose Potting Soil for Specific Vegetables
Different vegetables have somewhat different soil preferences. Matching your potting mix to your specific crops can improve performance, though honestly most vegetables do fine in any quality general-purpose mix!
Tomatoes need rich, moisture-retentive soil that drains well - a tough combination! They're heavy feeders that need lots of nutrition and consistent moisture. I use either premium bagged mix like FoxFarm Ocean Forest, or my homemade mix with extra compost and earthworm castings. The extra nutrients support the vigorous growth and heavy fruit production tomatoes demand.
Avoid really light, soilless mixes for tomatoes. They dry out too quickly and don't hold enough nutrients. Tomatoes do best in a heavier, richer mix than something like lettuce or herbs.
Peppers have similar needs to tomatoes but they're slightly less demanding. Any quality vegetable potting mix works great for peppers. I use the same mix for peppers as tomatoes - rich, well-draining, with good moisture retention. Peppers appreciate consistent moisture but they're more forgiving of occasional drying than tomatoes are.
Lettuce and leafy greens prefer moisture-retentive soil that doesn't dry out quickly. I use mixes with extra vermiculite or water-holding crystals to keep the soil evenly moist. Lettuce that dries out becomes bitter and bolts to seed prematurely. A consistently moist (but not waterlogged) growing medium keeps leaves tender and delays bolting.
I also use lighter fertilizer for lettuce than for tomatoes. Heavy nitrogen can make lettuce bolt faster, so I use mixes with moderate nutrition or I fertilize less frequently.
Root vegetables like carrots, radishes, and beets need extremely light, fluffy soil without any obstacles. I use extra-perlite mixes that are super loose and drain aggressively. Any lumps, stones, or dense spots in the soil will cause root vegetables to fork, twist, or develop weird shapes. The lighter and more uniform the soil, the straighter and prettier the roots!
Avoid mixes with lots of wood chips or bark chunks for root vegetables. Those obstacles create misshapen roots. Stick with fine-textured mixes.
Cucumbers and squash are heavy feeders that need rich soil and consistent moisture. I use my richest DIY mixes or premium bagged blends. These crops produce enormous amounts of foliage and fruit, which demands serious nutrition and water. They'll quickly deplete poor-quality soil.
Herbs vary widely in their soil preferences! Mediterranean herbs like rosemary, thyme, lavender, and oregano prefer fast-draining, relatively lean soil. I use extra-perlite mixes and fertilize minimally. Rich, moist soil actually causes problems for these herbs - they get leggy, lose flavor, and can develop root rot.
Moisture-loving herbs like basil, parsley, mint, and cilantro are the opposite - they want richer, more moisture-retentive soil. I use standard vegetable potting mix for these herbs, same as I'd use for tomatoes. They appreciate the nutrition and consistent moisture.
Beans and peas are nitrogen-fixing plants that don't need super-rich soil. In fact, too much nitrogen causes them to produce tons of foliage but few pods! I use lighter, less-amended potting mixes for beans and peas. Basic potting mix without extra compost or fertilizer works perfectly.
Potatoes in containers need deep, loose soil that you can "hill up" as plants grow. I use a very light, fluffy mix with lots of perlite. The light texture makes it easy to add more soil around growing potato plants, and it allows easy harvesting - I just dump out the container and potatoes fall out rather than being stuck in heavy, compacted soil!
Common Potting Soil Problems and Solutions
Even with quality potting mix, problems can develop over time. Here's how to identify and fix the most common issues I've encountered!
Compaction and soil settling happens to all potting mix eventually. Over weeks and months of watering, the mix compresses and the level drops in containers. I've had containers lose 2-3 inches of height as the soil compacted. This is normal to some degree, but excessive compaction indicates poor-quality mix or not enough drainage materials.
The solution is refreshing soil by mixing in extra perlite and compost. I often top-dress containers midseason with fresh potting mix to restore volume. At the end of the season, I dump out containers, break up the compacted soil, mix in amendments, and reuse it for another season or two.
Water beading up and running off the surface indicates hydrophobic soil. This happens when peat-based potting mix dries out completely - it actually becomes water-repellent! I pour water on the surface and it just beads up and rolls off rather than soaking in. Super frustrating!
The fix is adding a drop of dish soap to your watering can (1 drop per gallon), which breaks the surface tension and allows water to penetrate. Or you can bottom-water by setting containers in a tray of water and letting them soak up moisture from below. Once the soil is re-wetted, it usually behaves normally again.
Salt buildup shows up as white crusty deposits on the soil surface or container rim. This is accumulated mineral salts from tap water and fertilizer. It's super common with container growing and not necessarily harmful in small amounts, but heavy buildup can damage plant roots and reduce growth.
I fix salt buildup by flushing containers thoroughly. I water heavily until water runs freely from drainage holes, washing accumulated salts out of the soil. Doing this every month or two prevents excessive buildup. Using rainwater instead of tap water also reduces this problem significantly.
Fungus gnats are those annoying little flies that hover around potting mix. They're attracted to moist organic matter and lay eggs in the soil surface. The larvae feed on organic matter and sometimes plant roots. I've dealt with fungus gnats in pretty much every container garden I've had!
The solution is letting the soil surface dry out between waterings (gnats need moist conditions) and using yellow sticky traps to catch adults. You can also top-dress with sand or perlite, which creates a dry barrier that gnats can't penetrate to lay eggs. Bt (Bacillus thuringiensis) drenches kill larvae in the soil.
Nutrient depletion happens faster in containers than in-ground gardens. Even rich potting mixes run out of nutrition after 6-8 weeks of plant growth. I notice this when plants start yellowing despite adequate water, or when growth slows significantly.
The fix is regular fertilizing once the initial nutrients are depleted. I start liquid feeding about 6 weeks after planting, then continue every 1-2 weeks throughout the growing season. You can also add slow-release granular fertilizer to extend the feeding window.
Soil pH drift can occur over time as limestone breaks down or acid fertilizers accumulate. Most vegetables prefer slightly acidic soil (pH 6.0-6.5), but potting mix pH can shift outside this range with extended use or certain fertilizers.
I test pH occasionally using an inexpensive soil test kit. If pH is too low (acidic), I add garden lime. If too high (alkaline), I add sulfur or use acidifying fertilizers like ammonium sulfate. Honestly though, pH problems are relatively rare with quality potting mixes.
Mold or algae growth on the soil surface looks gross but usually isn't harmful to plants. Green algae or white mold growing on top of potting mix indicates excessive moisture or poor air circulation. I get this sometimes in shady spots or with overwatered containers.
The solution is improving drainage and air circulation. I scrape off visible mold, let the soil dry out more between waterings, and sometimes top-dress with perlite or sand to create a drier surface layer. Better spacing between containers also improves air flow.
Reusing and Refreshing Potting Soil
Quality potting mix is expensive, so I reuse it for 2-3 seasons with proper refreshing. Here's how to extend the life of your potting soil and maintain good performance!
End-of-season soil evaluation determines whether soil is worth saving. I dump out containers and examine the potting mix. If it's still relatively fluffy with visible perlite chunks and not completely broken down, it's worth refreshing. If it's compacted into a dense, root-filled mass with no visible structure, I compost it and start fresh.
Root removal is the first step in refreshing soil. I shake or pick out old roots from the used potting mix. Large root masses go in the compost. Small fibrous roots that are difficult to remove can stay - they'll break down and add organic matter. I don't worry about getting every single root fiber out.
Sterilizing used soil kills any pests, diseases, or weed seeds that might be present. The easiest method is solarization - spread the soil in a thin layer in black plastic garbage bags, seal them, and leave in direct sun for 4-6 weeks during summer. The heat builds up and pasteurizes the soil. I've also baked small amounts in the oven at 180°F for 30 minutes, though this stinks up the house terribly!
Honestly, I usually skip sterilization for soil from healthy plants without disease issues. I just refresh it and reuse it. But if I had disease problems or if I'm being extra cautious, sterilization is worth the effort.
Amending refreshed soil restores its structure and nutrition. My standard refresh recipe for each 5 gallons of used potting mix: add 1 gallon fresh potting mix or compost, add 1-2 cups perlite, and add 2-3 tablespoons of balanced organic fertilizer. Mix everything thoroughly.
This refreshing process creates "like new" potting mix for a fraction of the cost of buying all fresh mix. I've used some batches of refreshed soil for three seasons before finally retiring them to the compost pile!
Storage of unused potting mix should keep it dry and protected from pests. I store opened bags in sealed plastic bins or garbage cans with tight lids. Potting mix stored in open bags can get infested with fungus gnats or can absorb moisture and become moldy. Proper storage keeps it usable for years.
Winter storage of soil in containers depends on your climate. In mild climates, I just leave containers as-is with the old soil in place. In cold climates where containers freeze, I dump out the soil to prevent freeze-thaw cycles from cracking containers. The used soil goes into a pile covered with a tarp, and I refresh it in spring.
When to completely replace potting mix rather than refreshing it: after 3+ seasons of use, if the mix has completely broken down into mucky compost-like material, if there were serious disease issues in the previous season, or if the mix just seems lifeless and depleted despite refreshing attempts. Sometimes it's worth starting fresh!
I probably reuse/refresh about 60% of my potting mix and replace 40% with completely fresh mix each season. This balances cost savings with maintaining good soil quality across my containers.
Organic vs Conventional Potting Soil
The organic versus conventional debate comes up frequently with potting soils. I use both types depending on the application, and there are legitimate pros and cons to each!
Organic potting mixes use naturally-derived ingredients and OMRI certification means they're approved for organic growing. Ingredients include things like composted bark, earthworm castings, bat guano, feather meal, kelp, etc. These provide slow-release nutrition from organic sources rather than synthetic fertilizers.
I prefer organic mixes for edible crops, especially vegetables and herbs I'll be eating fresh. The organic matter supports beneficial soil microorganisms, the nutrients release slowly and naturally, and there's no concern about synthetic chemical residues. My tomatoes, peppers, and lettuce all grow in organic potting mix.
The main downside of organic mixes is they tend to be more expensive - usually $3-5 more per bag than conventional equivalents. They can also vary more in nutrient content batch to batch since natural ingredients aren't as standardized as synthetic fertilizers.
Conventional potting mixes contain synthetic fertilizers and may include other non-organic ingredients. The fertilizers are typically controlled-release formulas that feed plants for 3-6 months. Brands like Miracle-Gro are the most common conventional options.
I use conventional mixes for ornamental flowers and non-edible plants where organic certification doesn't matter to me. The synthetic fertilizers work effectively, the mixes are widely available and affordable, and performance is reliable and consistent.
The advantage of conventional mixes is convenience and price. You get built-in feeding for months, the quality is very consistent, and they're usually the cheapest option. For people who don't prioritize organic growing, these mixes work perfectly fine.
Environmental impact differs between organic and conventional options. Organic mixes use renewable resources and support sustainable growing practices. However, peat moss (used in both organic and conventional mixes) raises environmental concerns. Conventional synthetic fertilizers require energy-intensive manufacturing but are very efficient in terms of nutrients delivered per unit.
I've honestly had excellent results with both organic and conventional potting mixes. The plants don't really care whether their nitrogen comes from feather meal or ammonium nitrate - they grow well either way! The choice is more about personal values and preferences than plant performance.
For edibles, I lean organic. For flowers and ornamentals, I use whatever's affordable and available. That's my practical approach that balances values with budget!
Conclusion
Choosing the right potting soil is genuinely one of the most important decisions you'll make for your container garden. It's the foundation - literally - that everything else builds on. Skimp on potting mix quality, and you'll struggle with poor growth, low yields, and constant problems no matter how good your other practices are.
Invest in quality potting mix, and suddenly container gardening gets way easier! Plants grow vigorously, they're more resistant to stress and disease, and harvests are significantly better. The difference between cheap potting soil and quality potting mix is dramatic - I've tracked it over multiple seasons and the yield difference is typically 40-60% or more.
You don't necessarily need the most expensive premium brands, though they do perform excellently. Mid-range quality options like Espoma or Miracle-Gro Performance Organics work great for most home gardeners. The key is avoiding the absolute cheapest stuff and making sure your potting mix has proper ingredients - peat or coir for structure, perlite or vermiculite for drainage, and some organic matter for nutrition.
DIY mixes can save money while delivering quality results if you're willing to put in the effort of mixing your own. My basic recipe of equal parts peat/compost/perlite costs about 40% less than buying premium bagged mix and performs just as well. It's worth considering if you're filling many containers!
Start this season by investing in proper potting mix for your containers. Your plants will thank you with healthier growth and bigger harvests. The extra cost upfront - maybe $5-10 more per container than using cheap stuff - pays for itself many times over in increased production. Quality potting soil is one investment that genuinely makes a measurable difference!
What potting mix do you use for your container vegetables? Have you noticed performance differences between brands? Drop a comment below and share your experiences! I'm always curious what works well for other container gardeners in different climates and growing situations. Let's grow something amazing!