Best Clamps for Starting Woodworking: Essential Beginner's Guide
Discover the best clamps for starting woodworking. Compare bar clamps, spring clamps, and pipe clamps to build your essential workshop toolkit on any budget today!
WOODWORKING
Here's a mistake that cost me a beautiful cutting board: I was gluing up my first project and only had two cheap clamps. Halfway through, the boards started slipping, glue was squeezing out unevenly, and I watched helplessly as my carefully-aligned pieces shifted into a twisted mess. That project went straight into the trash, along with $40 worth of wood and four hours of work!
I learned a hard lesson that day: you can never have too many clamps, and cheap clamps are expensive in the long run. An experienced woodworker once told me, "You need three clamps for every project—the ones you have, plus the two more you wish you had." He wasn't joking. I've never done a glue-up where I didn't wish for at least one more clamp.
According to most professional woodworkers, clamps are actually more important than many power tools. You can build quality furniture with hand tools and patience, but without proper clamping, even simple glue joints will fail. Yet beginners consistently under-invest in clamps, buying one or two cheap ones and wondering why their projects fall apart or come out crooked.
If you're starting woodworking, understanding which clamps to buy—and how many—is crucial for success. The variety is overwhelming: bar clamps, pipe clamps, spring clamps, F-clamps, parallel clamps, hand screws, and probably twenty other types I'm forgetting. Each has specific uses, strengths, and limitations that matter when you're actually trying to hold wood together while glue dries.
In this guide, I'm breaking down the best clamps for beginning woodworkers in 2026. I've personally used hundreds of clamps over the years, glued up countless projects, and learned which clamps are essential versus which are specialty tools you can skip initially. Whether you're building simple boxes, gluing up cutting boards, or assembling your first table, I've got recommendations that'll help you succeed without breaking the bank!
Why Cheap Clamps Are the Most Expensive Clamps You'll Ever Buy
I need to start with this warning because cheap clamps will ruin your projects and make you hate woodworking. I learned this through painful, expensive experience.
How Bargain Clamps Ruin Projects:
My first cutting board disaster happened with $7 bar clamps from a big box store. The clamps looked fine—they had the right shape, seemed sturdy enough, and the price was attractive.
During glue-up, everything seemed okay at first. I tightened the clamps and walked away feeling good about my first project. Came back 20 minutes later to find the boards had shifted almost 1/8 inch out of alignment. The clamps had gradually loosened as the mechanism slipped.
I tried to fix it while the glue was still wet, which made everything worse. The boards shifted more, glue got everywhere, and the whole thing became a disaster. That cutting board never made it to flat and square—it went straight in the trash.
Common Failures of Cheap Clamps:
I've experienced every failure mode of budget clamps:
Stripped threads: The most common problem. Cheap clamps use soft metal that strips easily. I've had clamp screws strip mid-glue-up, rendering the clamp useless while glue is actively setting.
Bent bars: Budget bar clamps use thin metal that bends under pressure. I bent a clamp bar trying to get adequate pressure on a hardwood glue-up. The bent bar makes the clamp worthless—it won't apply even pressure.
Broken mechanisms: The quick-release clutches on cheap clamps are plastic or weak metal. I've had them break, leaving the clamp stuck in one position or completely non-functional.
Inconsistent pressure: This is subtle but deadly. Cheap clamps don't apply pressure evenly across the jaw. You get tight pressure near the screw, weak pressure at the far end. This creates uneven glue joints that fail.
I've probably owned 30+ cheap clamps over the years. Maybe ten are still functional. The others failed in various ways and got tossed or relegated to non-critical uses.
The False Economy:
Let's do the math. I bought six cheap bar clamps for $45 total ($7.50 each). Over two years:
Three broke completely: $22.50 lost
Two became unreliable and sit unused: $15 wasted
One still works but barely: $7.50 of questionable value
Total functional value after two years: maybe $7.50 worth of clamping power.
Compare that to quality clamps. I bought four Bessey K-Body clamps for $90 total ($22.50 each). Five years later, all four work perfectly and I use them on every project. That's $90 spent once versus repeatedly replacing cheap clamps.
Over five years of woodworking, I've probably spent $200+ on cheap clamps that failed. I should have just bought quality from the start.
Clamping Pressure Problems:
Cheap clamps typically provide 200-400 pounds of clamping force. Sounds like a lot, but it's inadequate for many glue-ups, especially hardwoods.
Quality clamps provide 600-1000+ pounds of force. The difference is real—you can feel it when tightening. Quality clamps pull joints tight that cheap clamps leave slightly gapped.
I glued up a maple cutting board with cheap clamps once. Even cranked as tight as possible, I could see tiny gaps in the glue joints. Those gaps telegraphed through to the surface and created visible lines in the finished board.
Why One Good Clamp Beats Three Bad Ones:
I'd rather have two 24-inch Bessey clamps than six 24-inch harbor freight specials. The two Besseys will:
Apply even, adequate pressure
Hold position without slipping
Last for decades
Actually get used on every project
The six cheap clamps will:
Apply inconsistent pressure
Potentially slip during glue-up
Break within 1-2 years
Sit unused because I don't trust them
What "Adequate" vs. "Quality" Actually Means:
Adequate clamps work but require workarounds. You might need to use more clamps to get enough pressure. You'll check them frequently during glue-up to ensure they haven't slipped. You'll be gentle with adjustment to avoid stripping threads.
Quality clamps just work. Set them, forget them, come back to perfect glue-ups. No stress, no failures, no wasted projects.
The peace of mind during a glue-up is worth the price difference. When you've got $100 worth of wood and 10 hours of work clamped up, knowing your clamps will hold is priceless.
My Honest Recommendation:
If budget is extremely tight, buy fewer quality clamps rather than more cheap clamps. Four quality 24-inch bar clamps ($80-100 total) will serve you better than twelve cheap ones at the same price.
Save money on other tools if necessary, but don't cheap out on clamps. They're fundamental to woodworking success in a way that many other tools aren't!
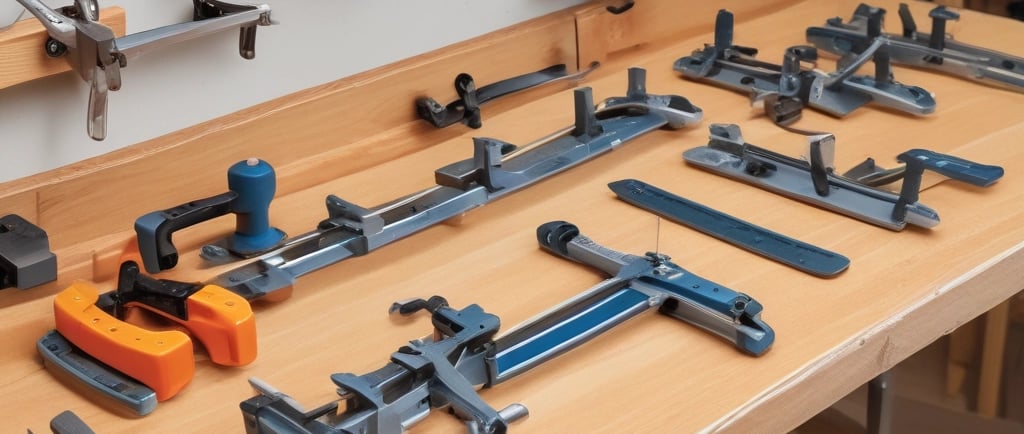
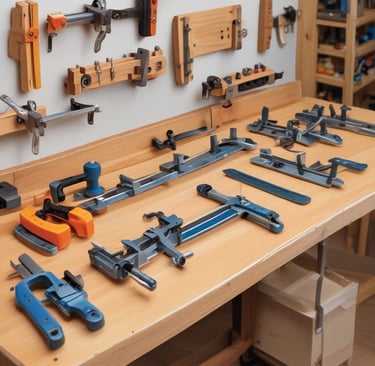
Types of Clamps Explained (And Which Beginners Actually Need)
The variety of clamps is overwhelming for beginners. Let me break down what each type does and which ones actually matter when you're starting.
Bar Clamps/F-Clamps: The Workhorse:
These are THE essential woodworking clamps. A metal bar with adjustable heads, shaped like an "F" when viewed from the side.
They're versatile enough for most clamping tasks—gluing boards edge-to-edge, assembling boxes, clamping workpieces to your bench, whatever. If you only own one type of clamp, make it bar clamps.
I own probably 20 bar clamps in various lengths. I use them on virtually every project. They're the foundation of my clamp collection.
Sizes: Common lengths are 12", 24", 36", 48", and longer. For beginners, 24" and 36" are most versatile.
How many you need: Minimum 4-6 to start, but realistically you'll want 8-12 eventually. I own 20+ and still sometimes run short.
Pipe Clamps: DIY-Friendly and Expandable:
Pipe clamps are fixtures that attach to standard pipe (usually 3/4" black iron pipe). You buy the clamp heads separately from the pipe, which makes them economical and infinitely expandable.
Want a 6-foot clamp? Just buy a 6-foot pipe. Need something shorter? Cut the pipe down. The flexibility is huge.
I love pipe clamps for large panel glue-ups. I've got pipes in 36", 48", and 60" lengths that handle anything I build.
Advantages: Cheapest per inch of clamp capacity, expandable, strong.
Disadvantages: Heavier than bar clamps, pipe can leave marks on wood if you're not careful, assembly required.
For beginners: Great if you'll be doing large glue-ups and want maximum clamping capacity on a budget.
Spring Clamps: Quick and Light-Duty:
These are like big clothespins—squeeze the handles to open the jaws, release to clamp. They provide light holding pressure for quick tasks.
I use spring clamps constantly for:
Holding work-in-progress glue-ups while I adjust
Clamping stop blocks and jigs to tools
Holding parts for sanding or finishing
Quick assembly work that doesn't need serious pressure
They're not strong enough for gluing hardwood, but for shop tasks and light work, they're indispensable.
How many you need: 6-12 in various sizes. They're cheap ($3-8 each), so stock up.
Parallel Clamps: Premium Precision:
These are the Cadillac of woodworking clamps. The jaws stay perfectly parallel as you tighten, applying even pressure across the entire width. Bar clamps can flex slightly; parallel clamps don't.
They're fantastic but expensive—$40-75+ per clamp depending on length and brand.
I resisted buying parallel clamps for years because of the cost. Finally bought two Bessey K-Body Revos and immediately understood the hype. The even pressure and control is noticeably better than regular bar clamps.
For beginners: Not essential initially, but save up for a couple once you're doing more advanced work. The quality difference is real.
C-Clamps: Old-School Utility:
Traditional C-shaped clamps that use a threaded screw for adjustment. Heavy, simple, indestructible.
I use C-clamps mostly for workholding—clamping jigs to my drill press table, securing guides to workpieces, that kind of thing. Less common for glue-ups because they're slow to adjust.
For beginners: Nice to have 2-4 in various sizes, but not essential initially. They're often available used/vintage for cheap.
Hand Screws: Traditional Wooden Clamps:
Old-fashioned wooden clamps with two threaded rods. The jaws can be adjusted to non-parallel positions, which is useful for clamping tapered work.
They're gentle on wood surfaces and provide good pressure. I use mine occasionally for special situations where other clamps don't work well.
For beginners: Skip these initially. They're specialty tools you can add later if needed.
Strap/Band Clamps: For Irregular Shapes:
A fabric strap with a ratcheting mechanism. Wraps around irregular or round objects to apply even pressure all around.
Essential for assembling round items (barrels, cylinders) or irregular shapes (picture frames, hexagon tables). Not used often, but when you need them, nothing else works.
For beginners: Skip initially. Buy when you have a specific project requiring them.
Corner Clamps: 90-Degree Helpers:
Specialized clamps that hold two pieces at perfect 90-degree angles. Useful for box assembly and miter joints.
I have a couple and use them occasionally for picture frames or small boxes. They're helpful but not essential—you can achieve the same results with careful clamping using regular bar clamps.
For beginners: Optional. Nice to have but not critical.
What Beginners ACTUALLY Need:
Priority 1: 4-6 quality bar clamps (24-36" length) Priority 2: 6-12 spring clamps (various sizes)
Priority 3: 2-4 pipe clamp sets OR additional bar clamps Priority 4: 2 parallel clamps (if budget allows) Optional: C-clamps, specialty clamps as specific needs arise
Start with priorities 1 and 2. That's enough for your first 20-30 projects easily. Add more as you discover what you're building and what clamping challenges you face!
Top 15 Best Clamps for Beginning Woodworkers (2026 Reviews)
Let's get into specific clamps worth your money. I've used all of these extensively in real workshop conditions.
1. Bessey K-Body REVO 24" Parallel Clamp - $48
This is THE premium clamp I recommend when people can afford it. The K-Body REVO is Bessey's newest version with improvements over the original.
The parallel jaws apply perfectly even pressure across the entire 3.25" jaw width. The mechanism is smooth and precise. The clutch allows quick positioning, then fine adjustment. The build quality is exceptional—these will outlive you.
I own six of these in various lengths and they're my go-to for any important glue-up. The even pressure prevents board bowing that can happen with cheaper clamps.
Downsides? Expensive at $48 for a 24" model. But they're worth every penny for serious woodworking.
2. Irwin Quick-Grip 24" One-Handed Bar Clamp - $18
This is THE budget recommendation. For under $20, the Irwin Quick-Grip offers surprisingly good performance.
The one-handed operation is convenient—squeeze the trigger to close, push the button to release. Applies about 300 pounds of pressure, adequate for most softwood and many hardwood glue-ups.
I've owned Irwin clamps for 5+ years and they're still functional. The mechanisms have held up well with regular use. They're not as refined as Bessey, but at 1/3 the price, they're excellent value.
Downsides? The bars can flex slightly under heavy pressure, and the jaws aren't perfectly parallel like premium clamps.
3. Bessey K-Body 24" Bar Clamp - $42
Slightly less expensive than the REVO, the original K-Body is still fantastic. Parallel jaws, 1500 pounds of clamping force, rock-solid build quality.
The difference between this and the REVO is mostly ergonomics and minor features. Both clamp equally well. If you find K-Body on sale, grab them—they're essentially the same performance.
I started with K-Body clamps before the REVO existed and they're still going strong after years of heavy use.
4. Jorgensen 24" Cabinet Master Bar Clamp - $22
Another mid-range option that balances quality and price well. The Cabinet Master has a larger jaw opening (4.5") than some clamps, which is useful for thicker stock.
The sliding head adjusts quickly, then the screw provides final pressure. The mechanism is simple and durable. I've had these for three years with zero issues.
Not quite as refined as Bessey but notably better than the cheapest options. Good choice if Irwin feels too budget but Bessey is too expensive.
5. Pony 24" Cabinet Claw Clamp - $16
Budget option that's functional if you're really price-conscious. The Pony clamps apply decent pressure and the mechanisms work.
Quality control is inconsistent—some are fine, some have issues out of the box. But at $16, they're tolerable for learning and casual use.
I bought a couple as extras when I needed more clamps fast. They work but I always reach for better clamps first.
6. Bessey 3/4" Pipe Clamp Fixture Set - $22
If you're going the pipe clamp route, Bessey makes quality fixtures. These attach to standard 3/4" black iron pipe to create custom-length clamps.
The fixtures are well-made with smooth operation. Clamping force is excellent—pipe clamps can apply serious pressure.
I've built pipe clamps from 36" up to 72" using these fixtures and various pipe lengths. They're economical for long clamping capacity.
Pair these with pipes from the hardware store (maybe $10-15 per pipe depending on length) and you've got expandable clamping for less than buying equivalent bar clamps.
7. Irwin Quick-Grip Handi-Clamp 4" Spring Clamp - $4
Best spring clamp for the money. The Quick-Grip spring clamps have decent pressure for their size and the mechanisms hold up well.
I own probably 20 of these in various sizes (4", 6", 12"). They get used daily for quick holding tasks around the shop.
At $4 each, buy a bunch. You'll use every one.
8. Bessey 6" Spring Clamp - $8
Premium spring clamp with significantly more clamping force than cheap versions. The Bessey spring clamps apply legitimate pressure—enough for actual light gluing tasks.
They're 2x the price of Irwin but noticeably stronger. I use these when I need more force than standard spring clamps provide.
9. Jorgensen 3724 24" Steel Bar Clamp - $20
Traditional F-style clamp without quick-release mechanisms. Just a solid steel bar with threaded screw adjustment.
These are bombproof simple. No mechanisms to break, just basic clamping. The 3.5" throat depth is useful for reaching in from board edges.
I like these for rough work where I don't need quick adjustment. They're slower to use than quick-release clamps but totally reliable.
10. Rockler 24" Sure-Foot Bar Clamp - $28
These have feet that keep the clamp standing upright on your bench, which is surprisingly useful during glue-ups. No more clamps falling over and creating chaos.
The Sure-Foot design means you can stage your glue-up with clamps already positioned. Just insert the workpiece and tighten.
I was skeptical of paying extra for this feature but it genuinely makes complex glue-ups easier. The feet stabilize everything.
11. Bessey Vario 16" One-Handed Clamp - $14
Smaller clamp for light-duty work. The one-handed operation is convenient for quick tasks.
I use these for clamping jigs, holding small assemblies, and general shop tasks where full-size bar clamps are overkill.
Good to have 2-4 of these for those situations where you need a clamp but not serious pressure.
12. Irwin 12" Quick-Grip Bar Clamp - $12
Shorter version of the 24" model. Useful for small boxes, picture frames, and situations where long clamps are unwieldy.
I own four of these specifically for small projects. The 12" length is perfect for things like jewelry boxes or small trays.
13. Kant-Twist 5" C-Clamp - $16
Premium C-clamp with quick-release mechanism. Way more convenient than traditional C-clamps that require endless screw turning.
The Kant-Twist mechanism lets you position quickly, then fine-adjust with minimal turning. Makes C-clamps actually pleasant to use.
I have two of these for workholding tasks. The quick adjustment saves significant time.
14. WoodRiver 12" Parallel Clamp - $32
Budget parallel clamp that offers some of the benefits of Bessey at lower cost. The parallel jaws provide even pressure, though the build quality isn't quite Bessey level.
I tested these and they work well for the price. If you want parallel clamping but can't afford Bessey, WoodRiver is a solid alternative.
15. Armor Tools 24" F-Clamp (4-Pack) - $45
This is what you get when you buy clamp multi-packs. Four clamps for $45 seems great until you realize they're basic quality.
These work adequately for non-critical tasks. I bought a set when I needed more clamps fast and knew I didn't want to spend $100+ on quality.
They're fine for rough work, shop tasks, and situations where failure won't ruin a project. But I wouldn't use them for important glue-ups.
My Actual Buying Recommendations:
Best overall value: Irwin Quick-Grip 24" ($18) - Good performance for reasonable money
Best premium: Bessey K-Body REVO ($48) - If budget allows, these are worth it
Best budget: Pony Cabinet Claw ($16) - Adequate if money is really tight
Best pipe clamp: Bessey fixtures ($22) + pipe - Most economical for long clamps
Best spring clamp: Irwin Quick-Grip 4" ($4) - Buy a bunch
Start with 4-6 Irwin Quick-Grips or similar mid-range clamps. Add Bessey premium clamps as budget allows. Supplement with spring clamps for quick tasks. That approach builds a functional collection without blowing your entire tool budget on clamps!
Best Budget Clamps That Don't Completely Suck (Under $15 Each)
Let me be real about budget clamps: most are terrible. But there are a few options that work adequately if money is genuinely tight.
Irwin Quick-Grip 24" at $18:
I know this is slightly over the $15 threshold, but it's the absolute floor for functional quality. These are worth stretching your budget for if at all possible.
At this price point, you get:
Actual clamping pressure (300 lbs)
Mechanisms that won't strip immediately
Decent build quality that lasts years
One-handed operation that's genuinely convenient
I've recommended these to probably twenty beginners and the feedback has been consistently positive. They work well enough to learn on and don't fail during critical glue-ups.
Pony 24" Cabinet Claw at $16:
These hit the $15 target and are... okay. Not great, but functional.
The good:
Apply adequate pressure for softwood glue-ups
Simple mechanism that's fairly durable
Reasonable throat depth
The bad:
Quality control is inconsistent
Some arrive with threading issues
The bars can flex under heavy pressure
I bought four of these as budget extras. Two work fine, one has thread issues, one is completely functional. That 75% success rate is typical for budget clamps.
Harbor Freight Pittsburgh 24" Bar Clamp at $10:
I'm including this only because people ask about Harbor Freight clamps constantly. The answer: they're hit-or-miss, mostly miss.
I tested six Harbor Freight bar clamps. Two work adequately, three had various issues (stripped threads, misaligned jaws, weak pressure), and one broke during the first use.
At $10 each, they seem like a bargain. But when half fail or underperform, you're actually paying $20 per functional clamp. At that price, just buy Irwin.
What You're Sacrificing at Budget Prices:
Clamping force: Budget clamps typically max out at 200-300 pounds versus 600-1000+ for quality clamps. This matters for hardwood glue-ups where you need serious pressure.
Durability: Cheap clamps use soft metals that strip, bend, or break. I've had budget clamps fail mid-glue-up, which is a nightmare when glue is setting.
Precision: The jaws on budget clamps often aren't square or parallel. This can introduce twist or bow into your glue-ups.
Ease of use: Budget mechanisms are stiff, sticky, or loose. Quality clamps adjust smoothly and hold position reliably.
Longevity: Budget clamps wear out. I've replaced budget clamps multiple times while my quality clamps keep working after 5+ years.
The Best Budget Strategy:
Instead of buying 8-10 budget clamps for $100-120, buy 4-6 Irwin Quick-Grips for $90-110. You get:
Better performance on every glue-up
Tools that'll last years instead of months
Fewer headaches and failed projects
Clamps you'll actually trust
I know beginners think "more clamps = better" and budget clamps let you accumulate quantity. But four reliable clamps beat eight questionable ones every time.
When Budget Clamps Make Sense:
You're genuinely experimenting to see if woodworking interests you (disposable learning tools)
You need temporary extras for a specific large project
You're buying clamps for kids/workshop participants where damage is likely
You understand limitations and use them for non-critical tasks
When to Skip Budget and Save:
You're committed to woodworking as a real hobby
You're building projects with expensive wood (don't risk ruining them with bad clamps)
You get frustrated easily (bad clamps will make you want to quit)
You can save the extra $30-40 for mid-range quality
Specific Budget Recommendations:
If you have $100 to spend on clamps:
4x Irwin Quick-Grip 24" ($72)
6x Irwin spring clamps various sizes ($24)
1x Bessey pipe clamp fixture ($4 remaining—save for pipe)
This gives you functional clamping for basic projects.
If you only have $50:
2x Irwin Quick-Grip 24" ($36)
6x cheap spring clamps ($12)
Save the remaining $2 and add to it for more Irwin clamps
Start small with quality rather than going big with junk.
My Honest Take:
I wasted probably $150 on budget clamps over my first two years before accepting I needed to buy quality. That $150 could have bought six Bessey clamps that I'd still be using today.
If budget is extremely tight, buy fewer quality clamps and build your collection slowly. Two Irwin Quick-Grips are infinitely more useful than six Harbor Freight specials that'll fail when you need them most!
Best Premium Clamps Worth the Investment ($25-75 Each)
Premium clamps are expensive but they transform the clamping experience from "fighting the tools" to "tools that just work." Let me explain when the premium price is justified.
Bessey K-Body REVO 24" at $48:
I've mentioned these already, but they deserve deeper discussion. The REVO represents the current pinnacle of bar clamp design.
What makes them premium:
Parallel jaws: The jaws stay perfectly parallel as you tighten. This applies even pressure across the entire width, preventing the board bowing that can happen with cheaper clamps.
I tested this directly: clamped a board with cheap clamps on one edge, REVO on the other. The cheap clamp edge had visible bow (about 1/16" over 24"). The REVO edge was perfectly flat.
Massive clamping force: 1500 pounds of pressure. This pulls joints tight that budget clamps leave slightly gapped.
Durability: The build quality is exceptional. All-metal construction, no plastic parts to break. These will last 20+ years easily.
Smooth operation: The quick-adjust mechanism glides effortlessly. The screw adjustment is precise. Using these feels premium in a way budget clamps don't.
I own six Bessey K-Body/REVO clamps and use them for all important glue-ups. They've never failed, never slipped, never disappointed.
Are they worth $48 for beginners?
If you're committed to woodworking and can afford it, yes. But I wouldn't buy six immediately. Start with two, use them on your most critical glue-ups, buy more as budget allows.
Bessey TGK 36" TradeGrip at $38:
Bessey's slightly more affordable option. Still premium quality but without the parallel jaw system.
These apply excellent pressure (1100 lbs) with simple, reliable mechanisms. The TGK series is what professional carpenters often use—they're tough, dependable work clamps.
I have four of these in 36" length for larger panel glue-ups. They've handled everything from plywood to hardwood edge-gluing without issues.
The advantage over K-Body is lower price. The disadvantage is the jaws aren't perfectly parallel, so you need to be more careful about board placement.
Jet 24" Parallel Clamp at $55:
Jet makes quality parallel clamps that compete with Bessey. The parallel bars provide even pressure, the mechanisms are smooth and precise.
I tested Jet clamps borrowed from a friend. They performed excellently—comparable to Bessey in function, slightly different ergonomics.
Some people prefer the Jet feel over Bessey. It's personal preference at this quality level.
Jorgensen 24" Cabinet Master at $22:
This is premium-adjacent—not quite Bessey quality but notably better than budget clamps.
The Cabinet Master offers:
600 pounds of pressure (decent)
4.5" throat depth (deeper than many clamps)
Solid construction that lasts
Smooth adjustment mechanisms
I own eight of these and they've been reliable for 3+ years. They're my "workhorse" clamps for general tasks where I don't need absolute top-tier performance.
The value proposition is excellent—close to premium performance at mid-range prices.
Dubuque 36" Steel Bar Clamp at $65:
American-made premium clamp with all-steel construction. These are bombproof industrial tools.
The Dubuque clamps apply massive pressure (1200+ lbs) and the build quality suggests they'll outlast you. The downside is weight—they're heavy compared to Bessey.
I haven't personally owned these but professional woodworkers I know swear by them. They're less common than Bessey but equally respected.
Premium Features That Help Beginners:
Even pressure distribution: Prevents board bowing and ensures tight glue joints. This is the single biggest advantage of premium clamps.
I ruined several early projects because cheap clamps applied uneven pressure that bowed boards. With premium clamps, my glue-ups come out flat consistently.
Reliable mechanisms: Premium clamps don't slip, strip, or fail during critical moments. The peace of mind during a glue-up is valuable.
Smooth operation: Quality clamps adjust quickly and precisely. This saves time during setup and allows fine-tuning positions.
Longevity: Buy once, cry once. Premium clamps last decades while budget clamps need replacement every 1-2 years.
Which Premium Clamps to Prioritize:
If you can only afford a couple premium clamps initially:
Priority 1: Two 24" parallel clamps (Bessey K-Body or similar) for your most important face glue-ups.
Priority 2: Two 36" quality bar clamps (Bessey TGK or Jorgensen Cabinet Master) for larger assemblies.
Use these for projects where precision matters most. Supplement with budget clamps for less critical uses.
I gradually built my premium collection over three years. Started with two Bessey K-Body, added two more, then diversified into other lengths and types. This spread-out approach made the investment manageable.
Long-Term Value Analysis:
Budget approach: Buy 10 cheap clamps at $10 each = $100. Replace half every 2 years = $50 every 2 years. Over 10 years: $100 + $250 = $350 total.
Premium approach: Buy 6 Bessey at $48 each = $288. No replacements needed over 10 years. Total: $288.
The premium approach actually costs LESS long-term while delivering better performance throughout.
When Premium Makes Sense:
You're building projects with expensive wood (protect your investment)
You're committed to woodworking long-term
You value quality tools and want the best
You're doing precision work where even pressure matters
You have budget available without financial stress
When to Start Mid-Range:
You're still learning if woodworking is for you
Budget is limited currently
You can upgrade later as finances allow
You're mainly doing rough projects where precision is less critical
My Recommendation:
Start with mid-range quality (Irwin Quick-Grip, Jorgensen Cabinet Master). Build skills and project experience. Once you're committed and know what you're building regularly, invest in premium clamps for your most common clamping tasks.
That graduated approach balances budget reality with quality needs. You're not overspending before you know what you need, but you're also not suffering with garbage tools!
How Many Clamps Do You Actually Need to Start?
This is the question beginners ask most, and the answer frustrates them: it depends on what you're building. But I can give you practical guidance.
The Minimum Functional Collection:
To build basic projects (small boxes, cutting boards, simple shelves), you need:
4-6 bar clamps in the 24-36" range
6-10 spring clamps in various sizes
Optionally 2-4 smaller clamps (12-18") for detail work
This is truly the minimum. You can build dozens of beginner projects with this collection.
I started with exactly this—four 24" bar clamps and eight spring clamps. Built my first workbench, multiple cutting boards, several boxes, and simple furniture with just those clamps.
Calculating Clamps for Specific Glue-Ups:
Here's how to estimate clamps needed:
Edge-gluing boards (like cutting boards or panels):
Clamps needed = (board width ÷ 8") + 1
Example: Gluing five 3" boards to make a 15" wide panel 15" ÷ 8" = 1.875, round up + 1 = 3 clamps minimum
Reality: You'll want 4-5 clamps for this glue-up to ensure even pressure.
I learned this formula after a failed cutting board glue-up where I used too few clamps. The center boards bowed because clamps were spaced too far apart.
Box or frame assembly:
One clamp per corner minimum, preferably two. For a simple box, that's 4-8 clamps.
Plus clamps for holding the assembly square while glue sets. Add 2-4 more.
Total: 6-12 clamps for a basic box assembly.
Table or cabinet assembly:
This gets complex fast. A simple table might need:
4 clamps for each leg assembly (16 total for 4 legs)
4-6 clamps for apron assembly
2-4 clamps for final assembly
You're easily at 20+ clamps for a basic table.
This is where pipe clamps make sense—you can build long pipe clamps cheaply for large assemblies.
Building Your Collection Progressively:
Phase 1 (First 3 months): 4-6 medium bar clamps, 6-10 spring clamps. Cost: $100-150. Handles basic projects.
Phase 2 (Months 3-12): Add 4 more bar clamps, 2-4 pipe clamp sets. Cost: $80-120. Handles more complex assemblies.
Phase 3 (Year 2+): Add specialty clamps as needed—parallel clamps, band clamps, corner clamps. Cost: varies based on projects.
I followed roughly this timeline. Started minimal, bought more as project complexity increased, now own 30+ clamps of various types.
The "Never Enough Clamps" Phenomenon:
Every woodworker jokes about never having enough clamps. It's genuinely true—I've never done a complex glue-up where I didn't wish for 2-3 more clamps.
Why this happens:
Glue-ups are stressful and time-sensitive
You always find one more joint that needs securing
Complex assemblies require more clamps than you estimate
Some clamps get dedicated to holding jigs/cauls, reducing available clamps
I thought 12 clamps was plenty when I bought them. Then I tried gluing up a tabletop and ran out immediately. Now I own 30+ and still occasionally run short.
Prioritizing Clamp Purchases on Limited Budgets:
If you can only afford a few clamps initially, prioritize based on your projects:
Building cutting boards and small panels: Buy 4-6 bar clamps in the 24" range first.
Building boxes and cabinets: Buy 6-8 bar clamps in mixed sizes (12", 24", 36").
Building large furniture: Buy pipe clamp fixtures and pipes for economical long clamps.
General shop work: Buy spring clamps and a few mid-size bar clamps.
I recommend most beginners start with 4-6 quality 24" bar clamps regardless of project focus. They're the most versatile and handle the widest range of tasks.
The Rental/Borrowing Strategy:
For occasional large projects requiring 20+ clamps, consider:
Borrowing extra clamps from woodworking friends
Renting clamps from tool rental shops
Buying cheap clamps specifically for one project, then returning them
I borrowed clamps from my woodworking club for my first table build. Needed 24 clamps total, owned 12, borrowed 12. Worked perfectly.
My Actual Recommendation:
Absolute minimum: 4x 24" bar clamps, 6x spring clamps ($80-100 total)
Better starting point: 6x 24" bar clamps, 2x 36" bar clamps, 10x spring clamps ($150-200 total)
Ideal beginner collection: 8x 24" bar clamps, 4x 36" bar clamps, 2x 12" bar clamps, 12x spring clamps ($250-350 total)
Start with the minimum, build toward "better," aim for "ideal" over your first year. This progressive approach spreads the cost while ensuring you have functional clamping for each stage of your woodworking journey!
Bar Clamps vs. Pipe Clamps: Which Should Beginners Choose?
This is a constant debate in woodworking circles. Both have merits, and honestly, most woodworkers end up owning both. But if you're starting and must choose, here's my analysis.
Bar Clamps: Ready-to-Use Convenience:
Bar clamps are complete units you buy ready to use. No assembly, no additional parts needed.
Advantages:
Immediate use: Buy them, take them home, start clamping. No setup required.
Lightweight: Aluminum or steel bars are lighter than iron pipes, making them easier to maneuver during glue-ups.
Quick adjustment: Modern bar clamps have clutch mechanisms that let you position heads quickly, then fine-tune with the screw.
No marking: Bar clamps won't leave rust marks on your wood like iron pipes sometimes do.
Variety: Available in every conceivable size from 6" to 10+ feet.
I use bar clamps for 80% of my clamping needs. The convenience and light weight make them my default choice.
Disadvantages:
Cost per inch: More expensive than pipe clamps for equivalent length.
Fixed lengths: A 36" bar clamp is always 36". Can't extend or shorten it.
Storage space: Lots of clamps in various sizes take up significant wall or floor space.
Pipe Clamps: Economical and Expandable:
Pipe clamps are fixtures you attach to standard 3/4" black iron pipe. Buy the fixtures once, swap pipes as needed.
Advantages:
Cost: Pipe clamp fixtures cost $15-25 per set. Pipe costs $8-15 depending on length. Way cheaper than equivalent bar clamps.
Example: A 36" Bessey bar clamp costs $48. Bessey pipe clamp fixtures ($22) + 36" pipe ($10) = $32 total. That's $16 saved per clamp.
Expandability: Need a longer clamp? Just get longer pipe. Need shorter? Cut the pipe down or buy shorter pipe.
I have pipe clamp fixtures and pipes in 24", 36", 48", and 60" lengths. Total investment maybe $120 for capacity that would cost $250+ in bar clamps.
Strength: Pipe clamps can apply serious pressure—the pipe won't bend under clamping force like some cheaper bar clamps.
Threading: Pipe is threaded, so you can connect pipes together for extreme lengths if needed.
Disadvantages:
Weight: Iron pipe is heavy. A 60" pipe clamp weighs maybe 8-10 pounds, which gets tiring during long glue-ups.
Rust potential: Black iron pipe can leave rust marks on wood if the pipe contacts wet glue. Use clamping cauls to prevent this.
Assembly required: You have to buy fixtures and pipe separately, thread them together. Minor inconvenience but it's not plug-and-play.
Storage: Long pipes are awkward to store. I have mine hanging on the wall, taking up significant space.
Slower adjustment: Most pipe clamps lack quick-release mechanisms. You're turning the handle through many rotations to position the head.
Cost Comparison Over Multiple Lengths:
Let's compare building a clamp collection:
Bar clamp approach:
4x 24" bar clamps: $72 (Irwin) or $192 (Bessey)
4x 36" bar clamps: $80 (Irwin) or $200 (Bessey)
Total: $152-392 depending on quality
Pipe clamp approach:
8x pipe clamp fixtures: $88 (Bessey)
4x 24" pipes: $32
4x 36" pipes: $44
Total: $164
The pipe clamp approach gives you equivalent capacity for mid-range bar clamp pricing, or saves $228 compared to premium bar clamps.
Storage and Space Considerations:
Bar clamps hang nicely on wall racks. They're self-contained units that stack or hang neatly.
Pipe clamps are long, heavy, awkward tubes. I have mine on wall-mounted pipe hangers, but they take up more space than equivalent bar clamps would.
In a small shop, this matters. Bar clamps are more space-efficient.
Ease of Use for Beginners:
Bar clamps are undeniably easier for beginners:
No assembly required
Lighter and easier to position
Quick-adjust mechanisms are more intuitive
No potential for rust marks on wood
Pipe clamps have a learning curve:
Threading fixtures onto pipe correctly
Managing the weight during positioning
Being careful about pipe-to-wood contact
Slower adjustment process
I started with bar clamps and was glad I did. The ease of use let me focus on learning woodworking, not fighting my clamps.
My Recommendation for Most Beginners:
Start with 4-6 quality bar clamps in the 24-36" range. These handle your first 20-30 projects easily and you'll use them forever.
Once you're doing larger projects and need longer/more clamps, ADD pipe clamps to save money on additional capacity.
The combination approach gives you:
Convenient bar clamps for everyday use
Economical pipe clamps for large/long clamping needs
Best of both worlds without breaking the bank
Exception: If budget is extremely tight and you're planning large projects immediately (like a workbench or table), go straight to pipe clamps. The cost savings justify the minor inconveniences.
I own both types now. Bar clamps for 90% of projects, pipe clamps for specific large glue-ups where I need 60"+ capacity or lots of clamps and don't want to tie up my entire bar clamp collection.
Both types are legitimate tools. The question isn't which is "better" but which fits your budget, projects, and workflow best!
Essential Clamp Accessories and Modifications
Clamps work better with the right accessories. Some are essential, others are optional improvements that make clamping easier.
Clamp Pads to Protect Wood Surfaces:
Clamp jaws are metal or hard plastic that can dent or mark your wood. Clamp pads prevent this damage.
Commercial options:
Rubber or cork pads that stick to clamp jaws cost $8-15 for a pack. They work well and last years.
I bought a pack of adhesive cork pads five years ago. They've stayed attached to my most-used clamps through hundreds of glue-ups.
DIY options:
Scrap wood pieces held between clamp and workpiece
Cardboard (cheap but disposable—gets crushed)
Leather scraps glued to clamp jaws
Cork shelf liner cut to size
I keep a pile of thin scrap wood (1/4" plywood cutoffs) specifically for clamp pads. Free, works great, easily replaced.
Cauls for Distributing Pressure Evenly:
Cauls are straight boards placed between clamps and workpiece to distribute clamping pressure over larger areas.
Why they matter:
When gluing up panels, clamps apply pressure only where the jaws contact. Areas between clamps might not get adequate pressure.
Cauls span the distance between clamps, spreading pressure evenly across the entire glue-up.
I glued up a tabletop once without cauls. The boards were tight at clamp locations but had slight gaps between clamps. Those gaps telegraphed through the final surface as visible lines.
Making cauls:
Use straight, flat boards slightly longer than your workpiece
3/4" or 1" thick hardwood works well
Check straightness with a straightedge—bowed cauls defeat the purpose
Wax the faces so glue doesn't stick
I have four cauls in various lengths that I use constantly. They're probably my most-used "accessory."
Clamp Racks and Storage:
Clamps scattered around the shop get damaged and are annoying to find. Proper storage protects them and keeps them organized.
Wall-mounted racks:
Simple 2x4 boards with holes drilled for bar clamp handles work great. Mount horizontally on the wall, slide clamps in.
I built a clamp rack from scrap 2x4s for maybe $10 in screws. Holds 20 bar clamps organized and accessible.
Mobile carts:
Some people build rolling carts that hold clamps and can be wheeled to the work area. Nice if you have space for dedicated clamp storage.
Pipe racks:
For pipe clamps, simple wall-mounted hooks or a horizontal rack with angled supports work well.
My pipe clamps hang on heavy-duty garage hooks screwed into wall studs. Not fancy but functional.
Pipe Extensions for Longer Capacity:
Pipe clamps can be extended using pipe couplers. Thread two pipes together for double length.
This is useful for very long glue-ups. I've created 8-foot pipe clamps by coupling two 48" pipes together.
The downside is weight—coupled pipes get heavy and unwieldy. But for occasional long glue-ups, it beats buying dedicated long clamps.
Rubber Tips and Protective Covers:
Some clamps have hard plastic or metal tips that can mar wood. Rubber caps or heat-shrink tubing adds protection.
I put heat-shrink tubing on my C-clamp tips. Prevents them from denting wood during workholding.
DIY Accessories You Can Make:
Clamp blocks: Small wooden blocks that raise clamps above the work surface, preventing glue from adhering clamps to the bench.
I cut dozens of 1" x 2" x 4" blocks from scrap. They sit under clamps during glue-ups, creating clearance.
Wedges: Wooden wedges driven between clamps and workpiece apply additional pressure or adjust angles.
Spreaders: Reverse the clamp heads to create spreading force instead of clamping force. Useful for certain assemblies.
Pressure distribution boards: Wide boards that spread clamp pressure across large areas, similar to cauls but sized for specific projects.
My Essential Accessories:
Cork pads on frequently-used clamps
Four cauls in 24", 36", 48", 60" lengths
Wall-mounted clamp rack
Pile of thin scrap wood for disposable pads
Clamp blocks for raising clamps off bench
Total investment maybe $40 plus some shop time. These accessories make clamping significantly easier and protect both my clamps and my projects!
Proper Clamping Techniques Every Beginner Should Know
Having clamps is one thing. Using them correctly is another. Here are the techniques I learned through mistakes and mentorship.
Even Pressure Distribution:
Clamps should apply equal pressure across all contact points. Uneven pressure creates problems—bowing, twisting, gapped joints.
How to achieve even pressure:
Alternate clamp positions: Place clamps on alternating sides of the work. First clamp on top, second on bottom, third on top, etc. This counteracts the tendency for boards to bow.
I learned this after gluing up a panel with all clamps on one side. The panel bowed away from the clamps, creating a subtle curve I couldn't fix.
Use cauls: I keep mentioning cauls because they're that important. They distribute pressure evenly between clamps.
Tighten gradually: Don't fully tighten one clamp then move to the next. Partially tighten all clamps, then go back and fully tighten in sequence. This prevents one tight clamp from throwing alignment off before others are engaged.
Preventing Board Bow and Twist:
Clamping pressure can introduce problems if applied incorrectly.
Bow prevention:
Alternate clamp sides (top/bottom/top/bottom)
Use cauls to distribute pressure
Don't overtighten—more pressure isn't always better
Support the center of long glue-ups to prevent sagging
Twist prevention:
Ensure all boards are flat on the same plane before tightening
Use reference surfaces (workbench top, cauls, straight edges)
Check for twist by sighting down the length—you'll see if ends are twisted relative to each other
Adjust clamp positions and pressure to correct twist before glue sets
I've ruined projects by not checking for twist during glue-up. By the time I noticed, the glue had set and the twist was permanent.
The Right Amount of Pressure:
Beginners often think "tighter is better." Wrong. Excessive pressure causes problems.
Signs of too much pressure:
Glue squeezes out excessively, leaving starved joints
Boards bow under clamp pressure
Thin stock compresses or dents
Clamp mechanisms start to flex or bend
Signs of too little pressure:
Glue doesn't squeeze out at all
Visible gaps in joints
Boards shift during clamping
Weak joints that fail later
The right amount:
Just enough to close joints completely with a small bead of glue squeeze-out. When you see consistent glue squeeze along the entire joint, that's adequate.
I aim for glue squeeze-out about the consistency of toothpaste along the joint. That indicates good contact without excessive pressure.
Using Cauls to Prevent Clamping Marks:
Even with clamp pads, concentrated pressure can leave marks. Cauls spread pressure over large areas, preventing this.
Place cauls between clamps and workpiece. The caul contacts the workpiece over its full length, not just at clamp points.
I caul every important glue-up now. It's extra setup time but eliminates marking and pressure problems.
Checking for Square During Glue-Ups:
Box and frame assemblies must be square or they'll be permanently crooked.
How to check:
Measure diagonals: On rectangles, measure corner-to-corner both ways. If measurements are equal, the assembly is square.
Use a square: Check corners with a framing square or combination square.
Sight along edges: Sometimes you can see if edges are parallel by sighting down them.
I check square immediately after clamping, then again before glue sets. If it's off, I adjust clamp positions or angles to correct it.
Adjusting for square:
If diagonals are unequal, the long diagonal needs to be shortened. Do this by:
Applying diagonal clamping pressure across the long diagonal
Loosening clamps slightly, racking the assembly square, then re-tightening
Adding shims or wedges to shift positions
Common Clamping Mistakes:
Mistake: Not enough clamps. The center of the glue-up doesn't get pressure and gaps form.
Fix: Add more clamps or use cauls to spread pressure.
Mistake: Clamps too tight. Boards bow or glue starves.
Fix: Back off pressure slightly. You want joint closure, not maximum torque.
Mistake: Forgetting to check square. Assembly sets up crooked.
Fix: Always check square immediately after clamping while you can still adjust.
Mistake: Gluing clamps to the project by not using blocks or pads.
Fix: Keep clamps off glue zones with blocks, or use wax paper barriers.
Mistake: Rushing the process. Glue sets up before clamping is complete.
Fix: Have everything prepared and staged before applying glue. Do dry runs on complex glue-ups.
I've made every one of these mistakes. The key is learning from them and developing a methodical clamping process that you follow every time!
Clamps for Specific Woodworking Projects
Different projects need different clamping approaches. Here's what works best for common beginner projects based on my experience.
Best Clamps for Cutting Board Glue-Ups:
Cutting boards are edge-gluing multiple boards face-to-face. You need even pressure across the width to prevent gaps.
What works:
4-6 bar clamps in the 24-36" range, depending on cutting board length. I use 24" clamps for standard 12x18" cutting boards.
Pipe clamps work great too, especially for longer cutting boards. The heavy weight actually helps keep everything stable.
Cauls are essential for cutting boards. Place straight cauls on top and bottom to prevent bowing. Without cauls, the boards will bow slightly between clamps, creating surface irregularities.
My cutting board process:
Apply glue to edges
Arrange boards on cauls
Add top cauls
Clamp with 4-5 clamps, alternating sides
Check that boards are flush at ends
Tighten gradually, checking alignment
Clean up squeeze-out
This produces flat cutting boards with tight joints every time.
Edge-Joining Boards for Tabletops:
Large panel glue-ups need lots of clamps and careful technique.
What you need:
6-12 bar or pipe clamps depending on panel size. For a 36" wide tabletop, I use 8-10 clamps spaced about 8-10" apart.
Long cauls that span the full panel width. These are critical for preventing cupping.
Clamp spacing: Place clamps every 8-10" along the panel length. Closer spacing for hardwoods, wider for softwoods.
I glued up a 48" x 30" oak tabletop using:
Ten 36" bar clamps
Two 48" cauls top and bottom
Clamps spaced 9" apart, alternating sides
The result was perfectly flat with no gaps. Without the cauls, the panel would have cupped between clamps.
Cabinet and Box Assembly:
Boxes need clamping in multiple directions simultaneously—front-to-back and side-to-side—while keeping everything square.
What works:
4-8 bar clamps depending on box size. A simple four-sided box needs at minimum one clamp per joint, but two per joint is better.
Band clamps are excellent for boxes. They wrap around the perimeter and apply even pressure to all four corners simultaneously.
Corner clamps help keep 90-degree angles perfect during assembly.
My box assembly process:
Dry-fit everything, adjust as needed
Apply glue to joints
Assemble box
Apply clamps to each joint
Check diagonals for square
Adjust clamp pressure/position to correct if needed
Add more clamps at critical joints
For a typical 12" x 8" x 6" box, I use six bar clamps—two per long dimension, one per short dimension, plus a band clamp around the perimeter for insurance.
Picture Frame and Miter Joint Clamps:
Miter joints on picture frames need pressure from multiple angles and perfect 90-degree corners.
Specialized options:
Band clamps with corner blocks are perfect for frames. The band wraps around, corner blocks ensure square corners, pressure is even all around.
I use a simple band clamp ($15) for all picture frames. It handles frames from 6" to 36" with no problem.
Corner clamps hold two pieces at perfect right angles while glue sets. You need four for a complete frame.
Alternative approach: Use bar clamps in an X-pattern across diagonal corners. This pulls the frame tight while keeping it square.
Chair and Furniture Assembly:
Complex assemblies with multiple joints in different orientations. This is advanced clamping that requires planning.
What you'll need:
Lots of clamps in various sizes. A simple chair might need 12-20 clamps.
Clamping sequence matters: Some joints must be clamped and set before others. Plan this out during dry-fit.
Specialized clamps help: Band clamps for round or curved parts, angle clamps for complex joinery.
My first chair assembly was chaos—glue setting, clamps everywhere, nothing quite square. Now I:
Create detailed clamping plan during dry-fit
Label parts and clamp positions
Have all clamps pre-positioned and adjusted
Work methodically through the sequence
Check square and alignment at each stage
Lamination and Veneer Work:
Applying thin layers requires even pressure over large areas without crushing the thin material.
What works:
Many clamps with low pressure distributed by cauls. For a 24" x 12" veneer glue-up, I use:
Eight clamps spaced evenly
Two cauls spanning the full surface
Wax paper between cauls and work to prevent gluing cauls to project
Vacuum bags are ideal for veneer but expensive for beginners. They apply perfectly even pressure across the entire surface.
Weights can supplement or replace clamps. I use bags of sand or heavy wood blocks for certain veneer work.
The key is even, moderate pressure. Too much pressure crushes thin veneer or squeezes out excessive glue.
Workholding Clamps vs. Glue-Up Clamps:
There's a distinction between holding work while you work on it versus clamping glue joints.
Workholding:
Quick-release clamps that you adjust frequently. Spring clamps, quick-grip clamps, toggle clamps.
I keep 8-10 spring clamps and a few quick-grips dedicated to workholding. These stay available even when all my bar clamps are tied up in glue-ups.
Glue-up clamping:
Serious pressure, set and forget until glue dries. Bar clamps, pipe clamps, parallel clamps.
These get locked up for hours during glue-ups. Having separate workholding clamps means I can keep working on other tasks.
Project-Specific Tips:
Small boxes: Four 12" bar clamps plus a band clamp. Check square obsessively.
Cutting boards: One clamp per 6-8" of length, cauls top and bottom mandatory.
Large panels: Clamps every 8-10", long cauls, patient setup time.
Frames: Band clamps or corner clamps, work on flat surface to ensure planar alignment.
Edge-banding: Spring clamps every 3-4" along the edge, or one long bar clamp with caul.
The common thread: plan your clamping strategy during dry-fit, have all clamps ready before applying glue, and always verify square before glue sets!
Maintaining Your Clamps for Longevity
Clamps are simple tools, but proper maintenance extends their life significantly. Here's my maintenance routine.
Cleaning Dried Glue from Clamp Surfaces:
Glue squeeze-out inevitably gets on clamps. Dried glue interferes with mechanisms and looks terrible.
Immediate cleaning (while glue is wet):
Wipe excess with damp rag. This prevents buildup and takes 10 seconds per clamp.
I keep a bucket with damp rags during glue-ups specifically for wiping clamps before glue hardens.
Removing dried glue:
Scraping: Use a plastic putty knife or old chisel to scrape dried glue. Metal scrapers can scratch clamp surfaces.
Sanding: Fine sandpaper (220 grit) removes glue without damaging metal.
Acetone: For stubborn glue, acetone on a rag dissolves most wood glues. Work in ventilated area.
I do a thorough glue cleaning on all clamps every few months. Keeps them operating smoothly.
Lubricating Threads and Mechanisms:
Moving parts need occasional lubrication to operate smoothly.
What to use:
Dry lubricants: Graphite powder or PTFE spray won't attract dust like oils.
Light machine oil: 3-in-1 oil or similar for clamp threads and sliding mechanisms.
Wax: Paste wax on sliding bars reduces friction.
My routine:
Every 3-4 months:
Clean glue and debris from all clamps
Apply paste wax to bars, buff with cloth
Put drop of machine oil on threaded screws
Work mechanisms through full range to distribute lubricant
Wipe off excess
This takes maybe 20 minutes for my entire clamp collection and keeps everything working smoothly.
Rust Prevention and Treatment:
Steel and iron clamps rust if exposed to moisture. Prevention is easier than cure.
Prevention:
Store in dry location
Wipe clamps down after use, especially if wet glue contacted them
Apply paste wax or light oil coat for long-term storage
Don't leave clamps outside or in damp areas
Rust treatment:
Light surface rust: Steel wool and oil removes it easily.
Moderate rust: Fine sandpaper or wire brush, then treat with rust converter.
Heavy rust: May require complete refinishing or replacement of rusted parts.
I've had a few clamps develop rust from being left in my humid garage over summer. Steel wool and oil removed it, then I started storing clamps in the house instead.
Storage to Prevent Damage:
Proper storage protects clamps from accidental damage.
Organized storage prevents:
Clamps getting knocked off surfaces and bent
Threading being damaged by impacts
Mechanisms getting clogged with dust/debris
Clamps being buried and hard to find when needed
My wall-mounted rack keeps clamps organized, visible, and protected. They're easy to grab when needed and out of harm's way.
Repairing Common Clamp Problems:
Stripped threads: Sometimes fixable by chasing threads with a tap or die. Severe stripping requires replacement parts or new clamps.
Bent bars: Can sometimes be carefully straightened in a vise. Severe bends usually mean the clamp is done.
Broken mechanisms: Replacement parts available for quality clamps (Bessey, Irwin). Cheap clamps often aren't worth repairing—just replace.
Loose handles: Often just need tightening. Some designs have set screws that can be tightened.
I've repaired stripped threads on a couple clamps using thread-chasing tools. Saved $40+ in replacement costs with $15 worth of tools and 10 minutes of work.
When to Replace vs. Repair:
Replace budget clamps: If a $12 clamp breaks, just buy another one. Repair time isn't worth it.
Repair quality clamps: My $48 Bessey clamps get repaired if anything goes wrong. Replacement parts are available and worth the cost.
Replace if repair cost exceeds 50% of replacement cost: Basic economics.
I've thrown away probably a dozen cheap broken clamps over the years. I've repaired two expensive clamps and they're still going strong.
Extending Life of Budget Clamps:
If you're using budget clamps, baby them to maximize lifespan:
Don't overtighten (stresses threads)
Clean glue promptly (prevents buildup)
Store properly (prevents damage)
Lubricate regularly (reduces wear)
Use clamp pads (prevents jaw damage)
Even cheap clamps last longer with proper care. My budget clamps that survived were the ones I maintained well.
My Maintenance Schedule:
After each use: Wipe glue off before it dries
Monthly: Quick check of all clamps, clean any glue buildup
Every 3-4 months: Full cleaning, lubrication, inspection
Annually: Detailed inspection, repair any damage, replace worn clamps
This routine takes maybe 30 minutes per quarter and keeps my clamp collection functional for years!
Creative Clamping Solutions on a Budget
Sometimes you need clamping but don't have the right clamps. Here are workarounds and DIY solutions I've used.
DIY Pipe Clamps from Plumbing Supplies:
Building your own pipe clamps is way cheaper than buying commercial versions.
What you need:
3/4" black iron pipe in desired lengths ($8-15 per pipe)
3/4" floor flanges (about $3 each)
Carriage bolts, nuts, washers
Wood blocks for handles
How to build:
Thread floor flange onto pipe end (this becomes fixed jaw)
Create handle block from hardwood scraps
Drill hole through handle for carriage bolt
Carriage bolt becomes the screw mechanism for movable jaw
I built four DIY pipe clamps for about $50 total. Not as refined as commercial pipe clamps, but functional for large glue-ups.
Using Weights and Gravity:
Heavy objects provide clamping pressure without actual clamps.
Applications:
Veneer work: Stack heavy boards or sandbags on veneered surface for even pressure.
Edge banding: Weight on top holds banding while glue sets.
Large flat assemblies: Distributed weight prevents warping.
I've used bags of sand, stacks of 2x4s, buckets of hardware, and even concrete blocks as clamping weights. Free and effective for certain applications.
Ratchet Straps as Poor-Man's Band Clamps:
Cargo ratchet straps work surprisingly well for clamping irregular shapes.
How to use:
Wrap strap around workpiece
Insert cardboard or wood blocks at corners to protect work and distribute pressure
Ratchet tight carefully—these can apply huge pressure
I've assembled hexagon tables, octagon frames, and round assemblies using ratchet straps. A $10 strap provides band clamp functionality.
Caution: Ratchet straps can apply too much pressure. Tighten carefully and check for crushing or deformation.
Making Wooden Hand Screws:
Traditional wooden hand screws are simple to build.
Materials:
Two hardwood jaws (maple or beech)
Two threaded rods with matching nuts
Handle materials (dowels or turned handles)
Benefits:
Gentle on wood surfaces
Jaws can be angled for non-parallel clamping
Satisfaction of using tools you built
I made a pair of hand screws from scrap maple. They're not as pretty as commercial versions but they work great for holding odd-shaped pieces.
Wedges and Cauls as Clamping Alternatives:
Wooden wedges driven between fixed points create clamping pressure.
Setup:
Create a fixed boundary (workbench dogs, screwed blocks, whatever)
Place workpiece against one boundary
Insert caul or protective pad
Drive wedge between caul and opposite boundary
This is old-school clamping that requires no actual clamps. I use it occasionally for edge-gluing when all my bar clamps are busy.
When Improvisation Works:
Light pressure needs: Improvised solutions work fine.
Non-critical assemblies: Shop jigs, test pieces, rough work.
Temporary holding: Just need something held in position briefly.
Odd shapes: Sometimes improvised solutions fit better than standard clamps.
I built an entire workbench using mostly improvised clamping—weights, wedges, creative use of three clamps I owned. It worked but took longer than having proper clamps would have.
When You Need Real Clamps:
High pressure needed: Hardwood glue-ups require serious clamping force.
Precision work: Important projects deserve proper clamps.
Complex assemblies: Multiple joints in different directions need real clamps.
Time constraints: Proper clamps are faster and more reliable than improvisation.
My Honest Take:
Improvised clamping works for specific situations. I still use weights, wedges, and creative solutions when appropriate.
But there's no substitute for actual clamps for real woodworking. The DIY solutions are supplements, not replacements, for a proper clamp collection.
If budget is so tight you're considering all DIY clamping, save up and buy even just 2-4 quality clamps. They'll make your woodworking exponentially easier and more successful!
Common Clamp Problems and Solutions
Every woodworker faces these issues. Here's how to solve them based on my experience.
Problem: Clamps Not Applying Even Pressure
You tighten the clamp but one end is tight while the other has a gap.
Causes:
Clamp bar isn't straight (bent from over-tightening)
Jaws aren't parallel (cheap clamp issue)
Work surface isn't flat
Workpiece has twist or bow
Solutions:
Check clamp bar straightness—sight down its length
Use cauls to distribute pressure evenly
Verify workbench is flat
Plane or sand workpiece flat before clamping
Consider upgrading to parallel jaw clamps
I fought this constantly with cheap clamps. Upgraded to better clamps and the problem disappeared.
Problem: Stripped Threads and Adjustment Issues
The clamp screw won't tighten or spins freely.
Causes:
Over-tightening damaged threads
Soft metal that stripped under normal use
Cross-threading during adjustment
Dirt/debris in threads
Solutions:
Clean threads thoroughly
Try chasing threads with tap/die set
Apply lubricant and work mechanism back and forth
If severely stripped, replace clamp (budget) or order replacement parts (quality clamps)
I've had multiple cheap clamps strip threads. Now I'm more careful about not over-tightening, but quality clamps are more forgiving.
Problem: Clamps Leaving Marks on Wood
Clamp jaws dent or mark your workpiece.
Causes:
Too much pressure in one spot
No protective pads between clamp and wood
Hardened glue on clamp jaws creating pressure points
Clamp jaw edge digging into soft wood
Solutions:
Use clamp pads (cork, rubber, or wood)
Reduce clamping pressure slightly
Clean dried glue off jaws regularly
Use cauls to distribute pressure
Place wax paper between clamp and work if necessary
Cork pads on my clamps eliminated this problem. Quick fix that costs maybe $8.
Problem: Insufficient Reach or Throat Depth
The clamp can't reach far enough into the workpiece or jaws don't open wide enough.
Causes:
Wrong size clamp for the application
Deep-set joint that requires longer throat depth
Thick stock exceeds jaw opening
Solutions:
Use longer clamps or deep-throat models
Reposition work to bring joint closer to edge
Consider different clamp type (pipe clamps often have deeper throat)
Creative positioning with blocks to bring clamping point closer
I've definitely grabbed the wrong length clamp mid-glue-up. Now I stage multiple clamp sizes before applying glue to avoid this.
Problem: Clamps Slipping During Glue-Up
You set the clamp, but it gradually loosens or shifts position.
Causes:
Worn clutch mechanism not holding
Insufficient friction in quick-release mechanism
Glue making surfaces slippery
Clamp positioned at angle creating lateral force
Solutions:
Tighten screw fully to engage locking mechanism
Position clamps perpendicular to work surface
Use clamp blocks to prevent slipping
Replace worn clamps with failing mechanisms
Wipe glue from surfaces before clamping
This happened to me during that cutting board disaster I mentioned. Cheap clamp mechanisms slipped, boards shifted, project ruined.
Problem: Bent or Damaged Clamp Bars
The bar has visible bend, causing jaw misalignment.
Causes:
Excessive tightening force
Dropping clamp on hard surface
Using clamp as pry bar (don't do this!)
Cheap thin-wall bars that bend easily
Solutions:
Carefully straighten minor bends in vise
Replace severely bent clamps
Avoid over-tightening in future
Upgrade to clamps with heavier-duty bars
I've bent a couple cheap clamp bars by over-tightening. They're basically useless afterward—the bend prevents even pressure.
Problem: Clamps Causing Boards to Bow
The panel or glue-up bows upward or downward after clamping.
Causes:
All clamps on same side creating unbalanced pressure
Too much pressure in center, not enough at ends
No cauls distributing pressure
Boards themselves have bow that's being forced out
Solutions:
Alternate clamp positions (top/bottom/top/bottom)
Use cauls on both faces
Reduce clamping pressure slightly
Pre-flatten boards before glue-up
This is prevented almost entirely by proper technique—alternating clamps and using cauls. Once I learned this, bowed glue-ups became rare.
General Troubleshooting Approach:
Identify the problem: What specifically isn't working?
Check the obvious: Is the clamp actually broken or am I using it wrong?
Try simple fixes first: Cleaning, lubrication, adjustment
Consider replacement: Sometimes it's not worth fighting a bad clamp
Learn for next time: Most problems teach you better technique
I've faced every one of these problems. The key is recognizing them early—before glue sets—so you can correct them!
Beginner Clamp FAQs
Let me answer the questions beginners ask most about clamps.
What clamps should I buy first as a beginner?
Start with 4-6 quality bar clamps in the 24-36" range. Irwin Quick-Grip or Bessey K-Body are both excellent.
Add 6-10 spring clamps in various sizes for light-duty tasks.
This combination handles 80% of beginner projects and costs $100-200 depending on quality level.
How many clamps do I really need to start?
Absolute minimum: 4 bar clamps, 6 spring clamps.
Better starting point: 6 bar clamps, 10 spring clamps.
Ideal beginner collection: 8-12 bar clamps in various lengths, 12+ spring clamps.
But honestly, you'll keep buying more as you do larger/more complex projects.
Are expensive clamps worth it for beginners?
Mid-range clamps ($15-25 each) are worth it. Premium clamps ($40-75 each) are nice but not essential initially.
The jump from cheap ($10) to mid-range ($20) is huge in quality. The jump from mid-range to premium is smaller but still noticeable.
I recommend starting mid-range and upgrading to premium as budget allows and you identify which clamps you use most.
Can I use pipe clamps instead of bar clamps?
Yes, absolutely. Pipe clamps are more economical for long capacity. They're slightly less convenient but totally functional.
Many woodworkers use exclusively pipe clamps. Others use bar clamps. Most end up with both.
If budget is tight and you need long clamps, pipe clamps make sense.
What size clamps should I get first?
24-36" bar clamps are most versatile for beginners.
12-18" clamps are useful but more specialized. 48"+ clamps are less frequently needed initially.
Start with 24" as your default length, add variety as specific projects require it.
Do I need parallel clamps or are bar clamps enough?
Bar clamps are adequate for most work. Parallel clamps are better but not essential.
If budget allows, buy 2 parallel clamps for your most critical glue-ups. Use regular bar clamps for everything else.
I woodworked for two years with only bar clamps before buying parallel clamps. They're an upgrade, not a requirement.
How do I prevent clamps from marking my wood?
Use clamp pads (cork, rubber, or wood)
Use cauls between clamps and work
Don't over-tighten
Place wax paper as barrier in critical areas
Clean dried glue off clamp jaws regularly
Cork pads solved this for me. $8 investment, eliminated the problem completely.
What's the difference between quick-release and traditional clamps?
Quick-release clamps have mechanisms that let you position the head rapidly by squeezing a trigger or lever. Final pressure comes from turning a screw.
Traditional clamps require turning the screw through the entire adjustment range.
Quick-release is faster and more convenient. Traditional is simpler and often stronger.
I prefer quick-release for most work, but own some traditional clamps too.
Should I buy all one brand or mix and match?
Mixing brands is fine. Clamps don't need to match like tools in a battery platform.
Buy whichever brand offers the best value for each specific clamp you need.
I own Bessey, Irwin, Jorgensen, Pony, and generic clamps. They all work together fine.
How do I know if I'm applying enough clamping pressure?
Look for a small, consistent bead of glue squeeze-out along the entire joint. That indicates good contact and adequate pressure.
If no squeeze-out appears, add pressure. If excessive squeeze-out (glue pouring out), reduce pressure—you're starving the joint.
Feel the tightness too. It should be snug but not requiring all your strength to turn the screw.
The common thread in all these answers: start with quality basics, build your collection progressively, and focus on technique as much as tool accumulation!
Conclusion
Here's the bottom line on clamps for beginning woodworkers: quality matters more than quantity, but you need more clamps than you think. Start with 4-6 solid bar clamps and plan to keep adding to your collection as you tackle more projects.
For most beginners, I recommend the Irwin Quick-Grip 24" bar clamps as your starting point. At around $18 each, they balance quality with affordability perfectly. Buy four to start, then add two more within your first few months. Supplement with 6-10 spring clamps for light-duty work, and you'll have functional clamping for your first year of projects.
If budget allows, upgrade to Bessey K-Body or K-Body REVO parallel clamps. They're expensive at $42-48 each, but they're genuinely better tools that'll last decades. Start with two for your most critical glue-ups, use cheaper clamps for less demanding tasks.
Avoid the temptation of cheap clamp multi-packs. Those six clamps for $40 deals are universally disappointing—weak pressure, stripped threads, bent bars, and mechanisms that fail mid-glue-up. One quality $20 clamp serves you better than three $7 garbage clamps that'll be in the trash within a year.
Remember the woodworker's truth: you always need more clamps than you think. I started with four clamps thinking that was plenty. Now I own 30+ and still sometimes run short during complex glue-ups. That's normal. Build your collection progressively, buying more as specific project needs arise.
Don't skimp on clamping accessories either. Spend $20 on clamp pads and materials for making cauls. These simple additions prevent ruined projects and make clamping dramatically more effective. Cork pads on my clamp jaws have saved countless projects from dents and marks.
Learn proper clamping technique—alternating clamp positions, using cauls, checking for square, applying appropriate pressure. Good technique with adequate clamps produces tight, flat glue-ups every time. Poor technique with the best clamps still yields disappointing results.
The most expensive clamp is the one you don't have when you need it. Whether that's because you didn't buy enough, or because the cheap ones failed during a critical glue-up, inadequate clamping ruins projects and wastes wood. Invest appropriately in your clamping arsenal from the start.
What projects are you planning to build? Drop a comment below and let me know what you're working on! I can give specific clamp recommendations based on your projects and budget.
Now go grab some quality clamps and start building. Just remember—when you think you have enough clamps, buy two more. You'll use every single one!
Happy clamping!