Backyard Shade Solutions: 15 Proven Ways to Cool Your Outdoor Space
Discover effective backyard shade solutions to beat the heat! From pergolas and shade sails to natural tree canopies, explore 15 ways to create cool, comfortable outdoor living spaces you'll actually use.
BACKYARD IMPROVEMENTS
So there I was, sitting on my brand new patio furniture at 2pm on a Saturday in July, and I literally lasted about five minutes before I had to retreat back inside. The sun was absolutely brutal, and my "outdoor living space" was basically unusable for half the day. I'd spent all this money on creating this beautiful backyard area and I couldn't even use it during peak hours. Sound familiar?
Here's a stat that really opened my eyes: properly placed shade can reduce outdoor temperatures by 10-20 degrees Fahrenheit. That's the difference between "nope, too hot" and "yeah, let's hang out here for a while." And honestly? That temperature swing is exactly what I experienced once I finally got serious about adding shade to my yard.
The thing is, most people design their outdoor spaces thinking about furniture, maybe some plants, lighting—but they completely forget about shade until they're literally sweating through their shirt trying to enjoy their morning coffee. I was definitely one of those people! But after years of experimenting with different shade solutions (and making plenty of mistakes along the way), I've figured out what actually works.
In this guide, I'm gonna walk you through fifteen different shade solutions that can transform your hot, unusable outdoor space into somewhere you'll actually want to spend time. We're talking everything from permanent structures like pergolas to quick DIY solutions you can set up this weekend. Whether you've got a tiny patio or a sprawling backyard, there's a shade solution here that'll work for your space and budget. Let's cool things down!
Why Shade Matters More Than You Think
I used to think shade was just about personal comfort—like, sure, it's nice to not be in direct sun. But it's way more important than that, and understanding why helped me prioritize it in my backyard design.
Temperature reduction is the obvious benefit, but the actual numbers surprised me. Direct sunlight can make surfaces 20-40 degrees hotter than air temperature. That means if it's 85°F outside, your patio pavers could be 105-125°F—hot enough to burn bare feet! I learned this when my kids refused to walk on our deck without shoes because it was literally too hot. Once I added shade, the surface temperatures dropped dramatically. The air temperature under my pergola is consistently 10-15 degrees cooler than the unshaded areas of my yard. That difference is massive for usability.
UV protection isn't just for people—it's for all your outdoor stuff too. I was replacing my outdoor cushions every couple years because they'd fade and deteriorate in the sun. Since adding proper shade coverage, my furniture lasts way longer. The intense UV also damaged my composite decking, making it fade unevenly. Shade protects your investment in outdoor materials and keeps everything looking better longer. And obviously, protecting your skin from UV exposure is huge. I'm way more comfortable letting my kids play outside for extended periods when they're under shade rather than in direct sun all afternoon.
Energy savings were something I didn't even consider until my energy bill dropped noticeably. When you shade the west side of your house—especially windows and walls—you're preventing all that heat from radiating into your home. My air conditioning runs way less now that I have a pergola shading my west-facing patio doors. Studies show that strategic shade placement can reduce cooling costs by 15-25%. That adds up over a summer, and over the years you own your home, it can actually offset the cost of your shade structure.
Extending usable hours means you get way more value from your outdoor space. Before I had adequate shade, my patio was basically only comfortable in the early morning and evening. The middle of the day was a no-go zone. Now I can use it pretty much all day because I've got coverage from the afternoon sun. This is especially important if you work from home—I can actually take my laptop outside during lunch breaks now without squinting at my screen or melting.
Making outdoor entertaining actually comfortable was the real game-changer for me. I used to avoid hosting anything during the day because my yard was just too hot. People would show up, stand in the sun for ten minutes, and migrate back inside. Now I can host afternoon BBQs and pool parties without everyone clustering in the one tiny shaded corner. Having adequate shade means guests spread out and actually enjoy being outside.
Property value increase is a real thing with quality shade structures. When we got our house appraised recently, the appraiser specifically noted our pergola and shade sail setup as value-adds. Outdoor living spaces increase home value, but only if they're actually usable. A shaded, comfortable outdoor area is a major selling point. I've looked at houses where the backyard was just a concrete slab baking in the sun—totally unappealing. Good shade makes your property more attractive and functional.
Assessing Your Shade Needs Before You Build
This step saved me from making some really expensive mistakes. I almost built a pergola in completely the wrong spot before I actually assessed my shade needs properly.
Understanding your sun exposure patterns throughout the day is critical. I spent a whole weekend observing my yard—literally went out every hour and noted where the sun was, where shadows fell, which areas were brutally hot and which were comfortable. Morning sun from the east is generally gentler. Afternoon sun from the west is intense and hot. My west-facing patio was the problem area—full sun from about 1pm until sunset in summer. That's when I most wanted to be outside, so that's where I needed shade most. Don't just assume where shade should go—actually observe your space over several days.
Identifying the hottest spots in your yard tells you where to prioritize shade coverage. I used an infrared thermometer (you can get one cheap) to measure surface temperatures in different areas. My concrete patio was reading 130°F in the afternoon sun—absurd! The grass in full sun was around 100°F. Areas that got morning shade but afternoon sun were moderately hot. This data helped me figure out exactly where shade would make the biggest difference. Your hottest spots are usually west and southwest facing areas that get afternoon sun.
Seasonal sun angles change everything, and this is something I totally missed at first. The sun is much higher in the sky during summer and lower in winter. This means the same structure provides different amounts of shade depending on season. I designed my pergola with this in mind—in summer when the sun is high, the pergola slats block a lot of direct sun. In winter when the sun is lower, more light gets through which is actually nice because I want warmth in winter. If you're building permanent shade, think about how it'll function year-round.
Evaluating existing shade from trees and structures helps you build on what you already have. I've got a large oak tree that provides great shade on the eastern side of my yard in the afternoon. I didn't need to add structure there—I just positioned seating under the tree. But the west side had zero natural shade, so that's where I invested in built structures. Use what nature gives you and supplement where it's lacking. Also consider shade from your house, fences, or neighboring structures—these can block sun at certain times.
Determining how much shade coverage you actually need prevents over-building or under-building. I wanted to shade my main patio area where we sit and eat—about 300 square feet. I didn't need to shade my entire yard, just the spaces we actively use. Think about your priorities. Do you need to shade the whole pool deck or just a seating area beside the pool? Full coverage everywhere gets expensive fast. Strategic partial shade in the right spots is usually the best approach.
Budget considerations for different shade solutions vary wildly. I've spent as little as $50 on a shade sail and as much as $8,000 on a custom pergola. You can get meaningful shade improvement at almost any budget if you're strategic. Temporary solutions like umbrellas and shade sails are cheap and quick. Permanent structures are investments that add property value but cost more upfront. I started with budget temporary solutions and upgraded to permanent structures over time as I figured out what worked.
Permanent versus temporary shade structure decisions depend on whether you own or rent, your budget, and how sure you are about placement. I recommend starting with temporary solutions even if you plan to eventually build permanent structures. Test your shade placement with umbrellas or shade sails first. Once you know it works, invest in permanent. I repositioned my shade sail three times before I figured out the optimal placement—good thing it wasn't a $5,000 pergola! Temporary also makes sense if you might move, or if you want flexibility to change your yard layout.
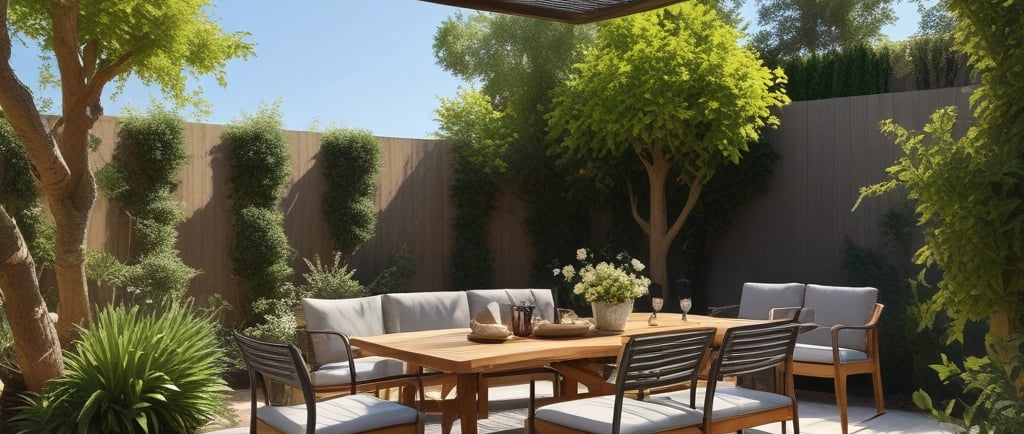
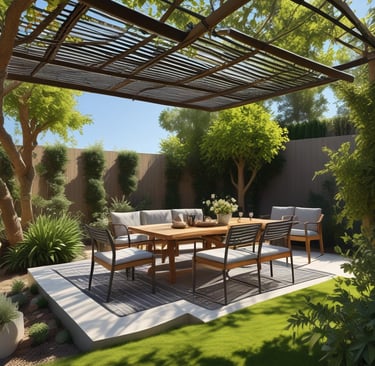
Pergolas: The Classic Overhead Shade Structure
Pergolas are probably the most popular backyard shade structure, and for good reason. I've built two pergolas over the years and they've been worth every penny and every splinter.
How pergolas provide dappled shade while maintaining airflow is their superpower. Unlike a solid roof, pergola slats or beams create filtered shade that blocks harsh direct sun but still allows air to circulate. This means you get cooling shade without creating a stuffy, enclosed feeling. My pergola blocks probably 60-70% of direct sunlight during peak hours, which is enough to make the space comfortable without being dark. The dappled light pattern is also really beautiful—creates interesting shadows and feels more natural than being under a solid cover.
Attached versus freestanding pergola options each have benefits. My first pergola was attached to my house over my patio—this is structurally easier to build because you're anchoring to the house on one side and only need posts on the other. It also creates a seamless transition from indoors to outdoors. My current pergola is freestanding in the middle of my yard over my fire pit area. This took more work to build but gave me flexibility in placement. Freestanding works better if you want shade away from the house or if you can't attach to your house for structural or HOA reasons.
Materials comparison is huge for longevity and maintenance. I built my first pergola from pressure-treated pine because it was cheap—about $1,200 in materials. It looked great for three years, then started requiring annual staining and maintenance. It'll last maybe 15-20 years total. Cedar or redwood is naturally rot-resistant and beautiful but expensive—probably $3,000-4,000 in materials for the same size. Vinyl pergolas are low-maintenance and won't rot, but they're pricey and I personally don't love the look. Aluminum is super durable and low-maintenance but also expensive. For my current pergola I used cedar and I'm happy paying more upfront for less maintenance and better aesthetics.
Adding retractable canopies or shade cloth for more coverage turns a pergola into versatile shade. My pergola alone provides moderate shade, but I added a retractable canopy system that I can extend when I want more coverage. It's like having adjustable shade—open on nice days, closed when it's brutally hot or if it starts raining. You can also drape shade cloth over pergola beams for increased coverage. I use 70% shade cloth in summer and remove it in winter. This gives me flexibility to adapt to different seasons and weather.
Growing climbing plants for additional natural shade is beautiful and functional. I planted wisteria at the base of my pergola posts and trained it to grow up and over the beams. It took three years to really fill in, but now it provides significant additional shade and looks gorgeous when blooming. Grapevines also work great and you get grapes as a bonus. The living canopy provides more cooling than just wood because plants transpire moisture which has a cooling effect. Just be aware that maintenance is required—pruning annually to keep growth controlled.
Cost breakdown and DIY versus professional installation depends on your skills and budget. I DIY'd my first pergola and it cost about $1,200 in materials plus a lot of weekends. Probably saved $2,000-3,000 versus hiring it out. My current larger cedar pergola cost $4,500 in materials and I paid a contractor $3,500 to build it—total $8,000. You could probably pay $10,000-15,000 for the same thing from a high-end contractor. DIY is definitely doable if you're handy, but pergolas require precise measurements and some structural knowledge. If you're not confident, hire it out—a poorly built pergola is dangerous.
Maintenance requirements for different materials range from minimal to significant. Wood pergolas need annual inspection and treatment every 2-3 years—staining or sealing to prevent rot and maintain appearance. I spend maybe 6-8 hours per year maintaining my wood pergola. Vinyl and aluminum are basically maintenance-free—just occasional cleaning. If you've got climbing plants, you'll need to prune them back annually. Check hardware and fasteners yearly to make sure everything's still secure. Overall, pergolas are pretty low-maintenance compared to other outdoor structures.
Shade Sails: Modern and Highly Effective
Shade sails were a revelation when I discovered them. They're like the modern, cooler cousin of the traditional awning, and they provide serious shade coverage.
The surprising amount of shade sails provide really impressed me. Quality shade sails block up to 95-98% of UV rays and provide substantial cooling. I installed a shade sail over my pool deck and the temperature difference was immediately noticeable—probably 12-15 degrees cooler under the sail. They create near-complete shade while still allowing airflow underneath, which is perfect for hot climates. The key is getting a high-quality sail with a proper UV rating—cheap ones don't block as much sun and deteriorate quickly.
Proper tensioning and installation techniques are critical for shade sails to work correctly and last. This is where I screwed up initially. I installed my first shade sail without enough tension and it sagged and flapped in the wind. Shade sails need to be pulled tight—really tight—to maintain their shape and withstand wind. I use heavy-duty turnbuckles at each anchor point to tension the sail. The mounting points need to be super sturdy—I anchored mine to heavy-duty posts cemented 3 feet into the ground. Inadequate mounting points will fail, and a shade sail pulling free in a storm is dangerous.
Single versus multiple overlapping sail configurations depends on the area you want to cover. A single large sail is simpler and cheaper. I use a single 16x20 foot rectangle over my pool deck and it works great. But in my outdoor dining area, I use three overlapping triangular sails which creates this really cool layered look and provides complete coverage over an irregularly shaped space. Overlapping sails also give you flexibility—you can remove one or two in winter and leave one up. Multiple smaller sails are easier to handle during installation than one huge sail.
Best shapes for different spaces—triangle, square, rectangle—each have ideal uses. Triangular sails are great for corners or irregularly shaped areas. I used a triangle in one corner of my patio anchored to the house, a fence post, and a standalone pole. They're also easier to tension properly because of the geometry. Rectangular sails cover more area and work well for rectangular patios or pool decks. Square sails are kind of in between. I generally prefer rectangles for maximum coverage and triangles for tighter spaces or to fill in gaps between other shade structures.
Choosing UV-resistant fabric that lasts is worth the investment. I bought a cheap shade sail at first for like $50 and it faded and tore within one season. Total waste of money. Quality shade sails made from HDPE (high-density polyethylene) fabric with UV stabilizers cost more—$150-500 depending on size—but last 5-10 years. Look for sails with reinforced corners and strong stitching. The fabric should have a UV rating of 95% or higher. Colors matter too—lighter colors reflect more heat, darker colors absorb heat but might look better aesthetically. I went with a sand/beige color that looks great and stays relatively cool.
Dealing with wind, rain, and seasonal removal requires planning. Shade sails catch wind like—well, like sails. In high winds, they can generate significant force on anchor points. I take my sails down during storm warnings just to be safe. Rain is fine—quality shade sails are waterproof or water-resistant and actually create a nice dry area underneath. The fabric is typically designed to shed water. For seasonal removal, I take my sails down in late fall and store them for winter. Takes about 30 minutes to remove and reinstall, and it extends their lifespan significantly. Some people leave them up year-round in mild climates.
Cost-effective coverage for large areas is where shade sails really shine. My 16x20 foot shade sail cost $280 and covers 320 square feet. To cover that same area with a built structure would've been thousands of dollars. Shade sails are probably the cheapest per-square-foot shade solution available. Installation is DIY-friendly if you're handy—I did mine myself for the cost of the sail plus about $150 in mounting hardware and posts. Even if you hire someone, installation is way cheaper than building a pergola or gazebo.
Retractable Awnings for Flexible Shade
Retractable awnings are the shade solution I wish I'd installed sooner. The flexibility to have shade when you want it and sun when you don't is amazing.
Manual versus motorized retractable awning options is mostly about budget and convenience. My first retractable awning was manual with a crank handle—cost about $800 installed. It worked fine but cranking it out and back in was kind of a pain, especially for my wife. We upgraded to a motorized awning a few years later for about $2,500, and holy crap what a difference. Push a button and it extends smoothly in about 30 seconds. We use it way more because there's no friction—literally just press the button when the sun gets intense. Motorized is worth it if you can afford it.
Perfect for shading specific times of day is the main advantage of retractable awnings. My patio gets brutal afternoon sun from about 2-6pm. I extend the awning during those hours and retract it in the morning and evening when I actually want sun. This flexibility means I can maximize sun exposure when it's pleasant and block it when it's harsh. Fixed shade structures don't give you that option—they're always there whether you need shade or not. If your sun exposure problem is time-specific rather than all-day, retractable awnings are ideal.
Protecting awnings during storms and winter is critical for longevity. I learned this the hard way when I left my awning extended during an unexpected windstorm and the fabric tore. Now I retract it anytime winds are forecasted over 20-25 mph. Most quality awnings have wind sensors that automatically retract when winds get strong—this feature is worth paying for if you're buying motorized. In winter, I keep it fully retracted and usually cover it with a protective sleeve. The awning mechanism can handle snow and ice better when it's in the retracted position.
Ideal placement over patios and decks is typically attached to the house wall above your door or windows. My awning extends about 10 feet from the house wall and covers most of my patio. The projection (how far it extends) should be enough to shade your main seating area. Measure your patio depth and get an awning with similar projection. Placement height matters too—it should be high enough for headroom (at least 7-8 feet clearance when extended) but not so high that it doesn't block afternoon sun effectively. I positioned mine at about 9 feet high and it works perfectly.
Fabric choices and longevity expectations vary significantly. I went with solution-dyed acrylic fabric which is pretty much the standard for quality awnings. It's fade-resistant, water-resistant, and durable. Cheaper vinyl or polyester fabrics don't last as long and fade faster. My fabric is warranted for 10 years and still looks great after 6 years. Expect to replace fabric every 10-15 years depending on sun exposure and climate. The mechanical components should last 15-20+ years with basic maintenance. Colors matter—I chose a lighter shade that reflects heat rather than absorbing it.
Integration with smart home systems is possible with motorized awnings and it's actually pretty cool. My newer awning connects to my home automation system. I have it programmed to automatically extend when outdoor temperature hits 85°F and retract at sunset. I can also control it via phone app from inside the house or even when I'm away. There are awnings with sun and wind sensors that automatically adjust based on conditions. This smart integration means the awning optimizes shade without me thinking about it.
When to extend versus retract for optimal benefit depends on your specific sun exposure. I extend mine when afternoon sun starts hitting the patio—usually around 1-2pm in summer. I retract it in late evening around 7pm when the sun is low and no longer directly overhead. On overcast days I leave it retracted since the sun isn't an issue. In spring and fall when sun is pleasant, I use it less. The key is paying attention to when your space is uncomfortable and using the awning to address those specific times. Don't just extend it and leave it—you'll get more life from the fabric and mechanism if you only use it when needed.
Cantilever and Market Umbrellas
Umbrellas are the quickest, most flexible shade solution, and I've got several scattered around my yard for spot shade coverage.
Choosing the right size umbrella for your space is more important than people realize. I see undersized umbrellas all the time that provide inadequate shade. For a dining table, the umbrella should extend at least 2 feet beyond the table edge on all sides. So a 6-foot round table needs at least a 10-foot umbrella. For lounge areas, think about the footprint of your furniture and add several feet. I have a 9-foot umbrella over my bistro table and an 11-foot umbrella over my loungers. Bigger is almost always better with umbrellas—you won't regret having more shade, but you'll definitely notice if there's not enough.
Cantilever umbrellas for furniture-free shade placement are genius. These offset umbrellas have the pole on the side rather than in the middle, so you can position shade exactly where you want it without a pole obstructing your table or seating area. I use a cantilever umbrella over my pool lounge chairs—the pole is completely out of the way and I can position the shade canopy precisely where the sun is hitting. They rotate 360 degrees and tilt at different angles, giving you crazy flexibility. The downside is they're more expensive (mine was $600 versus $200 for a comparable market umbrella) and they need heavier bases for stability.
Market umbrellas for dining table coverage are the classic center-pole design. These work great when you want shade centered over a table—the pole goes through the table's umbrella hole. I have one over my outdoor dining table and it works perfectly for that application. They're generally cheaper and simpler than cantilever umbrellas. The pole can be somewhat in the way depending on your table size, but most dining tables are designed to accommodate them. For just covering a table for outdoor meals, market umbrellas are the way to go.
Base weight requirements for stability are something I completely underestimated at first. I bought a nice umbrella and a cheap lightweight base, and the first strong breeze knocked the whole thing over, breaking the umbrella pole. So frustrating! Large umbrellas need heavy bases—I'm talking 75-100+ pounds for a 9-11 foot umbrella. Cantilever umbrellas need even more weight because of the offset design—my cantilever base is 120 pounds. You can buy base weights or fill hollow bases with sand. Don't cheap out on the base—a toppled umbrella can damage furniture or hurt someone.
Fabric quality and fade resistance matters for longevity. I've owned cheap umbrellas with thin polyester fabric that faded and tore within two seasons. Now I only buy umbrellas with solution-dyed acrylic or Sunbrella fabric. These premium fabrics are UV-resistant, fade-resistant, and water-resistant. They cost more upfront—maybe $300-400 for a quality 9-foot umbrella versus $100-150 for a cheap one—but they last 5-10 years versus 1-2 years. The shade quality is also better with thicker fabric—blocks more UV and feels cooler underneath.
Crank versus push-up opening mechanisms is purely about convenience. Push-up umbrellas are fine for smaller sizes (7-8 feet) but really difficult for larger umbrellas. I have a 11-foot market umbrella with a crank mechanism and it makes opening and closing so much easier—just turn the crank handle and the umbrella smoothly rises. My older push-up umbrella requires serious muscle to open, and I usually don't bother closing it because it's such a pain. If you're getting anything 9 feet or larger, pay the extra $30-50 for a crank mechanism. Your back will thank you.
Multiple umbrella strategies for larger areas works well when you don't want a permanent structure. I use this approach for my pool deck where I have three large umbrellas positioned strategically. It gives me flexible shade that I can adjust or remove seasonally. The key is overlapping coverage—position umbrellas so there aren't big gaps of uncovered area between them. I can also remove one or two umbrellas and leave one up depending on how much shade I need. This approach costs more than a single shade sail or pergola might, but gives you more flexibility and easier seasonal changes.
Gazebos and Pavilions for Complete Coverage
Gazebos and pavilions provide the most complete weather protection of any shade solution. I added a gazebo to my yard a few years ago and it completely changed how I use that space.
Permanent versus portable gazebo options each serve different purposes. Portable pop-up gazebos are great for events or temporary shade—I've got one I set up for parties and take down afterwards. They're cheap (mine was $150) but flimsy and don't hold up to weather long-term. Permanent gazebos are actual structures with foundations that become part of your property. Mine cost $5,000 installed and is built to last 20+ years. If you want year-round usable space, go permanent. If you just need occasional shade for events, portable works.
Hard-top versus soft-top coverage is about durability and weather protection. My gazebo has a steel hard-top roof with shingles, so it's basically a miniature building. Completely waterproof, provides shade year-round, handles snow load fine. Soft-top gazebos use fabric canopies which are lighter and cheaper but need replacement every 3-5 years and don't handle weather as well. I've also seen polycarbonate hard-top gazebos that let light through while providing weather protection—kind of a middle ground. For a permanent structure, I strongly recommend hard-top. The durability and weather protection is worth the extra cost.
Creating an outdoor room with full weather protection is what gazebos do best. My gazebo feels like an actual room—I can be out there in light rain, wind, or intense sun and be completely comfortable. It's furnished with outdoor furniture, has a ceiling fan, and even has some weatherproof outlets I had installed. I use it more than any other part of my yard because it's usable in almost any weather. It's become like an extension of my house—a true outdoor living room. This level of protection is what sets gazebos apart from other shade solutions.
Screening options for bug-free enjoyment are a huge bonus. My gazebo has removable screen panels on all four sides. In summer when mosquitoes are bad, I put up the screens and can enjoy the outdoors without getting eaten alive. The screens still allow airflow but keep bugs out. Some gazebos come with built-in screens, others you add aftermarket. This was a game-changer for evening use—I can sit out there after dark when mosquitoes are worst and be completely comfortable.
Electrical and lighting integration possibilities make gazebos super functional. I ran electrical to my gazebo during installation (hired an electrician for this) and now I have outlets and overhead lighting. The ceiling fan makes hot days bearable. I've hung string lights inside for ambiance. I can plug in speakers, phone chargers, whatever. It's way more functional than just a shaded area. If you're building a permanent gazebo, strongly consider running power to it. It's easier and cheaper to do during construction than retrofitting later.
Foundation and anchoring requirements are serious for permanent gazebos. My gazebo sits on four concrete piers that go below frost line (about 3 feet deep in my area). This anchors it solidly and prevents frost heave. Portable gazebos need to be staked or weighted down—I've seen them blow away in storms. The foundation work for my permanent gazebo added about $800 to the installation cost but it's essential for structural integrity. Don't try to skip this step or you'll have problems. Check local building codes too—many areas require permits for permanent structures over a certain size.
Best uses for different gazebo styles depend on your needs. Traditional octagonal gazebos are great for seating areas or as focal points in larger yards. Rectangular pavilions work better for dining areas or outdoor kitchens because the rectangular shape fits furniture better. My gazebo is square (12x12) which worked well for the space I had available. Think about what furniture you want under it and choose a shape and size that accommodates that purpose. Also consider sightlines—gazebos are visually prominent, so placement in your yard matters for aesthetics.
Natural Shade: Strategic Tree Planting
Trees are the ultimate shade solution—they're beautiful, increase property value, provide environmental benefits, and create amazing natural shade. But they require patience because they take time to grow.
Fast-growing shade trees for quicker results are what I planted because I didn't want to wait 20 years for shade. Certain trees grow much faster than others. I planted red maples which grow 2-3 feet per year—I've got meaningful shade from them after about 5 years. Hybrid poplars grow even faster (3-5 feet per year) but they're messier and shorter-lived. River birch, willow oak, and dawn redwood are other fast growers. The tradeoff with fast-growing trees is they're sometimes weaker-wooded or shorter-lived than slow-growing species. But when you need shade sooner rather than later, fast growers make sense.
Deciduous versus evergreen trees for seasonal shade is an important consideration. Deciduous trees (those that lose leaves in winter) provide shade in summer when you want it and allow sun through in winter when you want warmth—perfect for shade near your house. All my patio-adjacent trees are deciduous for this reason. Evergreen trees provide year-round shade and wind protection, which is great for privacy screening but might be too much shade in some locations. I use evergreens along my property line for privacy but deciduous trees near entertaining areas.
Proper tree placement relative to your home and patio is critical for getting the shade where you need it. I made the mistake of planting a tree that I thought would shade my patio, but I didn't account for mature size and the angle of afternoon sun. The tree provides great shade—just not where I needed it. Work backward from where you want shade. If you want to shade your west-facing patio in late afternoon, the tree needs to be west/southwest of that area. Consider the sun angle at different times of day and different seasons. A landscape designer or arborist can help with this if you're not confident planning it yourself.
Understanding mature tree size before planting prevents problems later. That cute little sapling will eventually be 40-60 feet tall and wide depending on species. I've seen trees planted too close to houses, power lines, or other structures that created major issues once they matured. Check the mature height and spread of any tree you're planting and make sure you have adequate space. Also consider the root system—some trees have aggressive roots that damage foundations or underground utilities. Do your research before planting. It's much easier to plant the right tree in the right spot than to remove a large tree later.
Trees that provide shade without excessive mess are worth seeking out. I love my oak trees for shade, but man, they drop acorns and leaves constantly. My honey locust tree provides filtered shade and drops small leaves that decompose quickly—way less mess. Ginkgo trees are clean but the female trees drop messy fruit, so plant males only. Bradford pears were popular for years but they're brittle and break easily. I'd recommend red maple, honey locust, elm cultivars, or linden trees for good shade with manageable mess. Avoid trees known for surface roots (silver maple), sticky sap (sweet gum), or aggressive suckering (black locust).
How long until new trees provide meaningful shade depends on the species and size you plant. I planted 6-8 foot whips (young bare-root trees) which are cheap but took about 8-10 years to provide significant shade. If you plant larger container trees (10-15 feet tall), you'll get shade sooner but pay way more—like $500-1,000+ per tree versus $50-100 for whips. I'd say you need at least 5 years before a young tree provides useful shade, and 10-15 years before it provides substantial shade. This is why I recommend combining trees with other shade solutions—trees are the long-term solution but you need interim shade while they're growing.
Combining trees with other shade solutions while they grow is exactly what I did. I planted fast-growing trees in strategic locations, then installed shade sails and a pergola to provide immediate shade. As the trees matured and filled out over 7-8 years, I was able to remove some of the temporary shade structures. Now the trees do most of the heavy lifting for shade and I use umbrellas and shade sails for supplemental coverage. This phased approach gave me comfortable outdoor space immediately while building toward the long-term natural shade solution.
Shade Cloth and Screening Solutions
Shade cloth is one of the most versatile and affordable shade materials, and I've used it in tons of different applications around my yard.
Different shade percentages—30%, 50%, 70%, 90%—each serve different purposes. The percentage indicates how much sunlight is blocked. I use 30% shade cloth over my vegetable garden where plants still need substantial light but benefit from some sun protection. My 70% shade cloth creates a comfortable shaded patio area—blocks most direct sun but still allows enough light that it's not dim. 90% shade cloth is almost like being in full shade—I've used it over a small dog run area. For most patio applications, 50-70% is the sweet spot. Higher percentages block more sun but also make spaces darker.
Choosing the right density for your climate matters more than I initially realized. In my hot climate with intense sun, I need higher shade percentages (70-90%) to create comfortable spaces. In cooler or cloudier climates, 30-50% might be sufficient. The fabric density also affects cooling—denser weave blocks more UV and creates more temperature reduction. I experimented with different densities before settling on what works in my yard. Don't assume one density works everywhere—test if possible or talk to others in your area about what they use.
Attaching shade cloth to existing structures is how I've used it most. I draped 70% shade cloth over my pergola beams to increase shade coverage. Used zip ties to secure it at intervals—simple and it works. I've also attached shade cloth to fence posts to create a shaded walkway along the side of my yard. On my deck railing, I ran shade cloth along the sunny side for privacy and shade. The key is securing it well—corners need to be tied down or grommeted to prevent flapping in wind. Shade cloth is flexible material that adapts to lots of different structures.
Creating temporary shade with removable installations is perfect for seasonal needs. I hang shade cloth over my patio in summer and remove it in fall when I want more sun. It's attached with removable fasteners (grommets and hooks) so installation and removal takes maybe 30 minutes. This temporary approach works great if you're not ready to commit to permanent shade or if you rent. Shade cloth rolls up for compact storage in winter. I've been using the same pieces for 5+ years by taking care of them and storing them properly.
DIY shade cloth pergola toppers turned my open pergola into a much more effective shade structure. I measured the top of my pergola, bought shade cloth cut to size (with grommets around the edges), and zip-tied it to the pergola frame. Total cost was maybe $120 and took an afternoon to install. It dramatically increased the shade my pergola provides—went from dappled partial shade to comfortable full shade. I used 70% density which still lets some light through so it doesn't feel cave-like. This is a super cost-effective way to upgrade an existing pergola.
Privacy screening versus shade screening are related but different. Privacy screening uses denser weave or opaque materials to block sightlines while also providing shade. I've got privacy screen fabric along one fence line that keeps neighbors from looking directly into my patio while also shading that side from afternoon sun. Regular shade cloth is more see-through—blocks sun but you can still see through it to some degree. If privacy is your goal, look specifically for privacy screen fabric or use 90% shade cloth which is nearly opaque.
Longevity and replacement expectations for shade cloth vary by quality. Cheap shade cloth degrades in UV exposure pretty quickly—I've had it become brittle and tear after 2-3 years. Quality UV-stabilized shade cloth lasts much longer. My current shade cloth is rated for 8-10 years and it's held up well for 5 years so far. The edges tend to fray over time, and lighter colors may fade. Budget for eventual replacement as part of the long-term cost. Even so, shade cloth is cheap enough that replacing it every 5-10 years is still way more economical than other shade solutions.
Living Shade: Vines and Climbing Plants
Living shade from vines and climbing plants is beautiful and functional, though it requires more patience and maintenance than other shade solutions.
Fast-growing vines for quick coverage can provide meaningful shade surprisingly fast. I planted hops vine at the base of a trellis and it grew 15+ feet in a single season—covered the trellis completely and provided good shade by late summer. Morning glory is another crazy fast grower, though it's annual so you replant yearly. Trumpet vine grows fast and has beautiful flowers but can be invasive. Clematis is fast-growing and comes in lots of flower colors. If you want shade from vines within one or two seasons, these fast growers are your best bet.
Supporting structures needed for climbing plants must be sturdy. Vines get heavy as they mature—my wisteria is probably several hundred pounds of plant material. I built a heavy-duty pergola specifically to support it with thick posts and beams. For lighter vines, a simple trellis works, but make sure it's well-anchored. I use cattle panel fencing attached to strong posts for some of my vines—it's inexpensive and super strong. Wire or string systems work for lightweight annual vines but won't support perennial woody vines long-term. Don't underestimate the structural requirements.
Annual versus perennial vine options is about tradeoffs. Annual vines like morning glory, moonflower, or hyacinth bean grow fast and provide color, but you replant them every year. They die with first frost. Perennial vines like wisteria, grapevine, or clematis are permanent—they come back year after year and get fuller over time. But they take 2-3 years to really establish. I use both—perennial vines on permanent structures for long-term shade, and annual vines for quick seasonal coverage or to fill in while perennials are maturing.
Maintenance and pruning requirements can be significant for vigorous vines. My wisteria requires serious pruning twice a year or it takes over everything. It'll climb into trees, pull down fences, grow into my gutters—super aggressive. But it's also beautiful and provides amazing shade, so it's worth it. Grapevines need annual pruning to control growth and maximize fruit production. Clematis is less aggressive and needs lighter pruning. Research the maintenance requirements before planting—some vines are high-maintenance and if you're not committed to managing them, they'll become problems.
Combining beauty and function with flowering vines makes living shade extra appealing. Wisteria has gorgeous cascading purple flowers in spring before the leaves fill in. Trumpet vine attracts hummingbirds all summer with its orange flowers. Clematis comes in tons of colors and blooms profusely. Even grapevines have edible fruit as a bonus. The shade these vines provide is functional, but the aesthetic benefit is significant too. They soften structures, add color and texture, and create a natural organic feeling that solid shade structures can't match.
Avoiding invasive species that get out of control is important. English ivy looks beautiful but it's invasive in many areas and will destroy structures and kill trees. Oriental bittersweet is super aggressive and chokes out native plants. Japanese honeysuckle smells amazing but spreads uncontrollably. Check what's considered invasive in your region before planting. I made the mistake of planting trumpet vine not knowing how aggressive it is—it sends up shoots 20 feet from the main plant and I'm constantly fighting it. Go with well-behaved vines like clematis, climbing roses, or native species appropriate for your area.
How much shade different vines actually provide varies significantly. Dense-leaved vines like grapevine or hops create nearly complete shade—almost like a solid canopy. My pergola covered in mature wisteria blocks probably 90% of sun. Lighter vines like clematis or morning glory create dappled filtered shade—maybe 50-60% coverage. Annual vines typically provide less shade than mature perennial vines because they're starting fresh each year. If serious shade is your goal, choose dense-growing perennial vines and plan to wait 3-4 years for full coverage.
Outdoor Curtains and Drapes for Shade and Style
Outdoor curtains are an underutilized shade solution that also add a ton of style. I added them to my pergola a few years ago and they completely transformed the space.
Weather-resistant fabric choices are essential for outdoor curtains. Regular indoor curtains would mildew and fall apart quickly outside. I use curtains made from solution-dyed polyester or acrylic that's specifically rated for outdoor use. Sunbrella is a popular brand that makes excellent outdoor fabric—it's fade-resistant, mildew-resistant, and water-resistant. My outdoor curtains have been hanging for three years and still look great. They handle rain, sun, and wind without deteriorating. Don't use indoor curtains outside—they won't last a season.
Installation methods for different structures depend on what you're attaching to. I installed curtain rods along the beams of my pergola using heavy-duty brackets. The rods are outdoor-rated stainless steel so they won't rust. For covered patios, you can mount rods to the ceiling or fascia. I've also seen people use cable wire systems with curtain rings—creates a more modern look. Whatever system you use, make sure it's strong enough to handle wind load. Outdoor curtains catch wind and can pull down weak mounting systems.
Using curtains for adjustable shade control is brilliant. When the afternoon sun hits my pergola, I pull the west-facing curtains closed and it blocks the harsh angled sun perfectly. In the morning or evening when sun isn't an issue, I tie the curtains back for an open feeling. This adjustability is similar to indoor curtains but way more impactful outside. You can control exactly how much shade you want at any given time. It's like having walls that disappear when you don't need them.
Wind management and securing techniques prevent curtains from whipping around in the breeze. I added grommets to the bottom of my curtains and run bungee cords through them to nearby posts or the ground. This keeps them from flying up in wind. Some people use weights in the bottom hem. I've also seen magnetic strips sewn into curtains that attach to metal posts. Without securing the bottoms, outdoor curtains are constantly flapping and it's annoying. A light breeze is fine but strong wind requires securing.
Privacy benefits beyond just shade are significant. My outdoor curtains create a private enclosed feeling on my pergola when drawn. It's like having an outdoor room with walls. Great for changing near the pool or for intimate dinners where you don't want to feel exposed to neighbors. I can adjust privacy level by closing just one or two panels or all of them. This flexibility makes my outdoor space way more versatile—public gathering spot or private retreat depending on curtain configuration.
Maintenance and cleaning requirements are pretty minimal. I take my outdoor curtains down once or twice a season and wash them in the washing machine on gentle cycle. They're designed to be washable. I also spot-clean any stains as they happen. When storms are forecasted, I sometimes remove the curtains entirely and store them inside to prevent damage. At the end of season, I launder them and store them indoors for winter. This care routine keeps them looking good for years. Way less maintenance than I expected honestly.
Creating a resort-like ambiance is what outdoor curtains do aesthetically. They make a space feel designed and intentional—like a high-end resort rather than a basic backyard. The flowing fabric softens the hard edges of structures. White or cream curtains create an elegant airy feeling. Colorful curtains make a statement. Even just the movement of fabric in the breeze adds life to the space. I get tons of compliments on my outdoor curtains—they elevate the whole look of my patio.
Shade for Specific Areas: Pools, Playgrounds, and Gardens
Different areas of your yard have different shade requirements and sometimes need specialized solutions.
Poolside shade options that handle moisture are important since pool areas are constantly wet. I use shade sails over my pool deck because the fabric is waterproof and handles splashing and humidity without issues. Umbrellas work but can rust if they're not stainless steel or aluminum—I learned this when a cheap umbrella rusted out after one season near the pool. Pergolas with water-resistant finishes work great. What doesn't work well: wood structures without proper sealing (they'll rot), fabric that's not moisture-resistant (mildews quickly), or structures that can't handle the humidity and chemicals from pool water.
Playground shade structures for safe play areas are critical if you have kids. Playground equipment in direct sun gets dangerously hot—metal slides and platforms can cause burns. I installed a large shade sail over my kids' playset and it made a massive difference. The equipment stays cooler and my kids can play longer without overheating. There are also purpose-built playground shade structures (those big fabric canopies you see at schools) but they're expensive. A properly positioned shade sail or even a well-placed tree provides good playground shade for way less money.
Vegetable garden shade cloth for heat-sensitive crops was a game-changer for my summer gardening. Lettuce, spinach, and other greens bolt immediately in my summer heat. I installed 30-40% shade cloth over those beds and suddenly I could grow greens through summer. Tomatoes and peppers actually benefit from some afternoon shade in extreme heat—prevents blossom drop and sunscald. I use shade cloth on adjustable frames so I can add or remove it as needed throughout the growing season. Most vegetables still need good sun, so don't over-shade, but strategic shade extends the growing season significantly.
Shading outdoor kitchens and grilling areas makes cooking outside way more comfortable. My grill used to be in full sun and summer cooking was miserable—standing over a hot grill in 95°F heat and direct sun is not fun. I added a pergola over the grilling area with a retractable canopy. Now I can grill comfortably even on the hottest days. The shade also protects my outdoor kitchen cabinets and appliances from UV damage. If you invest in an outdoor kitchen, absolutely plan for shade over it—you'll use it way more if it's comfortable to be there.
Pet-friendly shaded areas in the yard are important for animal welfare. My dog would lie in the direct sun and overheat before I created shaded areas for him. Now I have a shaded section of the yard with a pet bed where he hangs out during the day. Dogs and cats need access to shade, especially in hot climates. This can be as simple as a tree, a small canopy, or a dedicated pet shelter. Make sure water is available in shaded areas too. I've seen pets suffer from heat stress because they didn't have adequate shade—it's preventable with basic planning.
Creating shaded pathways between zones makes moving around your yard more comfortable. I have a pathway from my patio to my back garden that used to be in full sun—walking it midday was brutal. I installed shade cloth on a simple frame structure over the path and it's so much better now. Alternatively, plant trees or tall shrubs along pathways to create natural shade tunnels. Shaded paths encourage use of your whole yard rather than people staying clustered in one shaded area. Think about the routes people walk and consider shade along those routes.
Flexible shade for multi-use spaces is important if areas serve different purposes. My side yard is sometimes used for storage, sometimes for kids' activities, sometimes for gardening. I use movable umbrellas and shade sails that I can reposition or remove depending on current use. This flexibility means I can optimize shade for whatever activity is happening. Permanent fixed shade might not work as well in spaces that need to adapt. Portable or adjustable shade solutions give you that versatility.
DIY Shade Solutions on a Budget
You don't need to spend thousands to get effective shade. I've created some really functional shade solutions with minimal budget and basic DIY skills.
Repurposed materials for creative shade structures save money and look unique. I built a shade structure using old pallets as the frame and shade cloth as the covering—total cost maybe $40. I've seen people use old vinyl fencing panels, repurposed lattice, even corrugated metal roofing. Reclaimed lumber from demolished structures is often free or cheap and works great for building shade frames. Check Craigslist, Facebook Marketplace, or construction dumpsters (with permission) for materials. A little creativity goes a long way. Just make sure repurposed materials are structurally sound and safe.
Building simple shade frames with lumber is totally doable as a weekend DIY project. I built a basic 10x10 pergola frame using pressure-treated 4x4 posts and 2x6 beams. Total lumber cost was about $250. It's not fancy but it's sturdy and provides good shade with shade cloth draped over it. Basic carpentry skills and common tools (saw, drill, level) are all you need. There are tons of free plans online for simple shade structures. This DIY approach costs a fraction of buying a prefab pergola kit and you can customize the size exactly to your space.
Using tarps effectively without looking cheap is tricky but possible. Regular blue tarps look terrible—just being honest. But you can find canvas or tan/beige tarps that look way better. I used a heavy-duty tan canvas tarp over a simple wood frame as temporary shade while my pergola was being built. It actually looked decent and worked well. The key is securing it tightly so it doesn't sag or flap. Use grommets and rope to tension it properly. Tarps are very inexpensive shade—a 12x16 tarp costs maybe $25—but the aesthetic is challenging. Best for temporary or utilitarian applications.
Pallet pergola projects are popular on Pinterest and they actually work. I built one in my first house using eight free pallets. Stood them on end as walls/screens, connected them at the top with lumber, and draped shade cloth over. It created a cozy shaded corner that cost almost nothing. Pallets are often free from businesses—just ask. They need to be cleaned, maybe sanded, and treated with outdoor sealant. Structurally they're not as strong as dimensional lumber, so I wouldn't build anything huge, but for a small 8x8 shade structure they work fine.
Bamboo shade screen installations are cheap and give a tropical vibe. I bought bamboo fencing rolls at the hardware store for about $30 per 6x15 foot roll. Attached them to a simple wood frame to create a shade wall along one side of my patio. Blocks afternoon sun and looks way better than plain fence. Bamboo is naturally UV-resistant and lasts several years before needing replacement. You can also use bamboo as a pergola topper for dappled shade. It's lightweight, easy to work with, and inexpensive. The aesthetic is very casual/tropical, so it doesn't work for all design styles, but for budget shade it's hard to beat.
Growing your own shade with fast-growing plants is the cheapest long-term solution. I planted several fast-growing trees from bare-root whips that cost $25-50 each. After 5-7 years they provide significant shade and cost almost nothing. Annual vines like morning glory or beans planted along a simple trellis create shade in a single season for the cost of a seed packet ($3). This approach requires patience but if you're on a tight budget and willing to wait, it's incredibly cost-effective. Supplement with temporary shade until your plants mature.
Temporary solutions for renters who can't build permanent structures include anything that's removable and doesn't damage the property. Large umbrellas in heavy bases, freestanding shade sails attached to posts in planter bases, portable pop-up canopies, outdoor curtains hung from existing structures, or large potted plants positioned for shade. I helped my sister set up shade on her rental patio using two large cantilever umbrellas in rolling base planters—she can move them as needed and take them when she moves. Think portable and adjustable rather than attached or permanent.
Combining Multiple Shade Solutions for Maximum Cooling
The most effective shade strategies use multiple solutions working together. My yard has several different shade elements that create comfortable coverage throughout the day.
Layering different shade types for all-day coverage addresses sun movement across the day. My pergola provides morning and midday shade over my patio. As the sun moves west in afternoon, my shade sail takes over, blocking the angled western sun. Trees provide dappled shade in other areas. By combining these, I have effective shade from morning through evening without any one element doing all the work. Single shade solutions often leave gaps in coverage—combining multiple elements fills those gaps.
Using trees for perimeter shade and structures for patio shade is my basic strategy. The trees around the edges of my property provide broader environmental cooling and shade pathways and borders. Closer to the house, I use built structures (pergola, awning) for precise shade over my main living areas. This makes sense functionally—you need exact shade placement near your patio but broader coverage further out. Trees on the south and west sides of my yard provide significant cooling to the whole area while my pergola creates the specific shade where I sit and eat.
Seasonal rotation of shade solutions optimizes for different conditions. In summer I use my retractable awning heavily, have shade sails up, and maintain maximum shade coverage. In fall and spring I retract or remove some shade elements to allow more sun when it's pleasant. My deciduous trees naturally provide this seasonal variation. Winter I want maximum sun so everything removable comes down except permanent structures. This rotation means I'm not over-shaded in spring or under-shaded in summer—I adjust to seasonal needs.
Creating microclimates with strategic shade placement can make different areas of your yard usable for different purposes. I have a heavily shaded area under trees that stays 15-20 degrees cooler than open areas—perfect for hot afternoons. A partially shaded area gets morning sun and afternoon shade—ideal for breakfast or dinner. My pool deck has both sunny and shaded sections so people can choose. These microclimates give options depending on weather, time of day, and individual preferences.
Complementing shade with fans and misters takes cooling to the next level. I have a ceiling fan under my pergola that moves air and makes the shaded area feel even cooler—probably another 5 degrees of perceived cooling. I installed a misting system around my patio perimeter that lowers temperature by about 10 degrees when running. The combination of shade + moving air + evaporative cooling from misters creates comfortable outdoor spaces even in extreme heat. Shade alone is good; shade plus active cooling is better.
Whole-yard shade planning versus spot solutions depends on your goals and budget. I took a whole-yard approach, mapping out shade coverage across my entire property and systematically filling in gaps over several years. This comprehensive planning created an overall cooler environment. But spot solutions work fine if you're just trying to make one patio or seating area comfortable. I'd say start with spot solutions for your most-used areas, then expand to whole-yard planning if budget allows and you're committed to long-term comfort.
Adjusting your shade system as the sun moves is something I do actively on hot days. My retractable awning extends in early afternoon. I position my cantilever umbrella to block the current sun angle. I might close outdoor curtains on the west side in late afternoon. This active management maximizes shade effectiveness. Some of this can be automated (motorized awnings with sun sensors), but I actually kind of enjoy the manual adjustment—it's a small ritual that connects me to the outdoor environment.
Maintenance and Longevity of Shade Structures
Shade structures are investments and proper maintenance significantly extends their life. I've learned this through both good maintenance and neglect.
Protecting shade structures during storms prevents damage and extends lifespan. I retract my awning anytime high winds are forecasted—learned this after wind damage cost me $400 in repairs. Shade sails come down for severe storms. Umbrellas get closed and secured. Removable shade cloth gets taken down. A little preventive action before storms saves major repair costs. Even permanent structures like pergolas benefit from inspection after storms to check for damage or loose fasteners. Don't assume structures can handle any weather—be proactive about protection.
Winterizing retractable and temporary shade is important in cold climates. I retract my awning fully and cover it with a protective sleeve for winter—keeps ice and snow from damaging the fabric and mechanism. Shade sails get removed, cleaned, and stored indoors. Outdoor curtains come down. Canvas umbrellas get covered or stored inside. Fabric left out all winter deteriorates faster from freeze-thaw cycles and UV exposure. Yeah, it's extra work in fall and spring, but it doubles the lifespan of these elements.
Cleaning and treating different materials maintains appearance and function. Wood structures need cleaning and re-staining/sealing every 2-3 years. I pressure wash my pergola, let it dry completely, then apply a fresh coat of sealer. Fabric elements (shade sails, curtains, umbrellas) need periodic washing—I do this seasonally. Vinyl and aluminum structures just need occasional washing with soap and water. Metal hardware benefits from lubrication and rust treatment. Neglected structures look terrible and fail prematurely. Budget time for maintenance when planning shade installations.
When to repair versus replace shade elements depends on the damage and cost. I've repaired small tears in shade cloth with outdoor repair tape—works fine and costs almost nothing. But when my shade sail developed multiple rips and significant UV degradation after 8 years, replacement made more sense than trying to patch it repeatedly. Awning fabric can be replaced without replacing the mechanism—this is way cheaper than full replacement. Evaluate whether repair is a long-term solution or just delaying inevitable replacement. Sometimes paying for replacement now is smarter than repeated repairs.
Preventing mold and mildew on fabric requires proper care. I make sure fabric elements dry completely before storing them. If I have to take down a shade sail after rain, I hang it somewhere to dry before folding and storing. Mold grows on damp fabric in storage and it's really hard to remove. I also use fabric protectant spray periodically which helps repel water and resist mildew. If mold does develop, there are specific cleaners for outdoor fabric that usually work. Prevention is way easier than cleaning though.
Reinforcing anchors and supports over time prevents structural failures. I inspect all my shade structure anchor points annually—checking concrete piers, post bases, wall attachments, etc. I've retightened bolts that loosened over time, replaced rusted hardware, and reinforced one post that had some rot developing. Small maintenance catches problems before they become dangerous failures. A shade sail pulling free because of a failed anchor is hazardous. A collapsed pergola can cause serious injury. Don't skip structural inspections.
Expected lifespan of common shade solutions helps with planning and budgeting. Quality shade sails last 5-10 years depending on UV exposure and care. Awning fabric lasts 10-15 years; the mechanism should last 20+ years. Wood pergolas last 15-25 years depending on wood type and maintenance. Vinyl and aluminum structures last 20-30+ years with minimal maintenance. Umbrellas last 5-10 years for quality ones, 1-3 years for cheap ones. Trees obviously last decades to centuries. Knowing these lifespans helps you plan replacement costs and choose appropriate solutions for your timeframe.
Conclusion
Listen, dealing with too much sun in your outdoor space is completely fixable. I've taken yards that were basically unusable during the day and turned them into comfortable spaces where my family actually wants to hang out. The difference adequate shade makes is genuinely life-changing for your outdoor enjoyment.
The most important thing is to start somewhere. You don't need to implement all fifteen shade solutions tomorrow—that would be crazy expensive and overwhelming. Pick the area you use most and address that first. Maybe that's a large umbrella over your dining table or a shade sail over your seating area. Get one zone comfortable, then expand from there as budget and time allow.
And honestly, don't overthink the perfect solution. I spent months researching and planning my first shade structure when I could've just bought an umbrella and started enjoying shade immediately. Temporary solutions are totally valid—they provide immediate relief while you figure out your long-term strategy. You can always upgrade later.
Before you build anything permanent, definitely check your local building codes and HOA regulations. I know this is boring bureaucratic stuff, but getting cited for unpermitted structures or having to remove something you already built is way more painful than filing for a permit upfront. Quick call to your city or email to your HOA can save massive headaches.
One more thing: measure your sun exposure before buying anything. Seriously, spend a weekend watching where the sun hits and when. I've seen people buy expensive shade structures and install them in spots that don't actually address their sun problem. Understanding your specific sun patterns ensures you're solving the right problem.
I'd love to hear what shade solutions you've tried! What's worked well in your climate and space? Did you discover any creative approaches that I didn't cover? Share your experiences in the comments—the outdoor living community is super helpful and we all learn from each other's wins and mistakes.
Now get out there and reclaim your yard from the tyranny of the sun! Your future self lounging comfortably in the shade will thank you for taking action today.